Android Context Menu สร้างเมนูแบบ Context Menu แบบง่าย ๆ |
Android Context Menu สำหรับ Context Menu จะเป็นเมนูที่อยู่ในรูปแบบของ Dialog Popup ที่สามารถสร้างเมนูได้หลาย ๆ ตัว เมนูนี้จะปรากฏก็ตือเมื่อมีการใช้ Long Click หรือ onLongPress โดย Context Menu สามาระประยุกต์ใช้กงานกับ Widgets หลาย ๆ ตัว ที่รองรับการทำงานผ่าน Event ของ onLongPress() เช่น Widgets Button , Widgets ListView , Widgets GridView และอื่น ๆ อีกหลายตัว
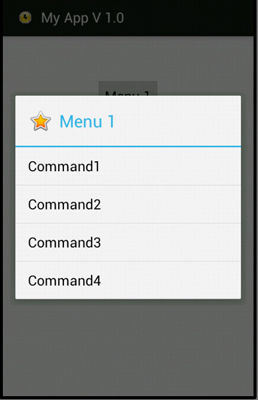 Android Context Menu Screenshot
Context Menu จะอยู่ภายใต้ Library ของ View ที่สามารถสร้างและใช้งานได้ง่าย ๆ และการอ่านค่าที่ผ่านจากการคลิกที่ Menu ก็สามารถใช้งานได้ง่ายเช่นเดียวกัน
menu.setHeaderTitle("Context Menu");
menu.add(0, 1, 1, "Menu 1");
menu.add(0, 2, 2, "Menu 2");
menu.add(0, 3, 3, "Menu 3");
menu.add(0, 4, 4, "Menu 4");
รูปแบบการสร้างเมนู
Example 1 การสร้าง Context Menu แบบง่าย ๆ
โครงสร้างของไฟล์ประกอบด้วย 2 ไฟล์คือ MainActivity.java, activity_main.xml
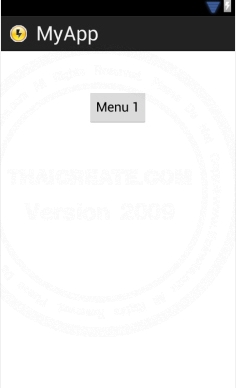
activity_main.xml
<RelativeLayout xmlns:android="http://schemas.android.com/apk/res/android"
    xmlns:tools="http://schemas.android.com/tools"
    android:layout_width="match_parent"
    android:layout_height="match_parent" >

    <Button
        android:id="@+id/button1"
        android:layout_width="wrap_content"
        android:layout_height="wrap_content"
        android:layout_alignParentTop="true"
        android:layout_centerHorizontal="true"
        android:layout_marginTop="53dp"
        android:text="Menu 1" />

</RelativeLayout>
MainActivity.java
package com.myapp;

import android.os.Bundle;
import android.view.ContextMenu;
import android.view.ContextMenu.ContextMenuInfo;
import android.view.Menu;
import android.view.MenuItem;
import android.view.View;
import android.widget.Button;
import android.widget.Toast;
import android.app.Activity;


public class MainActivity extends Activity {

	String[] Cmd = {"Command1","Command2","Command3","Command4"};

    @Override
    public void onCreate(Bundle savedInstanceState) {
        super.onCreate(savedInstanceState);
        setContentView(R.layout.activity_main);

        // button1
        final Button btn1 = (Button)findViewById(R.id.button1);

        registerForContextMenu(btn1);
    }

    @Override
    public void onCreateContextMenu(ContextMenu menu, View v, ContextMenuInfo menuInfo) {

		menu.setHeaderIcon(android.R.drawable.btn_star_big_on);
		menu.setHeaderTitle("Menu 1");
		String[] menuItems = Cmd;
		for (int i = 0; i<menuItems.length; i++) {
			menu.add(Menu.NONE, i, i, menuItems[i]);
		}
    }

    @Override
    public boolean onContextItemSelected(MenuItem item) {
	    int menuItemIndex = item.getItemId();
		String[] menuItems = Cmd;
		String CmdName = menuItems[menuItemIndex];

	    // Check Event Command
        if ("Command1".equals(CmdName)) {
          	 Toast.makeText(MainActivity.this,"Your Selected Command1",Toast.LENGTH_LONG).show();
          	 /**
          	  * Call the mthod
          	  * Eg: Command1();
          	  */
        } else if ("Command2".equals(CmdName)) {
        	Toast.makeText(MainActivity.this,"Your Selected Command2",Toast.LENGTH_LONG).show();
	      	 /**
	      	  * Call the mthod
	      	  * Eg: Command2();
	      	  */
        } else if ("Command3".equals(CmdName)) {
          	 Toast.makeText(MainActivity.this,"Your Selected Command3",Toast.LENGTH_LONG).show();
          	 /**
          	  * Call the mthod
          	  * Eg: Command3();
          	  */
        } else if ("Command4".equals(CmdName)) {
          	 Toast.makeText(MainActivity.this,"Your Selected Command4",Toast.LENGTH_LONG).show();
          	 /**
          	  * Call the mthod
          	  * Eg: Command4();
          	  */
        }

    	return true;
    }


    @Override
    public boolean onCreateOptionsMenu(Menu menu) {
        getMenuInflater().inflate(R.menu.activity_main, menu);
        return true;
    }

}
คำอธิบาย
String[] Cmd = {"Command1","Command2","Command3","Command4"};
ประกาศ Menu แบบ Array เพื่อง่ายต่อการนำไปใช้
        if ("Command1".equals(CmdName)) {
          	 Toast.makeText(MainActivity.this,"Your Selected Command1",Toast.LENGTH_LONG).show();
          	 /**
          	  * Call the mthod
          	  * Eg: Command1();
          	  */
        }
เป็นการอ่านว่าได้เลือก Menu จากรายการที่เลือก
Screenshot
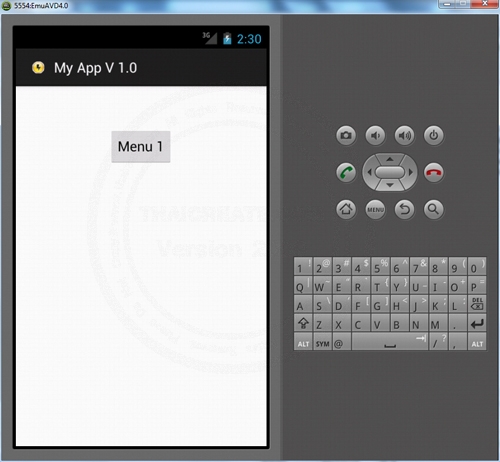
คลิกที่ Button ที่ Menu 1
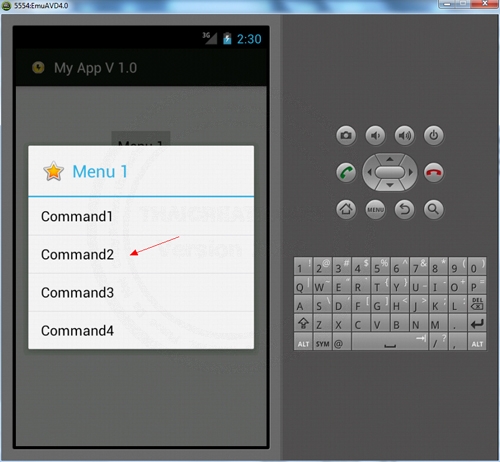
แสดง Command ที่มาจาก Context Menu
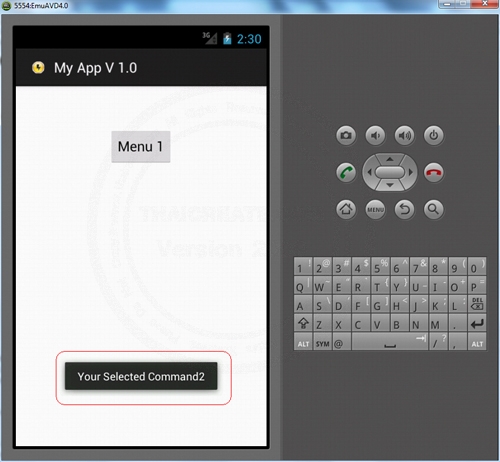
เมื่อเลือก Menu
Example 2 การสร้าง Context Menu แบบหลาย Menu
โครงสร้างของไฟล์ประกอบด้วย 2 ไฟล์คือ MainActivity.java, activity_main.xml
activity_main.xml
<RelativeLayout xmlns:android="http://schemas.android.com/apk/res/android"
    xmlns:tools="http://schemas.android.com/tools"
    android:layout_width="match_parent"
    android:layout_height="match_parent" >

    <Button
        android:id="@+id/button1"
        android:layout_width="wrap_content"
        android:layout_height="wrap_content"
        android:layout_alignParentTop="true"
        android:layout_centerHorizontal="true"
        android:layout_marginTop="53dp"
        android:text="Menu 1" />

    <Button
        android:id="@+id/button2"
        android:layout_width="wrap_content"
        android:layout_height="wrap_content"
        android:layout_alignLeft="@+id/button1"
        android:layout_below="@+id/button1"
        android:layout_marginTop="52dp"
        android:text="Menu 2" />

</RelativeLayout>
MainActivity.java
package com.myapp;

import android.os.Bundle;
import android.view.ContextMenu;
import android.view.ContextMenu.ContextMenuInfo;
import android.view.Menu;
import android.view.MenuItem;
import android.view.View;
import android.widget.Button;
import android.widget.Toast;
import android.app.Activity;


public class MainActivity extends Activity {

	String[] Cmd1 = {"Command1","Command2","Command3","Command4"};
	String[] Cmd2 = {"Command5","Command6","Command7","Command8"};

	Button btn1;
	Button btn2;

	String btnClick;

    @Override
    public void onCreate(Bundle savedInstanceState) {
        super.onCreate(savedInstanceState);
        setContentView(R.layout.activity_main);

        // button1
        btn1 = (Button)findViewById(R.id.button1);

        // button2
        btn2 = (Button)findViewById(R.id.button2);

        registerForContextMenu(btn1);
        registerForContextMenu(btn2);
    }

    @Override
    public void onCreateContextMenu(ContextMenu menu, View v, ContextMenuInfo menuInfo) {

		menu.setHeaderIcon(android.R.drawable.btn_star_big_on);

	    if (v == btn1) {
	    	btnClick = "Cmd1";
			String[] menuItems = Cmd1;
			menu.setHeaderTitle("Menu 1");
			for (int i = 0; i<menuItems.length; i++) {
				menu.add(Menu.NONE, i, i, menuItems[i]);
			}
	    } else if (v == btn2) {
	    	btnClick = "Cmd2";
			String[] menuItems = Cmd2;
			menu.setHeaderTitle("Menu 2");
			for (int i = 0; i<menuItems.length; i++) {
				menu.add(Menu.NONE, i, i, menuItems[i]);
			}
	    }


    }

    @Override
    public boolean onContextItemSelected(MenuItem item) {
	    int menuItemIndex = item.getItemId();

	    // for Cmd1
	    if(btnClick == "Cmd1")
	    {

			String[] menuItems = Cmd1;
			String CmdName = menuItems[menuItemIndex];

		    // Check Event Command
	        if ("Command1".equals(CmdName)) {
	          	 Toast.makeText(MainActivity.this,"Your Selected Command1",Toast.LENGTH_LONG).show();
	          	 /**
	          	  * Call the mthod
	          	  * Eg: Command1();
	          	  */
	        } else if ("Command2".equals(CmdName)) {
	       	 Toast.makeText(MainActivity.this,"Your Selected Command2",Toast.LENGTH_LONG).show();
	      	 /**
	      	  * Call the mthod
	      	  * Eg: Command2();
	      	  */
	        } else if ("Command3".equals(CmdName)) {
	          	 Toast.makeText(MainActivity.this,"Your Selected Command3",Toast.LENGTH_LONG).show();
	          	 /**
	          	  * Call the mthod
	          	  * Eg: Command3();
	          	  */
	        } else if ("Command4".equals(CmdName)) {
	          	 Toast.makeText(MainActivity.this,"Your Selected Command4",Toast.LENGTH_LONG).show();
	          	 /**
	          	  * Call the mthod
	          	  * Eg: Command4();
	          	  */
	        }

	    }

	    // for Cmd2
	    if(btnClick == "Cmd2")
	    {

			String[] menuItems = Cmd2;
			String CmdName = menuItems[menuItemIndex];

		    // Check Event Command
	        if ("Command5".equals(CmdName)) {
	          	 Toast.makeText(MainActivity.this,"Your Selected Command5",Toast.LENGTH_LONG).show();
	          	 /**
	          	  * Call the mthod
	          	  * Eg: Command5();
	          	  */
	        } else if ("Command6".equals(CmdName)) {
	       	 	Toast.makeText(MainActivity.this,"Your Selected Command6",Toast.LENGTH_LONG).show();
		      	 /**
		      	  * Call the mthod
		      	  * Eg: Command6();
		      	  */
	        } else if ("Command7".equals(CmdName)) {
	          	 Toast.makeText(MainActivity.this,"Your Selected Command7",Toast.LENGTH_LONG).show();
	          	 /**
	          	  * Call the mthod
	          	  * Eg: Command7();
	          	  */
	        } else if ("Command8".equals(CmdName)) {
	          	 Toast.makeText(MainActivity.this,"Your Selected Command8",Toast.LENGTH_LONG).show();
	          	 /**
	          	  * Call the mthod
	          	  * Eg: Command8();
	          	  */
	        }

	    }

    	return true;
    }


    @Override
    public boolean onCreateOptionsMenu(Menu menu) {
        getMenuInflater().inflate(R.menu.activity_main, menu);
        return true;
    }

}
จาก Code ของ Java
	String[] Cmd1 = {"Command1","Command2","Command3","Command4"};
	String[] Cmd2 = {"Command5","Command6","Command7","Command8"};
สร้างเมนูขึ้นมา 2 รายการจากค่า Array ของ Cmd1 และ Cmd2
Screenshot
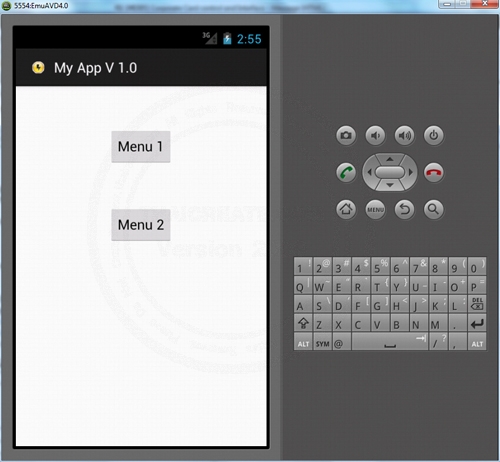
มีอยู่ 2 Button
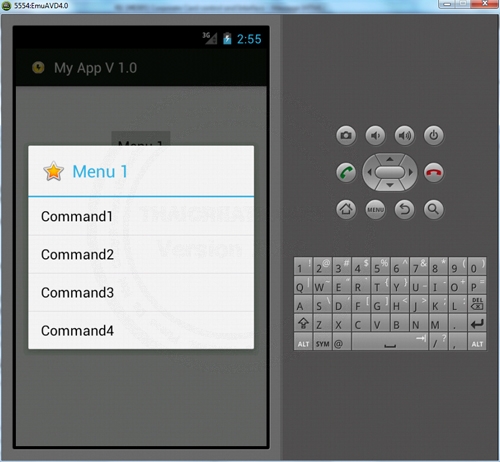
Menu จาก Menu 1
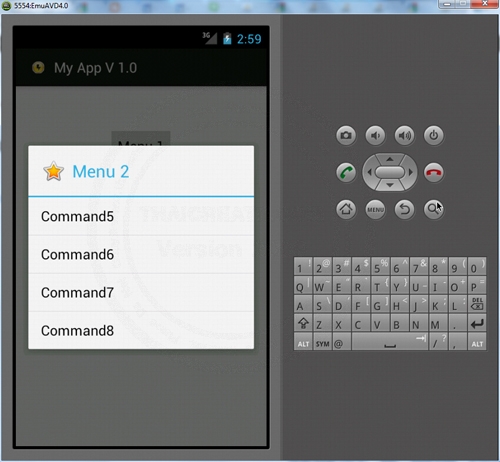
Menu จาก Menu 2
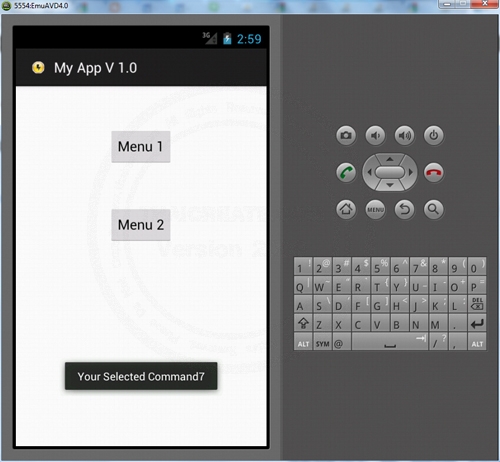
เมื่อคลิกเลิอกที่ Menu
ตัวอย่างการใช้ Context Menu
Android Delete Rows Data in SQLite Database (Android SQLite)
Android ImageView และ GridView แสดงรูปภาพบน GridView (GridView Column)
Android กับ ListView แสดงข้อมูลจาก Database ของ SQLite
|
 ช่วยกันสนับสนุนรักษาเว็บไซต์ความรู้แห่งนี้ไว้ด้วยการสนับสนุน Source Code 2.0 ของทีมงานไทยครีเอท ช่วยกันสนับสนุนรักษาเว็บไซต์ความรู้แห่งนี้ไว้ด้วยการสนับสนุน Source Code 2.0 ของทีมงานไทยครีเอท
|
|
| |
By : |
ThaiCreate.Com Team (บทความเป็นลิขสิทธิ์ของเว็บไทยครีเอทห้ามนำเผยแพร่ ณ เว็บไซต์อื่น ๆ) |
| |
Score Rating : |
   |
|
| |
Create/Update Date : |
2012-07-11 15:39:49 /
2017-03-26 21:42:36 |
| |
Download : |
No files |
|
|
Sponsored Links / Related |
|
|
|
|
|
|

|