ขั้นตอนการอ่านค่า Keystore และ SHA1 (ถ้าอยู่ในเฟสของ Dev ก็ไม่ต้องสนใจ ข้ามไปขั้นตอนการสมัคร API Key ได้เลย)

ไฟล์ debug.keystore จะมาพร้อมกับ Android SDK ปกติจะอยู่ที่
Windows
C:\Users\<your_user_name>\.android\debug.keystore
Mac OS X
~/.android/debug.keystore
เราสามารถใช้คำสั่ง
Windows
keytool -list -v -keystore "%USERPROFILE%\.android\debug.keystore" -alias androiddebugkey -storepass android -keypass android
Mac OS X
keytool -list -v -keystore ~/.android/debug.keystore -alias androiddebugkey -storepass android -keypass android
เพื่อทำการอ่านรหัสของ SHA1

ปกติแล้วมันจะได้ แต่ถ้า Error ดังรูปแสดงว่าไม่ได้ Set Path ของ Java JDK ไว้ซึ่งมันไม่รู้จักคำสั่งของ keytool

ให้ Search หาว่ามันอยู่ที่ไหน หรือไม่ก็ไป Set Path ที่ Environment Variables

ใช้การ CD เข้ามาใน Path ของ JDK

ทดสอบรันใหม่เราจะได้รหัสของ SHA1 ซึ่งอันที่จริงแล้วมันมีรหัสหลายประเภท ขึ้นอยู่ว่า API นั้น ๆ ต้องการรหัสชุดไหน

คลิกขวาเพื่อ Select All และ Copy
MD5: 31:39:AC:F1:C5:1E:F0:8C:90:2B:2C:BD:C9:F0:44:76
SHA1: 63:83:0D:91:E5:E0:1A:64:46:56:04:CB:19:5E:2E:78:E7:95:13:40
SHA256: 4C:3D:AD:DE:74:25:FE:6A:A6:53:75:9D:81:65:7C:5E:52:7D:F5:69:75:16:5A:6C:7E:D7:DB:F1:F4:4B:E4:AA
Signature algorithm name: SHA256withRSA
Version: 3
รหัส SHA1 ที่จะใช้ในการสมัคร API Key
การสมัคร Google API Key จำเป็นจะต้องมี ถ้าไม่มีจะไม่สามารถเรียก Map มาแสดงได้
Google Developer Console
https://console.developers.google.com/
URL สำหรับการสมัคร ซึ่งจะต้องใช้ Account ของ Gmail

หลังจากที่ Login เข้ามาแล้ว จะเป็นหน้าจอของ Google API

ให้คลิกไปที่ขวามือเลือก Create a project...

กรอกชื่อ Project และเลือก Create

หลังจากที่ Create Project เรียบร้อยแล้ว เราจะกลับมายังหน้า Dashboard

ให้เลือก Manage all project...

แสดงรายชื่อ Project ทั้งหมดที่มีอยู่ปัจจุบัน ให้คลิกเพื่อเข้าไปจัดการกับ API

เลือก API Enable and manage APIs

คลิกที่ Overview -> Google Maps Android API

เลือก Enable API

ในฝั่งของซ้ายมือเลือก Credentials

เลือก Add credentials -> API Key

เลือก Android key

ในขั้นตอนนี้สำคัญมาก จะเห็นว่ามีในส่วนที่จะให้เพิ่ม Add package name and fingerprint

จะเห็นว่ามีให้กรอก Package name และ SHA-1 ซึ่งเป็นรหัสที่เราได้ก่อนหน้านี้ ส่วน Package name มาจากโปรเจคของเรา
(ย้ำว่าในเฟส Dev ไม่จำเป็นต้องกรอกรหัสนี้ก็ได้)

หลังจากนั้นเราจะได้ API Key ที่จะใช้งาน

API Key ที่ได้

ในไฟล์ AndroidManifest.xml ให้เพิ่ม API Key และชุดคำสั่งนี้ลงไป (ให้ถูกตำแหน่งด้วย ไม่งั้น App ไม่แสดง Map)
    <application
        android:allowBackup="true"
        android:icon="@drawable/ic_launcher"
        android:label="@string/app_name" >
        <activity
            android:name=".MainActivity"
            android:label="@string/app_name" >
            <intent-filter>
                <action android:name="android.intent.action.MAIN" />

                <category android:name="android.intent.category.LAUNCHER" />
            </intent-filter>
        </activity>

		<uses-library android:name="com.google.android.maps" > </uses-library>

		<meta-data
		     android:name="com.google.android.maps.v2.API_KEY"
		     android:value="AIzaSyBPlg32Atd1FsDgmn_c5pefEkOotGqs3z8" />

	  	<meta-data
		    android:name="com.google.android.gms.version"
		    android:value="@integer/google_play_services_version" />

    </application>

เป็นโครงสร้างของโปรเจค สามารถใช้ได้ทั้งบน Eclipse และ Android Studio
activity_main.xml

<?xml version="1.0" encoding="utf-8"?>
<fragment xmlns:android="http://schemas.android.com/apk/res/android"
          android:id="@+id/googleMap"
          android:layout_width="fill_parent"
          android:layout_height="fill_parent"
          android:name="com.google.android.gms.maps.SupportMapFragment"/>
ในการใช้งานแนะนำให้ใช้ fragment
MainActivity.java
package com.myapp;

import com.google.android.gms.maps.GoogleMap;
import com.google.android.gms.maps.SupportMapFragment;
import android.os.Bundle;

import android.support.v4.app.FragmentActivity;

public class MainActivity extends FragmentActivity {

	  // Google Map
    private GoogleMap googleMap;

    protected void onCreate(Bundle savedInstanceState) {
        super.onCreate(savedInstanceState);
        setContentView(R.layout.activity_main);

        googleMap = ((SupportMapFragment)getSupportFragmentManager()
                .findFragmentById(R.id.googleMap)).getMap();

    }

}
ในการเขียน Code ของ Java แนะนำให้ extends ไปยัง FragmentActivity ซึ่งจะสามารถใช้งาน Google Map ได้อย่างไม่มีปัญหา
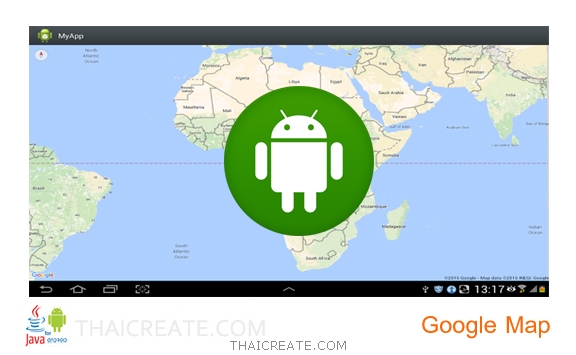
Screenshot

ผลลัพธ์ที่ได้
สำหรับหัวข้อแรกนี้อาจจะยาวนิดหนึ่ง แต่เนื้อหาใจความแล้วไม่มีอะไรซับซ้อน ถ้าสมาชิกท่านใดยังไม่สามารถทำให้ Map แสดงผลได้ ลองตรวจสอบขั้นตอนว่าได้ขาดขั้นตอนใดขั้นตอนหนึ่งหรือไม่
.