Android SeekBar in Alert Dialog Popup |
Android SeekBar in Alert Dialog Popup การเขียน Android เพื่อสร้าง SeekBar บน AlertDialog Popup โดยวิธีการสร้างสามารถใช้ class ของ AlertDialog.Builder เรียก View ที่ได้จากการ Widgets ของ SeekBar หรือจะเรียกจาก Custom Layout ของ XML ก็ได้เช่นเดียวกัน
SeekBar - Android Widgets Example
Example 1 การสร้าง SeekBar บน Dialog แบบง่าย ๆ
โครงสร้างของไฟล์ประกอบด้วย 2 ไฟล์คือ MainActivity.java, activity_main.xml
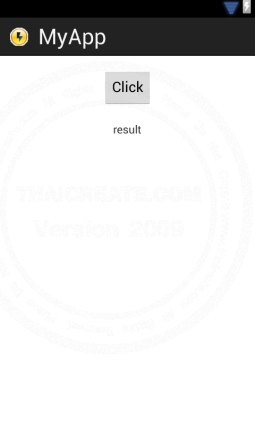
activity_main.xml
<RelativeLayout xmlns:android="http://schemas.android.com/apk/res/android"
    xmlns:tools="http://schemas.android.com/tools"
    android:layout_width="match_parent"
    android:layout_height="match_parent" >

    <Button
        android:id="@+id/button1"
        android:layout_width="wrap_content"
        android:layout_height="wrap_content"
        android:layout_alignParentTop="true"
        android:layout_centerHorizontal="true"
        android:layout_marginTop="16dp"
        android:text="Click" />

    <TextView
        android:id="@+id/textView1"
        android:layout_width="wrap_content"
        android:layout_height="wrap_content"
        android:layout_below="@+id/button1"
        android:layout_centerHorizontal="true"
        android:layout_marginTop="20dp"
        android:text="result" />

</RelativeLayout>
MainActivity.java
package com.myapp;

import android.os.Bundle;
import android.view.Menu;
import android.view.View;
import android.widget.Button;
import android.widget.SeekBar;
import android.widget.TextView;
import android.app.Activity;
import android.app.AlertDialog;
import android.content.DialogInterface;

public class MainActivity extends Activity {

	public TextView txtView;

	@Override
	public void onCreate(Bundle savedInstanceState) {
		super.onCreate(savedInstanceState);
		setContentView(R.layout.activity_main);


		txtView = (TextView)findViewById(R.id.textView1); // TextView

        // Button1
        final Button btn1 = (Button) findViewById(R.id.button1);
        btn1.setOnClickListener(new View.OnClickListener() {
            public void onClick(View v) {
            	ShowDialog();
            }
        });

	}

	public void ShowDialog()
	{
		final AlertDialog.Builder popDialog = new AlertDialog.Builder(this);
		final SeekBar seek = new SeekBar(this);
		seek.setMax(100);

		popDialog.setIcon(android.R.drawable.btn_star_big_on);
		popDialog.setTitle("Please Select Rank 1-100 ");
		popDialog.setView(seek);

		seek.setOnSeekBarChangeListener(new SeekBar.OnSeekBarChangeListener() {
		        public void onProgressChanged(SeekBar seekBar, int progress, boolean fromUser){
		            //Do something here with new value
		        	txtView.setText("Value of : " + progress);
		        }

				public void onStartTrackingTouch(SeekBar arg0) {
					// TODO Auto-generated method stub

				}

				public void onStopTrackingTouch(SeekBar seekBar) {
					// TODO Auto-generated method stub

				}
		    });


		// Button OK
		popDialog.setPositiveButton("OK",
				new DialogInterface.OnClickListener() {
					public void onClick(DialogInterface dialog, int which) {
						dialog.dismiss();
					}

				});


		popDialog.create();
		popDialog.show();

	}

    @Override
    public boolean onCreateOptionsMenu(Menu menu) {
        getMenuInflater().inflate(R.menu.activity_main, menu);
        return true;
    }

}
Screenshot
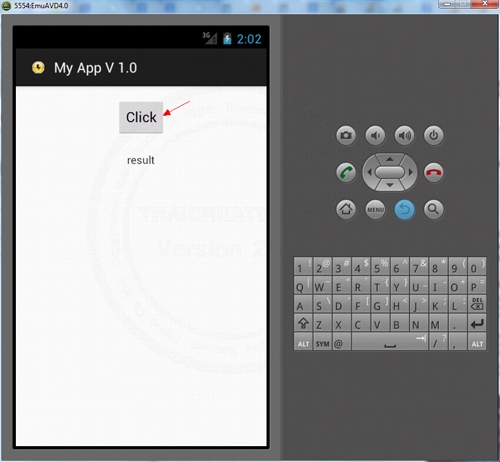
คลิกเพื่อแสดง Dialog Popup
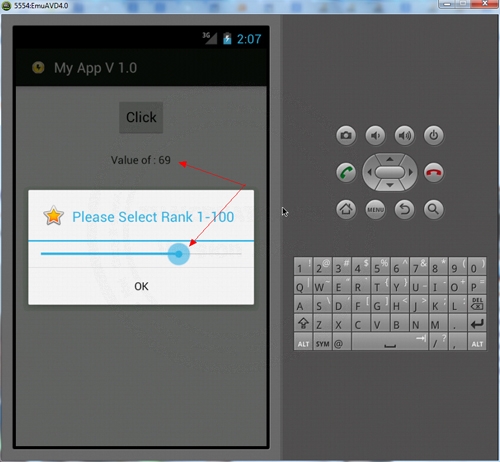
แสดง SeekBar บน AlertDialog Popup และการอ่านค่าของ SeekBar
Example 2 การสร้าง SeekBar บน Dialog Popup แบบ Custom Layout และมี SeekBar มีหลายรายการ
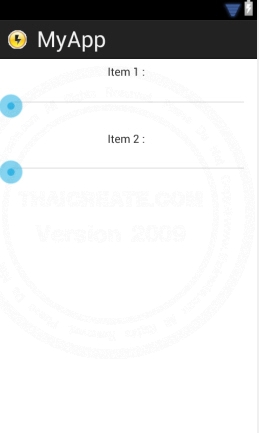
สำหรับวิธ๊นี้จะต้องสร้าง Layout ขึ้นมาและสร้าง SeekBar ที่ต้องการบน Layout จากนั้น Dialog Popup จะเรียก Layout นั้นมาแสดงบน Dialog
โครงสร้างของไฟล์ประกอบด้วย 3 ไฟล์คือ MainActivity.java, activity_main.xml และ activity_dialog.xml
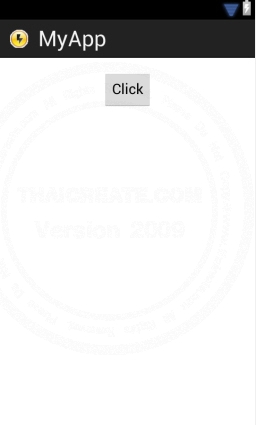
activity_main.xml
<RelativeLayout xmlns:android="http://schemas.android.com/apk/res/android"
    xmlns:tools="http://schemas.android.com/tools"
    android:layout_width="match_parent"
    android:layout_height="match_parent" >

    <Button
        android:id="@+id/button1"
        android:layout_width="wrap_content"
        android:layout_height="wrap_content"
        android:layout_alignParentTop="true"
        android:layout_centerHorizontal="true"
        android:layout_marginTop="16dp"
        android:text="Click" />

</RelativeLayout>
activity_dialog.xml
<RelativeLayout xmlns:android="http://schemas.android.com/apk/res/android"
    xmlns:tools="http://schemas.android.com/tools"
    android:id="@+id/layout_dialog"
    android:layout_width="match_parent"
    android:layout_height="match_parent" >

    <TextView
        android:id="@+id/txtItem1"
        android:layout_width="wrap_content"
        android:layout_height="wrap_content"
        android:layout_alignParentTop="true"
        android:layout_centerHorizontal="true"
        android:layout_marginTop="7dp"
        android:text="Item 1 : " />

    <SeekBar
        android:id="@+id/seekBar1"
        android:layout_width="match_parent"
        android:layout_height="wrap_content"
        android:layout_alignParentLeft="true"
        android:layout_below="@+id/txtItem1"
        android:layout_marginTop="17dp" />

    <TextView
        android:id="@+id/txtItem2"
        android:layout_width="wrap_content"
        android:layout_height="wrap_content"
        android:layout_alignLeft="@+id/txtItem1"
        android:layout_below="@+id/seekBar1"
        android:layout_marginTop="16dp"
        android:text="Item 2 : " />

    <SeekBar
        android:id="@+id/seekBar2"
        android:layout_width="match_parent"
        android:layout_height="wrap_content"
        android:layout_alignParentLeft="true"
        android:layout_below="@+id/txtItem2"
        android:layout_marginTop="16dp" />

</RelativeLayout>
MainActivity.java
package com.myapp;

import android.os.Bundle;
import android.view.LayoutInflater;
import android.view.Menu;
import android.view.View;
import android.view.ViewGroup;
import android.widget.Button;
import android.widget.SeekBar;
import android.widget.TextView;
import android.app.Activity;
import android.app.AlertDialog;
import android.content.DialogInterface;

public class MainActivity extends Activity {


	@Override
	public void onCreate(Bundle savedInstanceState) {
		super.onCreate(savedInstanceState);
		setContentView(R.layout.activity_main);


        // Button1
        final Button btn1 = (Button) findViewById(R.id.button1);
        btn1.setOnClickListener(new View.OnClickListener() {
            public void onClick(View v) {
            	ShowDialog();
            }
        });

	}

	public void ShowDialog()
	{

        final AlertDialog.Builder popDialog = new AlertDialog.Builder(this);
        final LayoutInflater inflater = (LayoutInflater) this.getSystemService(LAYOUT_INFLATER_SERVICE);

        final View Viewlayout = inflater.inflate(R.layout.activity_dialog,
                (ViewGroup) findViewById(R.id.layout_dialog));

        final TextView item1 = (TextView)Viewlayout.findViewById(R.id.txtItem1); // txtItem1
        final TextView item2 = (TextView)Viewlayout.findViewById(R.id.txtItem2); // txtItem2

		popDialog.setIcon(android.R.drawable.btn_star_big_on);
		popDialog.setTitle("Please Select Rank 1-100 ");
		popDialog.setView(Viewlayout);

		//  seekBar1
		SeekBar seek1 = (SeekBar) Viewlayout.findViewById(R.id.seekBar1);
		seek1.setOnSeekBarChangeListener(new SeekBar.OnSeekBarChangeListener() {
		        public void onProgressChanged(SeekBar seekBar, int progress, boolean fromUser){
		            //Do something here with new value
		        	item1.setText("Value of : " + progress);
		        }

				public void onStartTrackingTouch(SeekBar arg0) {
					// TODO Auto-generated method stub

				}

				public void onStopTrackingTouch(SeekBar seekBar) {
					// TODO Auto-generated method stub

				}
		    });

		//  seekBar2
		SeekBar seek2 = (SeekBar) Viewlayout.findViewById(R.id.seekBar2);
		seek2.setOnSeekBarChangeListener(new SeekBar.OnSeekBarChangeListener() {
		        public void onProgressChanged(SeekBar seekBar, int progress, boolean fromUser){
		            //Do something here with new value
		        	item2.setText("Value of : " + progress);
		        }

				public void onStartTrackingTouch(SeekBar arg0) {
					// TODO Auto-generated method stub

				}

				public void onStopTrackingTouch(SeekBar seekBar) {
					// TODO Auto-generated method stub

				}
		    });


		// Button OK
		popDialog.setPositiveButton("OK",
				new DialogInterface.OnClickListener() {
					public void onClick(DialogInterface dialog, int which) {
						dialog.dismiss();
					}

				});


		popDialog.create();
		popDialog.show();

	}

    @Override
    public boolean onCreateOptionsMenu(Menu menu) {
        getMenuInflater().inflate(R.menu.activity_main, menu);
        return true;
    }

}
Screenshot
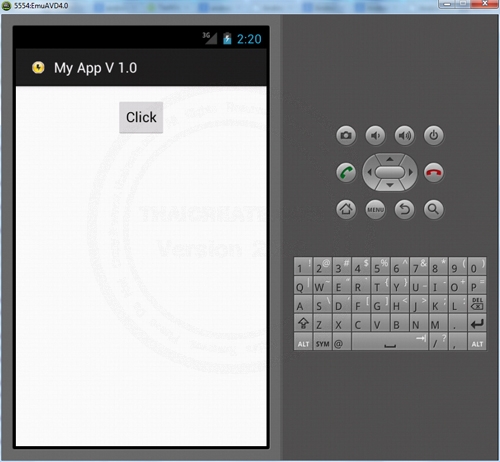
คลิกเพื่อเปิด Dialog Popup
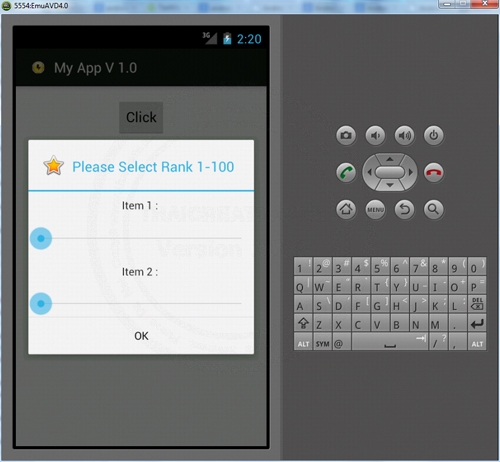
แสดง SeekBar แบบ 2 ตัว ที่อยู่บน XML Layout
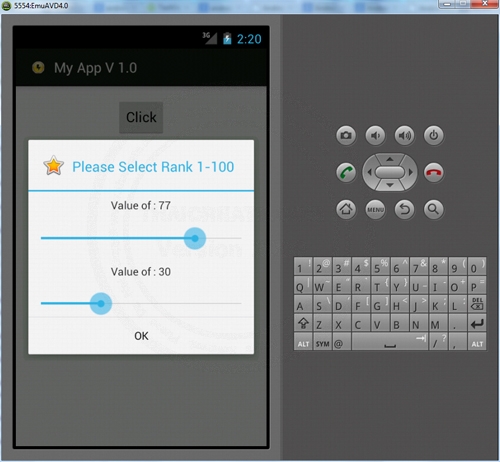
การอ่านค่าที่ได้จาก SeekBar
.
|
 ช่วยกันสนับสนุนรักษาเว็บไซต์ความรู้แห่งนี้ไว้ด้วยการสนับสนุน Source Code 2.0 ของทีมงานไทยครีเอท ช่วยกันสนับสนุนรักษาเว็บไซต์ความรู้แห่งนี้ไว้ด้วยการสนับสนุน Source Code 2.0 ของทีมงานไทยครีเอท
|
|
| |
By : |
ThaiCreate.Com Team (บทความเป็นลิขสิทธิ์ของเว็บไทยครีเอทห้ามนำเผยแพร่ ณ เว็บไซต์อื่น ๆ) |
| |
Score Rating : |
   |
|
| |
Create/Update Date : |
2012-08-25 20:00:00 /
2017-03-26 20:21:23 |
| |
Download : |
No files |
|
|
Sponsored Links / Related |
|
|
|
|
|
|

|