WebView - Android Widgets Example |
WebView - Android Widgets สำหรับ WebView เป็น Widget ที่ใช้สำหรับการแสดงผลข้อมูลของเว็บไซต์ที่อยู่ในรูปแบบ URL ต่าง ๆ โดยจะใช้มุมมองของ Web Browser ที่อยู่ใน OS รุ่นนั้น ๆ

XML Syntax
    <WebView
        android:id="@+id/webView1"
        android:layout_width="match_parent"
        android:layout_height="wrap_content" >
    </WebView>
Example 1 ตัวอย่างการแสดงผลจาก URL แบบง่าย ๆ
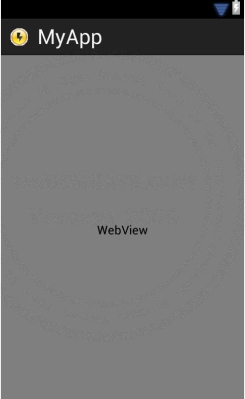
ออกแบบหน้าจอ GraphicalLayout ด้วย Widget ตามรูป
activity_main.xml (XML Layout)
<RelativeLayout xmlns:android="http://schemas.android.com/apk/res/android"
    xmlns:tools="http://schemas.android.com/tools"
    android:layout_width="match_parent"
    android:layout_height="match_parent" >

    <WebView
        android:id="@+id/webView1"
        android:layout_width="match_parent"
        android:layout_height="match_parent"
        android:layout_alignParentLeft="true"
        android:layout_alignParentTop="true" />

</RelativeLayout>
MainActivity.java (Java Code)
package com.myapp;

import android.app.Activity;
import android.os.Bundle;
import android.view.Menu;
import android.webkit.WebView;


public class MainActivity extends Activity{

	@Override
	public void onCreate(Bundle savedInstanceState) {
		super.onCreate(savedInstanceState);
		setContentView(R.layout.activity_main);

		WebView WebViw = (WebView) findViewById(R.id.webView1);
		WebViw.getSettings().setJavaScriptEnabled(true);
		WebViw.loadUrl("http://m.thaicreate.com");

	}

    @Override
    public boolean onCreateOptionsMenu(Menu menu) {
        getMenuInflater().inflate(R.menu.activity_main, menu);
        return true;
    }

}
คำอธิบาย
WebViw.getSettings().setJavaScriptEnabled(true);
สำหรับคำสั่งนี้เป็นการเปิดใช้งาน JavaScript
AndroidManifrst.xml
.
.
<uses-permission android:name="android.permission.INTERNET" />
.
.
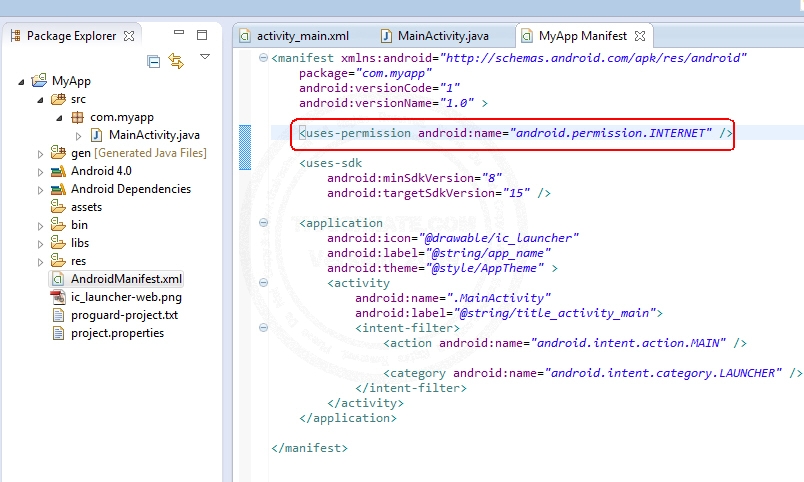
แก้ไขไฟล์ AndroidManifrst.xml ดังรูป
Screenshot
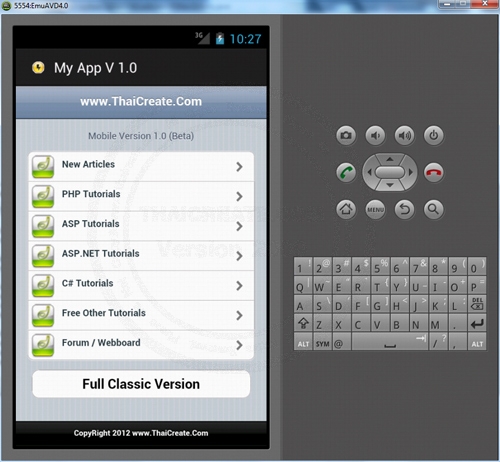
แสดงข้อมูลใน WebView ซึ่งจะแสดงจาก URL ของ http://m.thaicreate.com
Example 2 ตัวอย่างการรับค่า URL ของเว็บไซต์ ผ่าน EditText จาก User
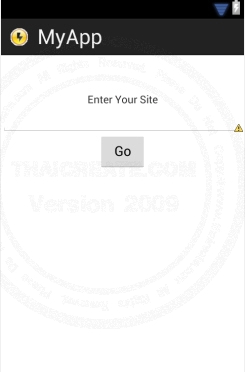
ออกแบบหน้าจอ GraphicalLayout ด้วย Widget ตามรูป
activity_main.xml (XML Layout)
	<ViewSwitcher xmlns:android="http://schemas.android.com/apk/res/android"
    android:id="@+id/viewSwitcher1"
    android:layout_width="fill_parent"
    android:layout_height="fill_parent">

	<TableLayout xmlns:android="http://schemas.android.com/apk/res/android"
	    xmlns:tools="http://schemas.android.com/tools"
	    android:id="@+id/tableLayout1"
	    android:layout_width="match_parent"
	    android:layout_height="match_parent"
	    android:layout_marginTop="50dp" >

	    <TextView
		    android:id="@+id/textView1"
		    android:layout_width="wrap_content"
		    android:layout_height="wrap_content"
		   	android:gravity="center"
		    android:text="Enter Your Site" />

		<EditText
		    android:id="@+id/editText1"
		    android:layout_width="wrap_content"
		    android:layout_height="wrap_content"
		    android:ems="10" >

		</EditText>

			<RelativeLayout
		        android:layout_width="fill_parent"
		        android:layout_height="wrap_content">
				<Button
				    android:id="@+id/button1"
				    android:layout_width="wrap_content"
				    android:layout_height="wrap_content"
				    android:layout_centerHorizontal="true"
			    android:text="Go" />
			</RelativeLayout>

     </TableLayout>

	<TableLayout xmlns:android="http://schemas.android.com/apk/res/android"
		    xmlns:tools="http://schemas.android.com/tools"
		    android:id="@+id/tableLayout2"
		    android:layout_width="match_parent"
		    android:layout_height="match_parent"
		    android:layout_marginTop="0dp" >
	    <WebView
	        android:id="@+id/webView1"
	        android:layout_width="match_parent"
	        android:layout_height="match_parent"/>

	</TableLayout>

</ViewSwitcher>
MainActivity.java (Java Code)
package com.myapp;

import android.app.Activity;
import android.os.Bundle;
import android.view.Menu;
import android.view.View;
import android.webkit.WebView;
import android.widget.Button;
import android.widget.EditText;
import android.widget.ViewSwitcher;


public class MainActivity extends Activity{

	ViewSwitcher Vs;

	@Override
	public void onCreate(Bundle savedInstanceState) {
		super.onCreate(savedInstanceState);
		setContentView(R.layout.activity_main);

        // viewSwitcher1
        Vs = (ViewSwitcher) findViewById(R.id.viewSwitcher1);

        // button1 (Go)
        Button btn1 = (Button) findViewById(R.id.button1);
        btn1.setOnClickListener(new View.OnClickListener() {
            public void onClick(View v) {
            	Vs.showNext();
                // editText1
            	EditText txtUrl = (EditText) findViewById(R.id.editText1);
            	// webView1
        		WebView WebViw = (WebView) findViewById(R.id.webView1);
				WebViw.getSettings().setJavaScriptEnabled(true);
        		WebViw.loadUrl(txtUrl.getText().toString());
            }
        });

	}

    @Override
    public boolean onCreateOptionsMenu(Menu menu) {
        getMenuInflater().inflate(R.menu.activity_main, menu);
        return true;
    }

}
Screenshot
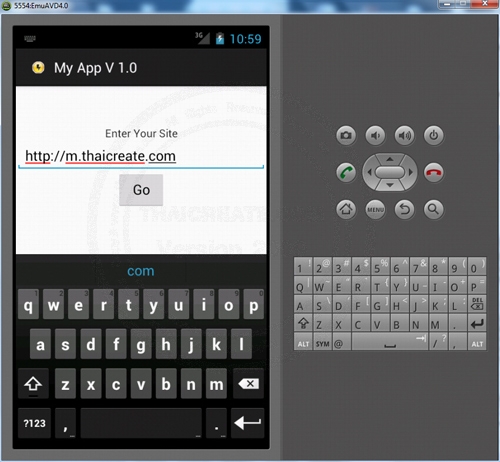
กรอก URLลงใน EditText แล้งคลิกที่ Go
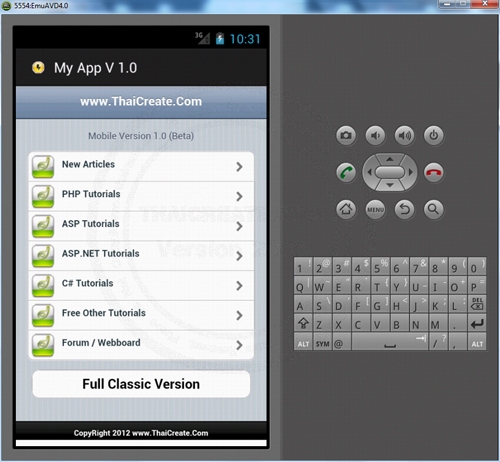
แสดงผลตาม URL ที่ได้ Input ลงไป
Example 3 การใช้ WebView แสดงผล Custom HTML คือสร้าง Format ของ HTML ขึ้นมาเอง
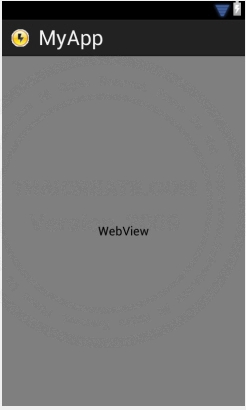
ออกแบบหน้าจอ GraphicalLayout ด้วย Widget ตามรูป
activity_main.xml (XML Layout)
<TableLayout xmlns:android="http://schemas.android.com/apk/res/android"
	    xmlns:tools="http://schemas.android.com/tools"
	    android:id="@+id/tableLayout1"
	    android:layout_width="match_parent"
	    android:layout_height="match_parent"
	    android:layout_marginTop="0dp" >
    <WebView
        android:id="@+id/webView1"
        android:layout_width="match_parent"
        android:layout_height="match_parent"/>

</TableLayout>
MainActivity.java (Java Code)
package com.myapp;

import android.app.Activity;
import android.os.Bundle;
import android.view.Menu;
import android.webkit.WebView;


public class MainActivity extends Activity{


	@Override
	public void onCreate(Bundle savedInstanceState) {
		super.onCreate(savedInstanceState);
		setContentView(R.layout.activity_main);

    	// webView1
		WebView WebViw = (WebView) findViewById(R.id.webView1);
		WebViw.getSettings().setJavaScriptEnabled(true);

		StringBuilder html = new StringBuilder();
		html.append("<html><body><h2><font color=\"red\">Sawatdee ThaiCreate.Com</font></h2>");

	   	WebViw.loadData(html.toString(), "text/html", "UTF-8");

	}


    @Override
    public boolean onCreateOptionsMenu(Menu menu) {
        getMenuInflater().inflate(R.menu.activity_main, menu);
        return true;
    }

}
Screenshot
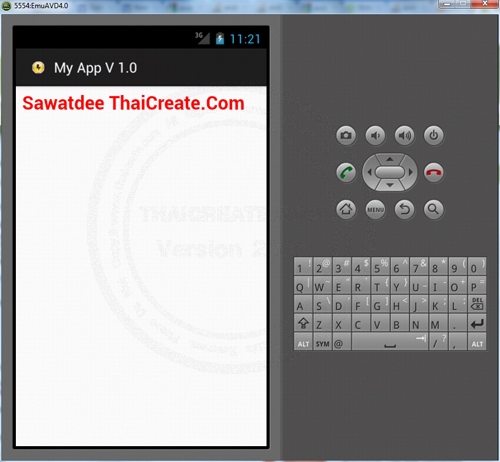
แสดงผลข้อมูลที่มาจาก Custom HTML
Example 4 การใช้ WebView แสดงผล Custom HTML และการใช้งาน JavaScriptInterface
WebViw.addJavascriptInterface(new JavaScriptInterface(this), "Android");
ในการใช้งาน Custom HTML จะต้องเรียกใช้ Property ของ addJavascriptInterface
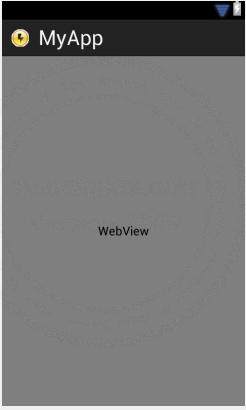
ออกแบบหน้าจอ GraphicalLayout ด้วย Widget ตามรูป
activity_main.xml (XML Layout)
<TableLayout xmlns:android="http://schemas.android.com/apk/res/android"
	    xmlns:tools="http://schemas.android.com/tools"
	    android:id="@+id/tableLayout1"
	    android:layout_width="match_parent"
	    android:layout_height="match_parent"
	    android:layout_marginTop="0dp" >
    <WebView
        android:id="@+id/webView1"
        android:layout_width="match_parent"
        android:layout_height="match_parent"/>

</TableLayout>
MainActivity.java (Java Code)
package com.myapp;

import android.app.Activity;
import android.content.Context;
import android.os.Bundle;
import android.view.Menu;
import android.webkit.WebView;
import android.widget.Toast;


public class MainActivity extends Activity{

	@Override
	public void onCreate(Bundle savedInstanceState) {
		super.onCreate(savedInstanceState);
		setContentView(R.layout.activity_main);

    	// webView1
		WebView WebViw = (WebView) findViewById(R.id.webView1);
		WebViw.getSettings().setJavaScriptEnabled(true);
		WebViw.addJavascriptInterface(new JavaScriptInterface(this), "Android");

		StringBuilder html = new StringBuilder();
		html.append("<html><body><h2>Test WebView</h2>");
		html.append("<input type=\"text\" id=\"txtName\" />");
		html.append("<input type=\"button\" value=\"Say hello\" onClick=\"showAndroidToast(document.getElementById('txtName').value)\" />");

		html.append("<script type=\"text/javascript\">");
		html.append("    function showAndroidToast(toast) {");
		html.append("        Android.showToast(toast);");
		html.append("    }");
		html.append("</script>");

	   	WebViw.loadData(html.toString(), "text/html", "UTF-8");

	}

	public class JavaScriptInterface {
	    Context mContext;

	    /** Instantiate the interface and set the context */
	    JavaScriptInterface(Context c) {
	        mContext = c;
	    }

	    /** Show a toast from the web page */
	    public void showToast(String toast) {
	        Toast.makeText(mContext, toast, Toast.LENGTH_SHORT).show();
	    }
	}

    @Override
    public boolean onCreateOptionsMenu(Menu menu) {
        getMenuInflater().inflate(R.menu.activity_main, menu);
        return true;
    }

}
Screenshot
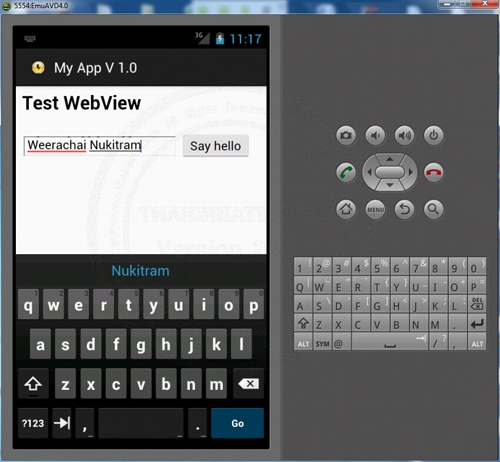
แสดงผล Custom HTML ตามที่ได้สร้างขึ้น
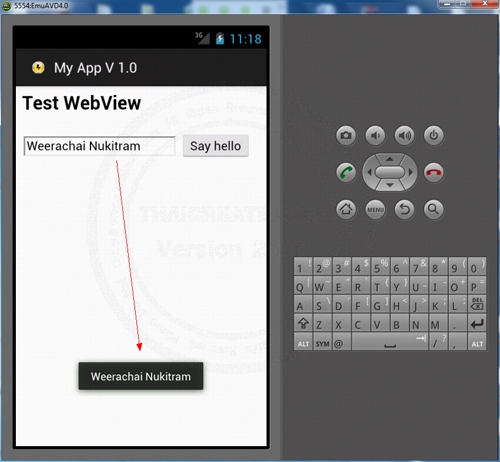
การทำงานรวมกับ JavaScript กับ Interface ของ Android
| Property & Method (Others Related) |
|
 ช่วยกันสนับสนุนรักษาเว็บไซต์ความรู้แห่งนี้ไว้ด้วยการสนับสนุน Source Code 2.0 ของทีมงานไทยครีเอท ช่วยกันสนับสนุนรักษาเว็บไซต์ความรู้แห่งนี้ไว้ด้วยการสนับสนุน Source Code 2.0 ของทีมงานไทยครีเอท
|
|
| |
By : |
ThaiCreate.Com Team (บทความเป็นลิขสิทธิ์ของเว็บไทยครีเอทห้ามนำเผยแพร่ ณ เว็บไซต์อื่น ๆ) |
| |
Score Rating : |
   |
|
| |
Create/Update Date : |
2012-07-01 16:17:04 /
2012-07-14 07:07:25 |
| |
Download : |
No files |
|
|
Sponsored Links / Related |
|
|
|
|
|
|

|