ตอนที่ 9 : Xamarin กับ Android การสร้าง Dialog Popup และ Alert Dialog / Toast Make Text (C#) |
ตอนที่ 9 : Xamarin กับ Android การสร้าง Dialog Popup และ Alert Dialog / Toast Make Text (C#) ในหัวข้อที่ผ่านมาเราได้เรียนรู้การติดตั้ง Xamarin และพื้นฐานไปบ้างพอสมควร เช่นพื้นฐานและเบื้องต้นการสร้าง Create New Project และการปรับแต่งค่าพื้นฐานที่จำเป็นต่อการเขียนโปรแกรมบน Android ด้วย C# บน Framework ของ Xamarin หัวข้อนี้เราจะได้เรียนรู้การเขียนโปรแกรมเกี่ยวกับการโต้ตอบระหว่าง User กับ Android แบบง่าย ๆ ผ่าน AlertDialog และ Make Text แบบ Toast Dialog ซึ่งเป็น Feature ที่สามารถใช้งานได้ง่าย ๆ แต่มีความจำเป็น และสามารถประยุกต์การใช้งานได้มากมาย
AlertDialog Syntax รูปแบบการใช้งานด้วยภาษา C#
            AlertDialog.Builder builder = new AlertDialog.Builder(this);
            AlertDialog alert = builder.Create();
            alert.SetTitle("Title");
            alert.SetMessage("Message");
            alert.Show();
Toast MakeText ด้วยภาษา C#
Toast.MakeText(this, "Message", ToastLength.Short).Show();
ลองมาดูตัวอย่างเพื่อความเข้าใจมากขึ้น
Example 1 การสร้าง AlertDialog และ Popup แบบง่าย ๆ
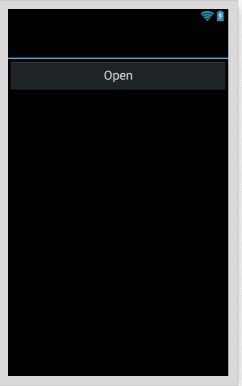
ก่อนอื่นออกแบบ Layout ง่าย ๆ ดังนี้
Main.axml
<?xml version="1.0" encoding="utf-8"?>
<LinearLayout xmlns:android="http://schemas.android.com/apk/res/android"
    android:orientation="vertical"
    android:layout_width="fill_parent"
    android:layout_height="fill_parent">
    <Button
        android:id="@+id/button1"
        android:layout_width="fill_parent"
        android:layout_height="wrap_content"
        android:text="Simple Dialog" />
    <Button
        android:text="Complext Dialog"
        android:layout_width="fill_parent"
        android:layout_height="wrap_content"
        android:id="@+id/button2" />
</LinearLayout>
MainActivity.cs
using System;
using Android.App;
using Android.Content;
using Android.Runtime;
using Android.Views;
using Android.Widget;
using Android.OS;

namespace myFirstApps
{
    [Activity(Label = "myFirstApps", MainLauncher = true, Icon = "@drawable/icon")]
    public class MainActivity : Activity
    {

        protected override void OnCreate(Bundle bundle)
        {
            base.OnCreate(bundle);

            // Set our view from the "main" layout resource
            SetContentView(Resource.Layout.Main);

            // Button Open
            Button btnOpen = FindViewById<Button>(Resource.Id.btnOpen);
            btnOpen.Click += (object sender, EventArgs e) =>
            {
                btnOpenClick(sender, e);
            };

        }


        private void btnOpenClick(object sender, EventArgs e)
        {

            AlertDialog.Builder builder = new AlertDialog.Builder(this);
            AlertDialog alert = builder.Create();
            alert.SetTitle("Your Title");
            alert.SetMessage("Test message sample.");
            alert.Show();
        }


    }
}
ทดสอบการทำงาน
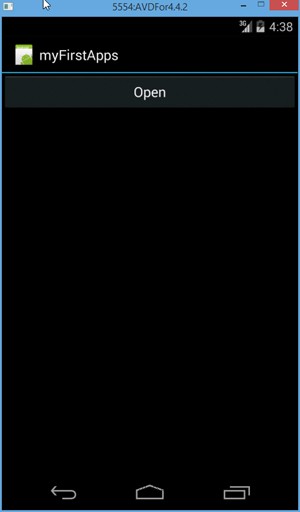
คลิกที่ Button Open เพื่อเปิด AlertDialog Popup
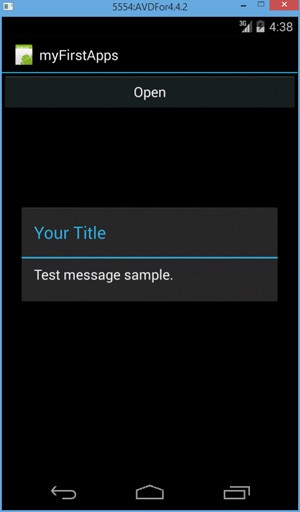
แสดง AlertDialog แบบง่าย ๆ
Example 2 การสร้าง AlertDialog และการปุ่ม Confirm / Cancel แบบง่าย ๆ และการใช้ Toast MakeText
Main.axml
<?xml version="1.0" encoding="utf-8"?>
<LinearLayout xmlns:android="http://schemas.android.com/apk/res/android"
    android:orientation="vertical"
    android:layout_width="fill_parent"
    android:layout_height="fill_parent">
    <Button
        android:id="@+id/button1"
        android:layout_width="fill_parent"
        android:layout_height="wrap_content"
        android:text="Simple Dialog" />
    <Button
        android:text="Complext Dialog"
        android:layout_width="fill_parent"
        android:layout_height="wrap_content"
        android:id="@+id/button2" />
</LinearLayout>
MainActivity.cs
using System;
using Android.App;
using Android.Content;
using Android.Runtime;
using Android.Views;
using Android.Widget;
using Android.OS;

namespace myFirstApps
{
    [Activity(Label = "myFirstApps", MainLauncher = true, Icon = "@drawable/icon")]
    public class MainActivity : Activity
    {

        protected override void OnCreate(Bundle bundle)
        {
            base.OnCreate(bundle);

            // Set our view from the "main" layout resource
            SetContentView(Resource.Layout.Main);

            // Button Open
            Button btnOpen = FindViewById<Button>(Resource.Id.btnOpen);
            btnOpen.Click += (object sender, EventArgs e) =>
            {
                btnOpenClick(sender, e);
            };

        }


        private void btnOpenClick(object sender, EventArgs e)
        {

            AlertDialog.Builder builder = new AlertDialog.Builder(this);
            AlertDialog alert = builder.Create();
            alert.SetTitle("Your Title");
            alert.SetMessage("Test message sample.");
            alert.SetButton("OK", (s, ev) =>
            {
                Toast.MakeText(this, "You click : OK", ToastLength.Short).Show();
            });
            alert.SetButton2("Cancel", (s, ev) =>
            {
                Toast.MakeText(this, "You click : Cancel", ToastLength.Short).Show();
            });
            alert.Show();
        }


    }
}
ทดสอบการทำงาน
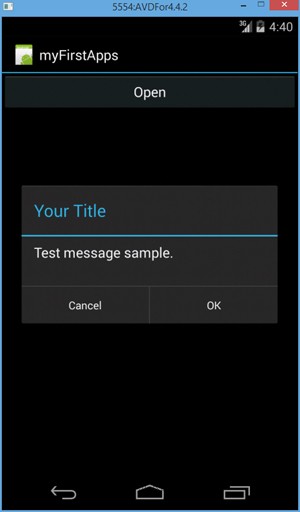
แสดง AlertDialog จะมีปุ่ม OK และ Cancel
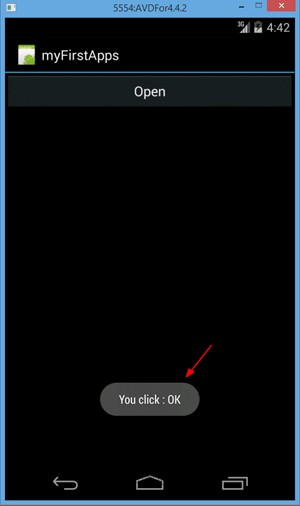
เมื่อคลิกที่ OK จะแสดงข้อความ "You click : OK" บน Toast MakeText
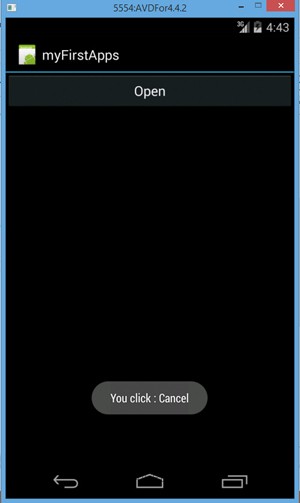
เมื่อคลิกที่ Cancel จะแสดงข้อความ "You click : Cancel" บน Toast MakeText
Example 3 การสร้าง AlertDialog และ Input บน Dialog และโต้ตอบผ่าน Toast MakeText
Main.axml
<?xml version="1.0" encoding="utf-8"?>
<LinearLayout xmlns:android="http://schemas.android.com/apk/res/android"
    android:orientation="vertical"
    android:layout_width="fill_parent"
    android:layout_height="fill_parent">
    <Button
        android:id="@+id/button1"
        android:layout_width="fill_parent"
        android:layout_height="wrap_content"
        android:text="Simple Dialog" />
    <Button
        android:text="Complext Dialog"
        android:layout_width="fill_parent"
        android:layout_height="wrap_content"
        android:id="@+id/button2" />
</LinearLayout>
MainActivity.cs
using System;
using Android.App;
using Android.Content;
using Android.Runtime;
using Android.Views;
using Android.Widget;
using Android.OS;

namespace myFirstApps
{
    [Activity(Label = "myFirstApps", MainLauncher = true, Icon = "@drawable/icon")]
    public class MainActivity : Activity
    {

        protected override void OnCreate(Bundle bundle)
        {
            base.OnCreate(bundle);

            // Set our view from the "main" layout resource
            SetContentView(Resource.Layout.Main);

            // Button Open
            Button btnOpen = FindViewById<Button>(Resource.Id.btnOpen);
            btnOpen.Click += (object sender, EventArgs e) =>
            {
                btnOpenClick(sender, e);
            };

        }


        private void btnOpenClick(object sender, EventArgs e)
        {
            EditText input = new EditText(this);

            AlertDialog.Builder builder = new AlertDialog.Builder(this);
            AlertDialog alert = builder.Create();
            alert.SetTitle("Your Title");
            alert.SetMessage("Input your name : ");
            alert.SetView(input);
            alert.SetButton("OK", (s, ev) =>
            {
                Toast.MakeText(this, "Hi, " + input.Text, ToastLength.Short).Show();
            });
            alert.Show();
        }


    }
}
ทดสอบการทำงาน
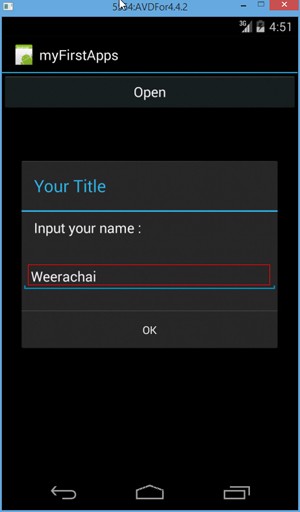
AlertDialog และการรับค่า Input
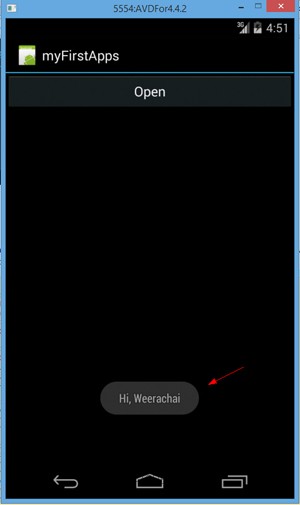
โต้ตอบผ่าน Toast MakeText
Example 4 การสร้าง AlertDialog และการใช้ ListView บน Dialog

Main.axml
<?xml version="1.0" encoding="utf-8"?>
<LinearLayout xmlns:android="http://schemas.android.com/apk/res/android"
    android:orientation="vertical"
    android:layout_width="fill_parent"
    android:layout_height="fill_parent">
    <Button
        android:id="@+id/button1"
        android:layout_width="fill_parent"
        android:layout_height="wrap_content"
        android:text="Simple Dialog" />
    <Button
        android:text="Complext Dialog"
        android:layout_width="fill_parent"
        android:layout_height="wrap_content"
        android:id="@+id/button2" />
</LinearLayout>
MainActivity.cs
using System;
using Android.App;
using Android.Content;
using Android.Runtime;
using Android.Views;
using Android.Widget;
using Android.OS;

namespace myFirstApps
{
    [Activity(Label = "myFirstApps", MainLauncher = true, Icon = "@drawable/icon")]
    public class MainActivity : Activity
    {

        protected override void OnCreate(Bundle bundle)
        {
            base.OnCreate(bundle);

            // Set our view from the "main" layout resource
            SetContentView(Resource.Layout.Main);

            // Button Open
            Button btnOpen = FindViewById<Button>(Resource.Id.btnOpen);
            btnOpen.Click += (object sender, EventArgs e) =>
            {
                btnOpenClick(sender, e);
            };

        }

        string[] items;

        private void btnOpenClick(object sender, EventArgs e)
        {
            items = new string[] { "Item 1", "Item 2", "Item 3", "Item 4", "Item 5", };
            ArrayAdapter ListAdapter = new ArrayAdapter<String>(this, Android.Resource.Layout.SimpleListItem1, items);
            var listView = new ListView(this);
            listView.Adapter = ListAdapter;
            listView.ItemClick += listViewItemClick;

            AlertDialog.Builder builder = new AlertDialog.Builder(this);
            AlertDialog alert = builder.Create();
            alert.SetTitle("Your Title");
            alert.SetMessage("Select your item.");
            alert.SetView(listView);

            alert.Show();
        }

        void listViewItemClick(object sender, AdapterView.ItemClickEventArgs e)
        {
            Toast.MakeText(this, "You clicked on : " + items[e.Position], ToastLength.Short).Show();
        }


    }
}
ทดสอบการทำงาน
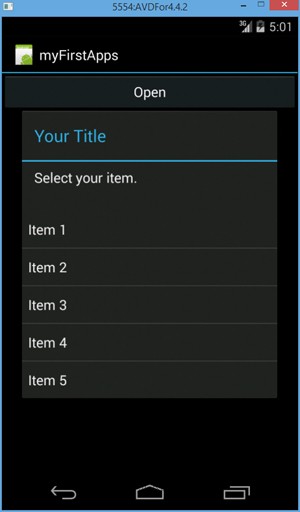
แสดงรายการ ListView บน Alert Dialog
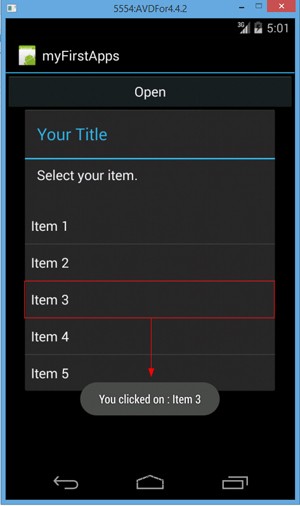
เมื่อเลือกรายการ ListView บน Alert Dialog
|