 |
Android มาวิธีใช้ tabbed activity + The Navigation Drawer หน่อยครับ แนะนำที |
| |
 |
|
|
 |
 |
|
ขอแบบเป็น Tabbed host ด้วยอ่ะครับ
|
 |
 |
 |
 |
| Date :
2017-03-06 20:50:46 |
By :
tot14883 |
|
 |
 |
 |
 |
|
|
 |
 |
|
 |
 |
 |
|
|
 |
 |
|
ลองศึกษาความเข้าใจก่อนนะครับ

[youtube]https://www.youtube.com/embed/oh7AaDHXCqM [/youtube]
https://www.youtube.com/watch?v=oh7AaDHXCqM
หากเข้าใจ แล้วลองดูตามนี้นะครับ
http://stackoverflow.com/questions/34917596/how-to-impliment-navigation-drawer-and-swipe-tab-in-same-activity-in-android-stu

เริ่มจาก สร้าง
1. Include the Design Support Library in your Module(app) dependencies.
Code (Android-Java)
dependencies {
    compile fileTree(dir: 'libs', include: ['*.jar'])
    compile 'com.android.support:appcompat-v7:22.2.1'
    compile 'com.android.support:design:22.2.1'
}
2. . สร้างไฟล์ new file drawermenu.xml in the Menu Directory under the Res folder.
Code (XML)
<?xml version="1.0" encoding="utf-8"?>
<menu xmlns:android="http://schemas.android.com/apk/res/android">


    <item android:title="Inbox"
          android:id="@+id/nav_item_inbox"
          android:icon="@drawable/inbox"/>

    <item android:title="Sent"
          android:id="@+id/nav_item_sent"
          android:icon="@drawable/sent"/>

    <item android:title="Drafts"
          android:id="@+id/nav_item_draft"
          android:icon="@drawable/draft"/>


    <item android:title="Others">
        <menu>
            <item
                android:title="Spam"
                android:icon="@drawable/spam"/>
            <item
                android:title="Bin"
                android:icon="@drawable/bin"/>
        </menu>
    </item>

    <group android:id="@+id/group_settings_id">

        <item android:title="Settings"
              android:icon="@drawable/settings"/>
        <item android:title="Help"
             android:icon="@drawable/help"/>
    </group>


</menu>
3. สร้าง colors and styles . colors.xml และ styles.xml
Code (XML)
styles.xml

<resources>

    <!-- Base application theme. -->
    <style name="AppTheme" parent="Theme.AppCompat.Light.NoActionBar">
        <!-- Customize your theme here. -->
        <item name="colorPrimary">@color/orange</item>
        <item name="colorPrimaryDark">@android:color/holo_orange_dark</item>
    </style>
</resources>
colors.xml
<?xml version="1.0" encoding="utf-8"?>
<resources>


    <color name="black">#000</color>
    <color name="orange">#FA0</color>
    <color name="white">#FFF</color>

</resources>
4. สร้าง activity-main.xml ตัวนึง
Code (XML)
<LinearLayout
    xmlns:android="http://schemas.android.com/apk/res/android"
    xmlns:app="http://schemas.android.com/apk/res-auto"
    android:layout_width="match_parent"
    android:layout_height="match_parent"
    android:fitsSystemWindows="true"
    android:orientation="vertical">

    <android.support.v7.widget.Toolbar
        xmlns:android="http://schemas.android.com/apk/res/android"
        android:layout_width="match_parent"
        android:layout_height="wrap_content"
        android:background="@color/orange"
        android:id="@+id/toolbar"
        android:theme="@style/ThemeOverlay.AppCompat.Dark.ActionBar"
        app:title="Drawer With Swipe Tabs" />

    <android.support.v4.widget.DrawerLayout
        xmlns:android="http://schemas.android.com/apk/res/android"
        xmlns:app="http://schemas.android.com/apk/res-auto"
        android:layout_height="match_parent"
        android:layout_width="match_parent"
        android:id="@+id/drawerLayout"
        >


    <FrameLayout
        android:orientation="vertical"
        android:layout_width="match_parent"
        android:layout_height="match_parent"
        android:id="@+id/containerView">
     </FrameLayout>


    <android.support.design.widget.NavigationView
        xmlns:android="http://schemas.android.com/apk/res/android"
        xmlns:app="http://schemas.android.com/apk/res-auto"
        android:layout_width="wrap_content"
        android:layout_height="match_parent"
        android:layout_gravity="start"
        android:id="@+id/shitstuff"
        app:itemTextColor="@color/black"
        app:menu="@menu/drawermenu"
        android:layout_marginTop="-24dp"
        />


    </android.support.v4.widget.DrawerLayout>
 </LinearLayout>
5. สร้าง layout file พร้อมรวมไปถึง tabLayout ให้เป็น ViewPager.
Code (XML)
tab_layout.xml

<?xml version="1.0" encoding="utf-8"?>
<LinearLayout
    xmlns:android="http://schemas.android.com/apk/res/android"
    xmlns:app="http://schemas.android.com/apk/res-auto"
    android:layout_width="match_parent"
    android:orientation="vertical"
    android:layout_height="wrap_content">


    <android.support.design.widget.TabLayout
        android:id="@+id/tabs"
        app:tabGravity="fill"
        app:tabMode="fixed"
        android:background="@color/material_blue_grey_800"
        app:tabIndicatorColor="@color/orange"
        app:tabSelectedTextColor="@color/orange"
        app:tabTextColor="@color/white"
        android:layout_width="match_parent"
        android:layout_height="wrap_content">
    </android.support.design.widget.TabLayout>

    <android.support.v4.view.ViewPager
        android:id="@+id/viewpager"
        android:layout_width="match_parent"
        android:layout_height="match_parent">

    </android.support.v4.view.ViewPager>

</LinearLayout>
6. สร้าง MainActivity.java เลย
Code (Android-Java)
MainActivity.java

package com.androidbelieve.drawerwithswipetabs;

import android.os.Bundle;
import android.support.design.widget.NavigationView;
import android.support.v4.app.FragmentManager;
import android.support.v4.app.FragmentTransaction;
import android.support.v4.widget.DrawerLayout;
import android.support.v7.app.ActionBarDrawerToggle;
import android.support.v7.app.AppCompatActivity;
import android.view.MenuItem;

public class MainActivity extends AppCompatActivity{
    DrawerLayout mDrawerLayout;
    NavigationView mNavigationView;
    FragmentManager mFragmentManager;
    FragmentTransaction mFragmentTransaction;

    @Override
    protected void onCreate(Bundle savedInstanceState) {
        super.onCreate(savedInstanceState);
        setContentView(R.layout.activity_main);

        /**
         *Setup the DrawerLayout and NavigationView
         */

             mDrawerLayout = (DrawerLayout) findViewById(R.id.drawerLayout);
             mNavigationView = (NavigationView) findViewById(R.id.shitstuff) ;

        /**
         * Lets inflate the very first fragment
         * Here , we are inflating the TabFragment as the first Fragment
         */

             mFragmentManager = getSupportFragmentManager();
             mFragmentTransaction = mFragmentManager.beginTransaction();
             mFragmentTransaction.replace(R.id.containerView,new TabFragment()).commit();
        /**
         * Setup click events on the Navigation View Items.
         */

             mNavigationView.setNavigationItemSelectedListener(new NavigationView.OnNavigationItemSelectedListener() {
             @Override
             public boolean onNavigationItemSelected(MenuItem menuItem) {
                mDrawerLayout.closeDrawers();


                 if (menuItem.getItemId() == R.id.nav_item_sent) {
                     FragmentTransaction fragmentTransaction = mFragmentManager.beginTransaction();
                     fragmentTransaction.replace(R.id.containerView,new
SentFragment()).commit();

                 }

                if (menuItem.getItemId() == R.id.nav_item_inbox) {
                    FragmentTransaction xfragmentTransaction = mFragmentManager.beginTransaction();
                    xfragmentTransaction.replace(R.id.containerView,new
TabFragment()).commit(); }

                 return false;
            }

        });

        /**
         * Setup Drawer Toggle of the Toolbar
         */

                android.support.v7.widget.Toolbar toolbar = (android.support.v7.widget.Toolbar) findViewById(R.id.toolbar);
                ActionBarDrawerToggle mDrawerToggle = new ActionBarDrawerToggle(this,mDrawerLayout, toolbar,R.string.app_name,
                R.string.app_name);

                mDrawerLayout.setDrawerListener(mDrawerToggle);

                mDrawerToggle.syncState();

    }
}
7. เพิ่ม Tab Fragment File. โดยตั้งชื่อว่า TabFragment.java
Code (Android-Java)
TabFragment.java

package com.androidbelieve.drawerwithswipetabs;
import android.os.Bundle;
import android.support.annotation.Nullable;
import android.support.design.widget.TabLayout;
import android.support.v4.app.Fragment;
import android.support.v4.app.FragmentManager;
import android.support.v4.app.FragmentPagerAdapter;
import android.support.v4.view.ViewPager;
import android.view.LayoutInflater;
import android.view.View;
import android.view.ViewGroup;

public class TabFragment extends Fragment {

    public static TabLayout tabLayout;
    public static ViewPager viewPager;
    public static int int_items = 3 ;

    @Nullable
    @Override
    public View onCreateView(LayoutInflater inflater, ViewGroup container, Bundle savedInstanceState) {
        /**
         *Inflate tab_layout and setup Views.
         */
            View x =  inflater.inflate(R.layout.tab_layout,null);
            tabLayout = (TabLayout) x.findViewById(R.id.tabs);
            viewPager = (ViewPager) x.findViewById(R.id.viewpager);

        /**
         *Set an Apater for the View Pager
         */
        viewPager.setAdapter(new MyAdapter(getChildFragmentManager()));

        /**
         * Now , this is a workaround ,
         * The setupWithViewPager dose't works without the runnable .
         * Maybe a Support Library Bug .
         */

        tabLayout.post(new Runnable() {
            @Override
            public void run() {
                    tabLayout.setupWithViewPager(viewPager);
                   }
        });

        return x;

    }

    class MyAdapter extends FragmentPagerAdapter{

        public MyAdapter(FragmentManager fm) {
            super(fm);
        }

        /**
         * Return fragment with respect to Position .
         */

        @Override
        public Fragment getItem(int position)
        {
          switch (position){
              case 0 : return new PrimaryFragment();
              case 1 : return new SocialFragment();
              case 2 : return new UpdatesFragment();
          }
        return null;
        }

        @Override
        public int getCount() {

            return int_items;

        }

        /**
         * This method returns the title of the tab according to the position.
         */

        @Override
        public CharSequence getPageTitle(int position) {

            switch (position){
                case 0 :
                    return "Primary";
                case 1 :
                    return "Social";
                case 2 :
                    return "Updates";
            }
                return null;
        }
    }

}
8.สร้าง demo fragment file ไว้ใน TabLayout. โดยตั้งชื่อว่า PrimaryFragment.java
Code (Android-Java)
package com.androidbelieve.drawerwithswipetabs;

import android.os.Bundle;
import android.support.annotation.Nullable;
import android.support.v4.app.Fragment;
import android.view.LayoutInflater;
import android.view.View;
import android.view.ViewGroup;


public class PrimaryFragment extends Fragment {

    @Nullable
    @Override
    public View onCreateView(LayoutInflater inflater, ViewGroup container, Bundle savedInstanceState) {
        return inflater.inflate(R.layout.primary_layout,null);
    }
}
9. สร้างไฟล์ primary_layout.xml
Code (XML)
<?xml version="1.0" encoding="utf-8"?>
<RelativeLayout xmlns:android="http://schemas.android.com/apk/res/android"
    android:orientation="vertical" android:layout_width="match_parent"
    android:layout_height="match_parent">

    <TextView
        android:layout_width="wrap_content"
        android:layout_height="wrap_content"
        android:layout_marginTop="40dp"
        android:textSize="30sp"
        android:gravity="center"
        android:id="@+id/textView"
        android:layout_centerHorizontal="true"
        android:textColor="@android:color/holo_blue_dark"
        android:text="Primary\nFragment"/>

    <TextView
        android:layout_width="wrap_content"
        android:layout_height="wrap_content"
        android:autoLink="web"
        android:textSize="15sp"
        android:layout_marginTop="10dp"
        android:layout_centerHorizontal="true"
        android:text="androidbelieve.com"
        android:textColor="#000"
        android:layout_below="@+id/textView"
        android:textStyle="italic"/>

</RelativeLayout>
จากไม่เข้าใจ ลองศึกษาตาม ตัวอย่างได้ครับ
https://androidbelieve.com/
|
ประวัติการแก้ไข
2017-03-08 17:54:41
 |
 |
 |
 |
| Date :
2017-03-08 17:51:55 |
By :
heloman |
|
 |
 |
 |
 |
|
|
 |
 |
|
 |
 |
 |
|
|
 |
 |
|
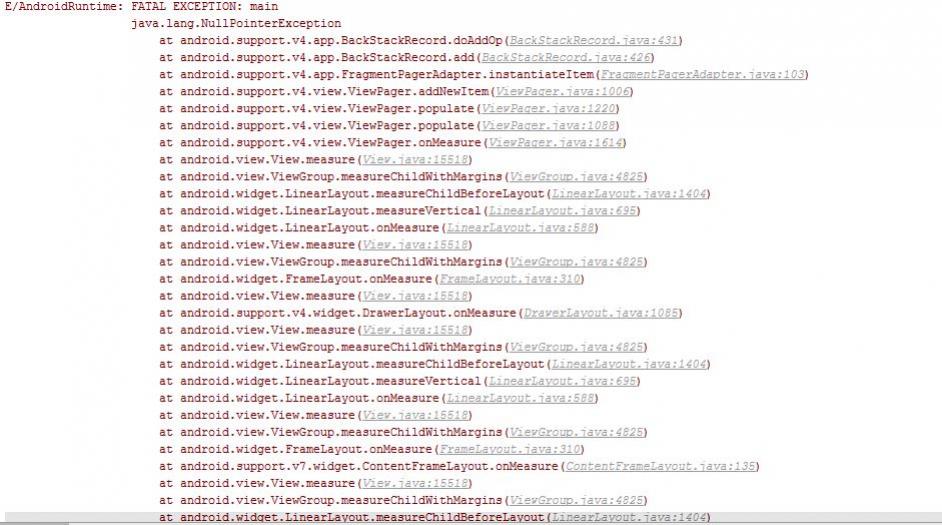
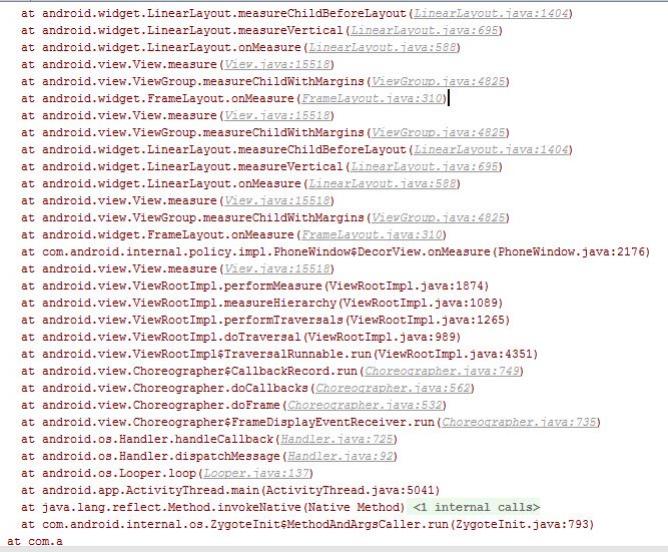
มันฟ้องยังงี้อ่ะครับ


ทำไงอ่ะครับ
|
 |
 |
 |
 |
| Date :
2017-03-30 22:54:56 |
By :
tot14883 |
|
 |
 |
 |
 |
|
|
 |
 |
|
 |
 |
|
|