iOS/iPhone Add Insert Data to Web Server (URL,Website, PHP and MySQL) |
iOS/iPhone Add Insert Data to Web Server (URL,Website) บทความการเขียน iOS ในการเชื่อมต่อกับ Web Server ผ่าน Class ของ NSURLConnection ในการที่จะส่ง POST ค่าจาก iOS ซึ่งทำหน้าที่เป็น Client ไปยัง Web Server โดยจะใช้ PHP กับ MySQL ทำหน้าที่รับและจัดเก็บ Insert ข้อมูลต่าง ๆ เหล่านั้นลงใน MySQL Database และหลังจากที่ PHP ทำงานเรียบร้อยแล้วก็จะส่งค่า Status การทำงาน โดยใช้ JSON เป็นตัวเข้ารหัสข้อมูลกลับมายัง iOS Client และเมื่อ iOS ได้ค่า JSON ทีเก็บ Status เหล่านั้นแล้วก็จะแสดงและแจ้งให้ผู้ใช้ทราบว่าข้อมูลที่ส่งไปนั้น สามารถบันทึกได้หรือไม่ ตัวอย่างนี้เหมาะจะเป้นตัวอย่าง App ที่เกี่ยวกับการรับข้อมูล เช่น ระบบลงทะเบียนสมาชิก หรือจะ Apply ใช้กับส่วนอื่น ๆ ของโปรแกรมก็ได้เช่นเดียวกัน
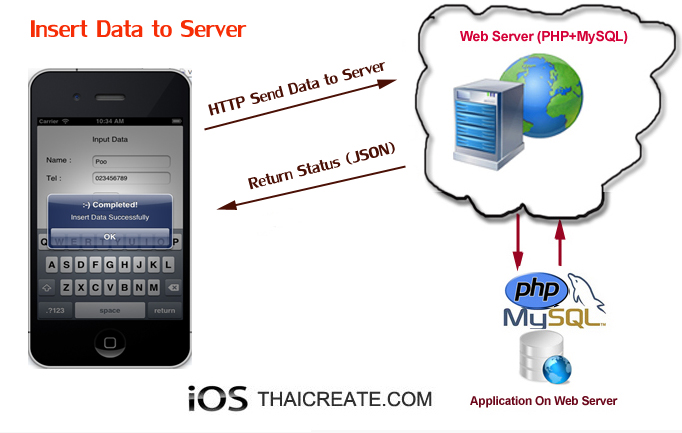 iOS/iPhone Add Insert Data to Web Server (URL,Website)
ในตัวอย่างนี้เมื่อมีการส่งค่าไปยัง Web Server ผ่าน URL Request และ Method POST จะมีการใช้ Progress แสดงสถานะการทำงาน โดยแทรกการทำงานต่าง ๆ จาก delegate method ของ NSURLConnection
Example ตัวอย่างการเขียน iOS เพื่อส่งข้อมูลไปจัดเก็บยัง Web Server (PHP and MySQL Database)
MySQL Database
CREATE TABLE `member` (
  `MemberID` int(11) NOT NULL auto_increment,
  `Name` varchar(50) NOT NULL,
  `Tel` varchar(50) NOT NULL,
  PRIMARY KEY  (`MemberID`)
) ENGINE=MyISAM  AUTO_INCREMENT=4 ;

--
-- Dumping data for table `member`
--

INSERT INTO `member` VALUES (1, 'Weerachai', '0819876107');
INSERT INTO `member` VALUES (2, 'Win', '021978032');
INSERT INTO `member` VALUES (3, 'Eak', '0876543210');
โครงสร้างของ MySQL Database สำหรับจัดเก็บข้อมูล

saveData.php
<?php
	/*** for Sample
		$_POST["sName"] = "a";
		$_POST["sTel"] = "b";
	*/

	$strName = $_POST["sName"];
	$strTel = $_POST["sTel"];

	$objConnect = mysql_connect("localhost","root","root");
	$objDB = mysql_select_db("mydatabase");

	/*** Insert ***/
	$strSQL = "INSERT INTO member (Name,Tel)
		VALUES (
			'".$strName."',
			'".$strTel."'
			)
		";

	$objQuery = mysql_query($strSQL);

	$arr = null;
	if(!$objQuery)
	{
		$arr["Status"] = "0";
		$arr["Message"] = "Insert Data Failed";
	}
	else
	{
		$arr["Status"] = "1";
		$arr["Message"] = "Insert Data Successfully";
	}

	echo json_encode($arr);
?>
ไฟล์ php ที่ทำหน้าที่รับค่า POST และบันทึกลงใน MySQL Database พร้อม ๆ กับการแจ้ง Status กลับไปให้ Client ได้ทราบ
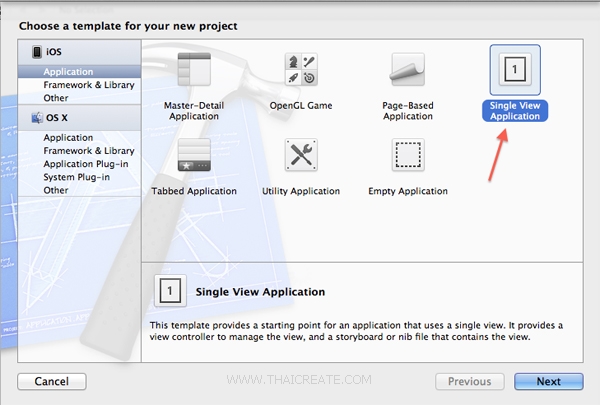
เริ่มต้นด้วยการสร้าง Application บน Xcode แบบ Single View Application
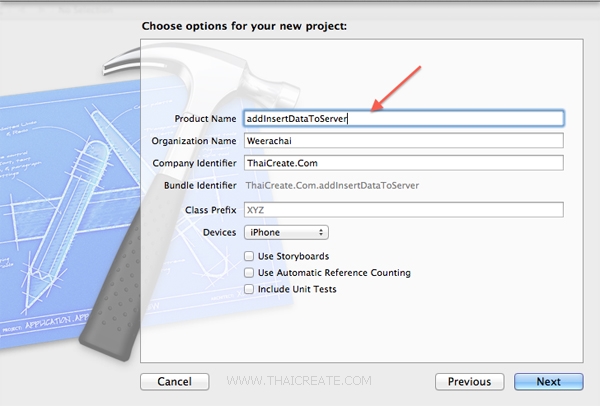
เลือกและไม่เลือกรายการดังรูป
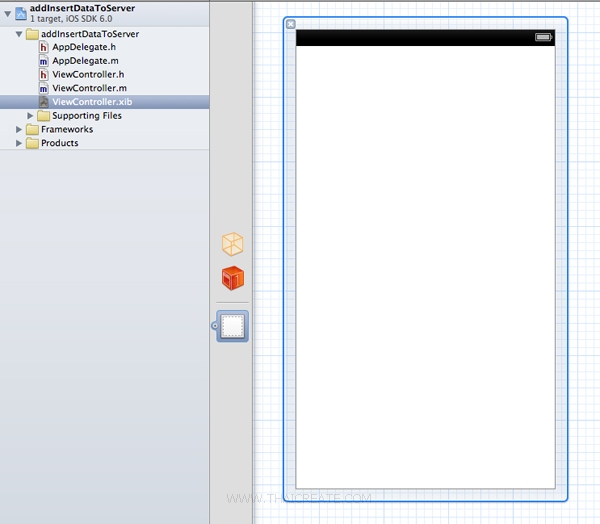
ตอนนี้หน้าจอ View ยังว่าง ๆ
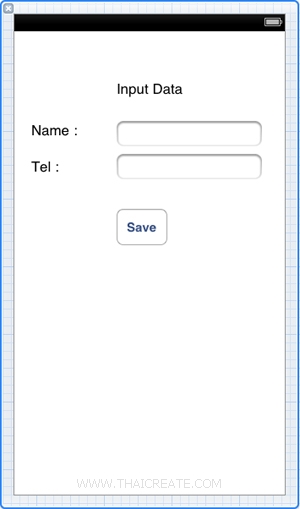
ให้ออกแบบหน้าจอ View ด้วย Label, Text Fields และ Button ดังรูป
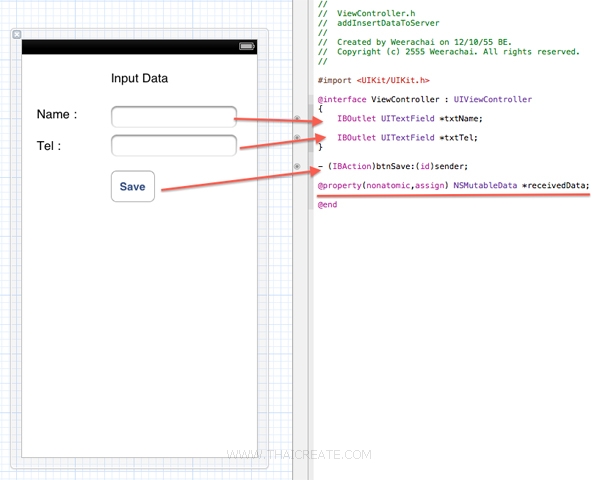
ใน Class ของ .h ให้ทำการเชื่อม IBOutlet และ IBAction ดังรูป จากนั้นเขียน Code ต่าง ๆ ทั้งหมดดังนี้
ViewController.h
//
//  ViewController.h
//  addInsertDataToServer
//
//  Created by Weerachai on 12/10/55 BE.
//  Copyright (c) 2555 Weerachai. All rights reserved.
//

#import <UIKit/UIKit.h>

@interface ViewController : UIViewController
{
    IBOutlet UITextField *txtName;

    IBOutlet UITextField *txtTel;
}

- (IBAction)btnSave:(id)sender;

@property(nonatomic,assign) NSMutableData *receivedData;

@end
ViewController.m
//
//  ViewController.m
//  addInsertDataToServer
//
//  Created by Weerachai on 12/10/55 BE.
//  Copyright (c) 2555 Weerachai. All rights reserved.
//

#import "ViewController.h"

@interface ViewController ()
{
    UIAlertView *loading;
}

@end

@implementation ViewController

@synthesize receivedData;

- (void)viewDidLoad
{
    [super viewDidLoad];
	// Do any additional setup after loading the view, typically from a nib.
}

- (IBAction)btnSave:(id)sender {

    //Name=Poo&Tel=023456789"
    NSMutableString *post = [NSString stringWithFormat:@"sName=%@&sTel=%@",[txtName text],[txtTel text]];

    NSData *postData = [post dataUsingEncoding:NSASCIIStringEncoding allowLossyConversion:YES];
    NSString *postLength = [NSString stringWithFormat:@"%d", [postData length]];

    NSURL *url = [NSURL URLWithString:@"https://www.thaicreate.com/url/saveData.php"];
    NSMutableURLRequest *request = [NSMutableURLRequest requestWithURL:url
                                        cachePolicy:NSURLRequestReloadIgnoringLocalCacheData
                                        timeoutInterval:10.0];
    [request setHTTPMethod:@"POST"];
    [request setValue:postLength forHTTPHeaderField:@"Content-Length"];
    [request setValue:@"application/x-www-form-urlencoded" forHTTPHeaderField:@"Content-Type"];
	[request setHTTPBody:postData];

    NSURLConnection *theConnection=[[NSURLConnection alloc] initWithRequest:request delegate:self];


    // Show Progress Loading...
    [UIApplication sharedApplication].networkActivityIndicatorVisible = YES;

    loading = [[UIAlertView alloc] initWithTitle:@"" message:@"Please Wait..." delegate:nil cancelButtonTitle:nil otherButtonTitles:nil];
    UIActivityIndicatorView *progress= [[UIActivityIndicatorView alloc] initWithFrame:CGRectMake(125, 50, 30, 30)];
    progress.activityIndicatorViewStyle = UIActivityIndicatorViewStyleWhiteLarge;
    [loading addSubview:progress];
    [progress startAnimating];
    [progress release];
    [loading show];

    if (theConnection) {
        self.receivedData = nil;
    } else {
		UIAlertView *connectFailMessage = [[UIAlertView alloc] initWithTitle:@"NSURLConnection " message:@"Failed in viewDidLoad"  delegate: self cancelButtonTitle:@"Ok" otherButtonTitles: nil];
		[connectFailMessage show];
		[connectFailMessage release];
    }

}

- (void)connection:(NSURLConnection *)connection didReceiveResponse:(NSURLResponse *)response
{
    receivedData = [[NSMutableData alloc] init];
}

- (void)connection:(NSURLConnection *)connection didReceiveData:(NSData *)data
{
    sleep(5);
    [receivedData appendData:data];
}

- (void)connection:(NSURLConnection *)connection didFailWithError:(NSError *)error
{

    [connection release];
    [receivedData release];

    // inform the user
    UIAlertView *didFailWithErrorMessage = [[UIAlertView alloc] initWithTitle: @"NSURLConnection " message: @"didFailWithError"  delegate: self cancelButtonTitle: @"Ok" otherButtonTitles: nil];
    [didFailWithErrorMessage show];
    [didFailWithErrorMessage release];

    //inform the user
    NSLog(@"Connection failed! Error - %@", [error localizedDescription]);

}

- (void)connectionDidFinishLoading:(NSURLConnection *)connection
{
    // Hide Progress
    [UIApplication sharedApplication].networkActivityIndicatorVisible = NO;
    [loading dismissWithClickedButtonIndex:0 animated:YES];

    // Return Status E.g : { "Status":"1", "Message":"Insert Data Successfully" }
    // 0 = Error
    // 1 = Completed

    if(receivedData)
    {
        //NSLog(@"%@",receivedData);

        //NSString *dataString = [[NSString alloc] initWithData:receivedData encoding:NSASCIIStringEncoding];
        //NSLog(@"%@",dataString);

        id jsonObjects = [NSJSONSerialization JSONObjectWithData:receivedData options:NSJSONReadingMutableContainers error:nil];

        // value in key name
        NSString *strStatus = [jsonObjects objectForKey:@"Status"];
        NSString *strMessage = [jsonObjects objectForKey:@"Message"];
        NSLog(@"Status = %@",strStatus);
        NSLog(@"Message = %@",strMessage);

        // Completed
        if( [strStatus isEqualToString:@"1"] ){
            UIAlertView *completed =[[UIAlertView alloc]
                                     initWithTitle:@": -) Completed!"
                                     message:strMessage delegate:self
                                     cancelButtonTitle:@"OK" otherButtonTitles: nil];
            [completed show];
        }
        else // Error
        {
            UIAlertView *error =[[UIAlertView alloc]
                                 initWithTitle:@": ( Error!"
                                 message:strMessage delegate:self
                                 cancelButtonTitle:@"OK" otherButtonTitles: nil];
            [error show];
        }

    }

    // release the connection, and the data object
    [connection release];
    [receivedData release];
}

- (void)didReceiveMemoryWarning
{
    [super didReceiveMemoryWarning];
    // Dispose of any resources that can be recreated.
}

- (void)dealloc {
    [txtName release];
    [txtTel release];
    [super dealloc];
}

@end
Screenshot
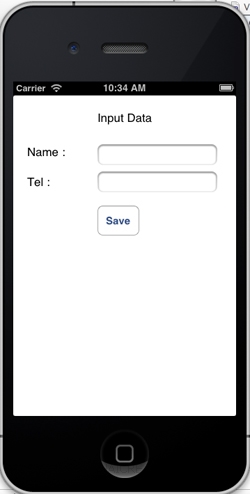
แสดงหน้าแรกของ App
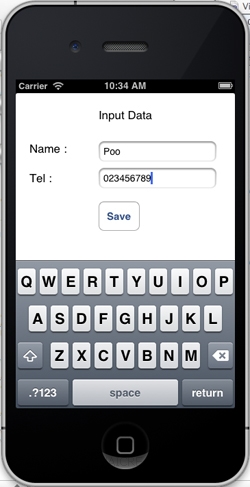
ทดสอบกรอกข้อมูล
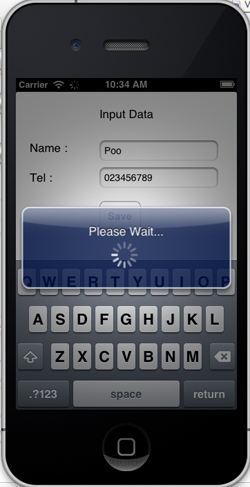
เมื่อคลิกที่ Save โปรแกรมจะทำการส่งข้อมูลไปยัง Web Server โดยจะแสดงสถานะ Progress ว่ากำลังทำงาน
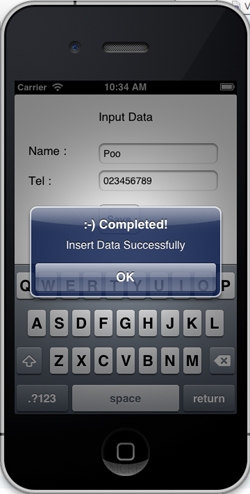
เมื่อ Insert เรียบร้อย
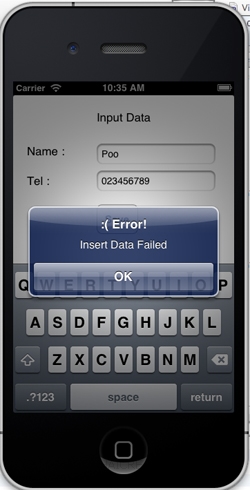
กรณีที่ Insert ไม่สมบูรณ์ หรือ Error ก็จะแจ้งให้ทราบ เช่นเดียวกัน
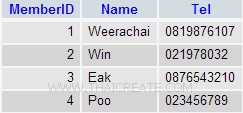
และเมื่อกลับไปดูที่ MySQL Database ที่อยู่บน Web Server ก็จะปรากฏ Record ที่ถูก Insert เข้ามา 1 รายการ
|
 ช่วยกันสนับสนุนรักษาเว็บไซต์ความรู้แห่งนี้ไว้ด้วยการสนับสนุน Source Code 2.0 ของทีมงานไทยครีเอท ช่วยกันสนับสนุนรักษาเว็บไซต์ความรู้แห่งนี้ไว้ด้วยการสนับสนุน Source Code 2.0 ของทีมงานไทยครีเอท
|
|
| |
By : |
ThaiCreate.Com Team (บทความเป็นลิขสิทธิ์ของเว็บไทยครีเอทห้ามนำเผยแพร่ ณ เว็บไซต์อื่น ๆ) |
| |
Score Rating : |
   |
|
| |
Create/Update Date : |
2012-12-13 12:27:17 /
2017-03-26 08:55:52 |
| |
Download : |

|
|
|
Sponsored Links / Related |
|
|
|
|
|
|

|