iOS/iPhone Portrait and Landscape Orientation (Objective-C, iPhone, iPad) |
iOS/iPhone Portrait and Landscape Orientation (Objective-C, iPhone, iPad) บทความนี้เราจะมารู้จักวิธีการเปลี่ยนมุมมองของเครื่อง iPhone หรือ iPad และการเรียกใช้งานมุมมองแบบ Portrait (แนวตั้ง) และ แนวนอน (Landscape) รวมทั้งการสร้าง View เพื่อให้สามารถแสดงผลตามมุมมองต่าง ๆ ที่ต้องการ
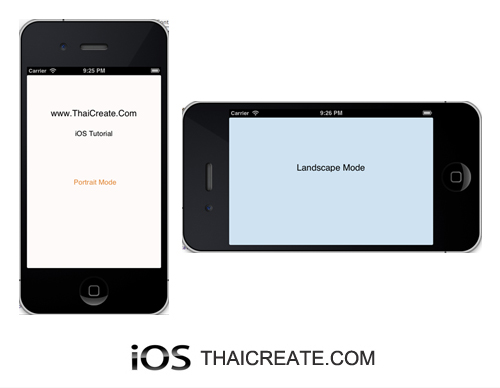 iOS/iPhone Portrait and Landscape Orientation
ในการเขียน App iOS สำหรับ iPhone และ iPad บน Xcode นั้น การกำหนดให้ App ว่าจะให้รองรับมุมมองต่าง ๆ ของหน้าจอ เช่น แนวตั้ง แนวนอน สามารถกำหนดได้ง่ายมาก ๆ และแทบจะไม่ต้องทำอะไรเลย เพียงแค่คลิก และก็คลิกเท่านั้น
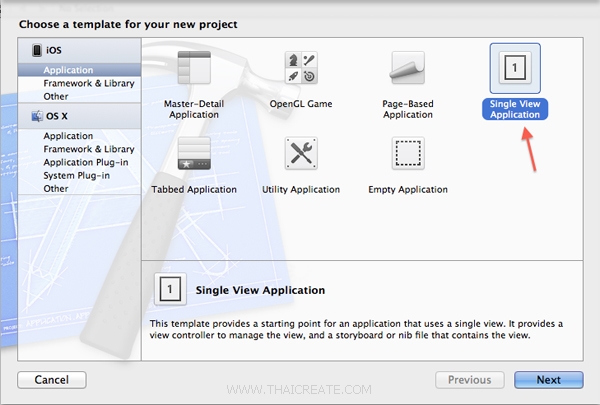
ทดสอบการสร้าง App แบบง่าย ๆ ด้วย Single View Application
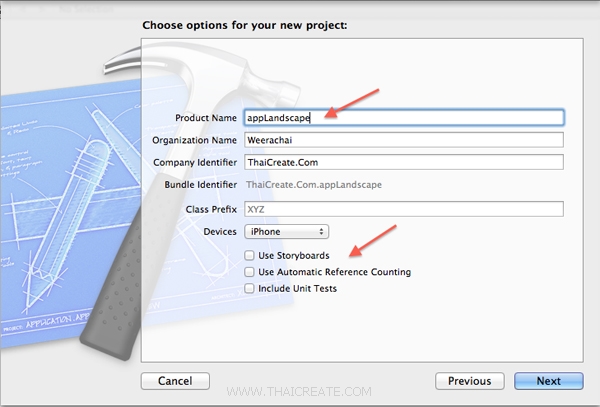
และข้อมูลและเลือกดังรูป
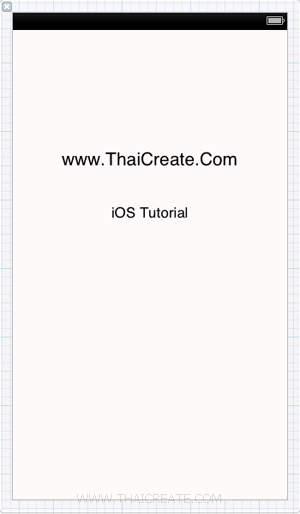
ทดสอบสร้าง Label แบบง่าย ๆ บนหน้าจอของ View
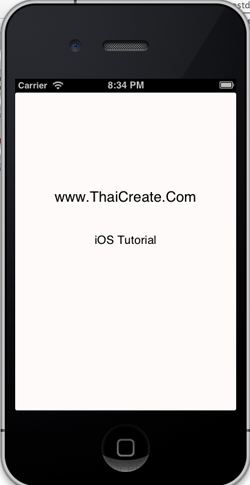
ทดสอบการรันบน iOS Simulator
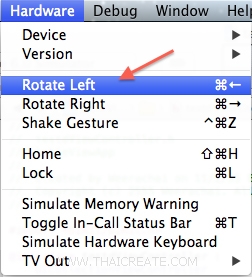
ในการหมุ่นเพื่อปรับให้ Simulator อยู่ในทิศทางต่าง ๆ ให้ไปที่ Hardware -> Retate ... เลือกเพื่อสลับไปยังตำแหน่งที่ต้องการ
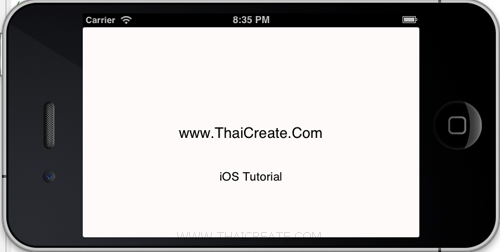
จะได้มุมมองในแนวนอน
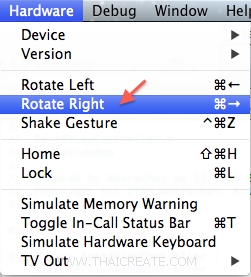
กลับไปมุมมองเดิม
การปรับแต่ง App ว่าจะให้ Support มุมมองไหนบ้าง
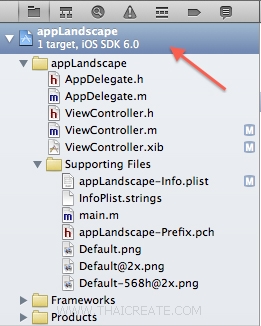
คลิกที่ Project และ Application หลัก
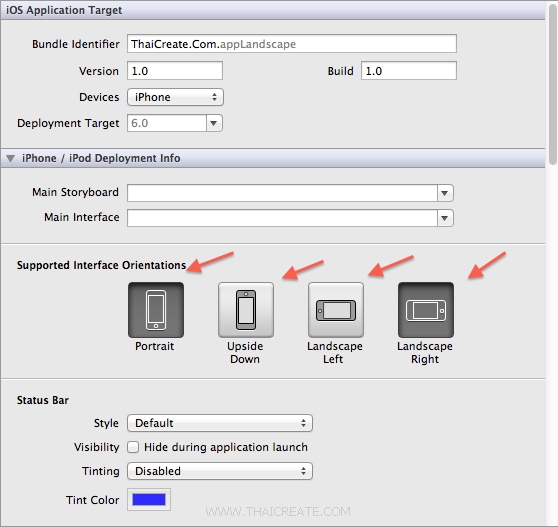
ตรง Supported Interface Orientation คลิกเลือกได้เลย ว่าจะให้ Support มุมมองไหนบ้าง
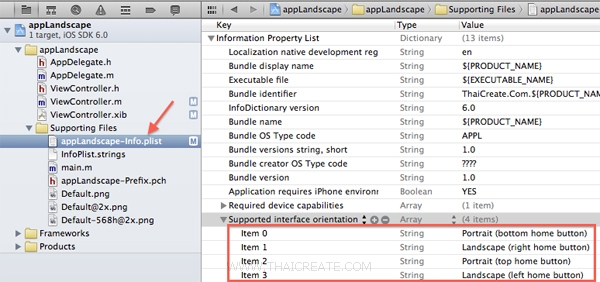
หรือจะปรับแต่งที่ info.plist
Ex 1 ตัวอย่างการสร้าง View ขึ้นมา 2 View และเลือกแสดงระหว่าง มุมมอง แนวตั้ง และ แนวนอน
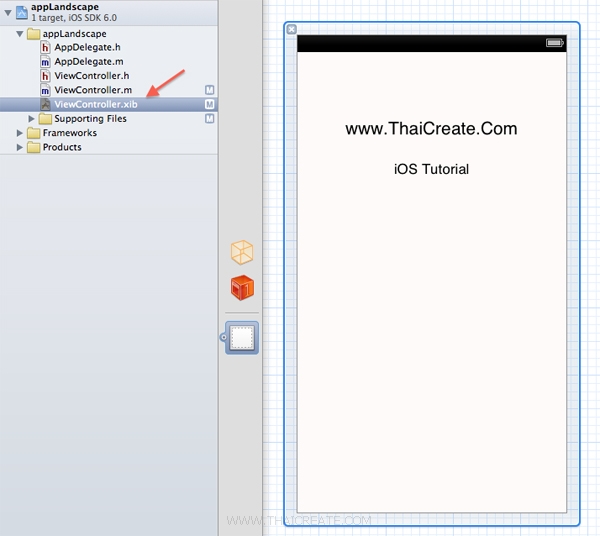
กลับมายัง View หลัก ให้ออกแบบหน้าจอดังรูป
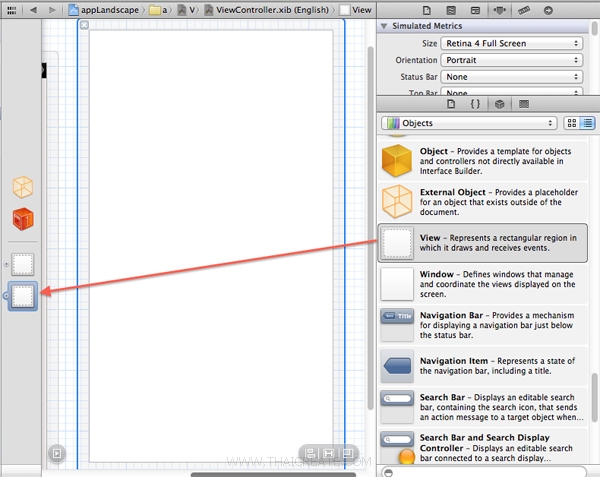
ทำการจาก Object ที่ชื่อว่า View มาใส่ดังรูป
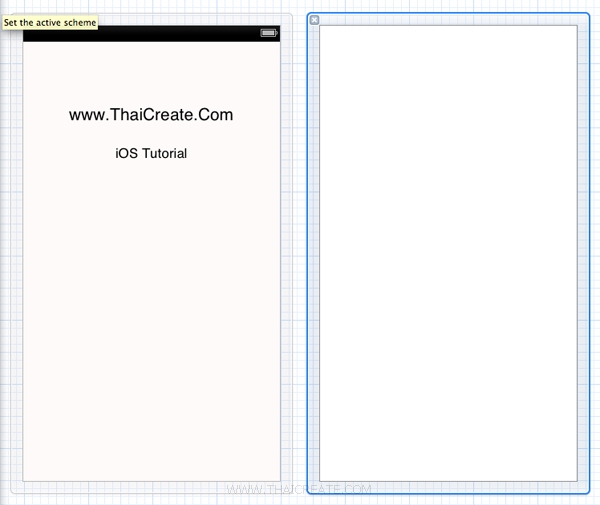
ซึ่งตอนนี้เราจะได้ View ขึ้นมา 2 ตัว เราจะเรียกว่า View 1 และ View 2
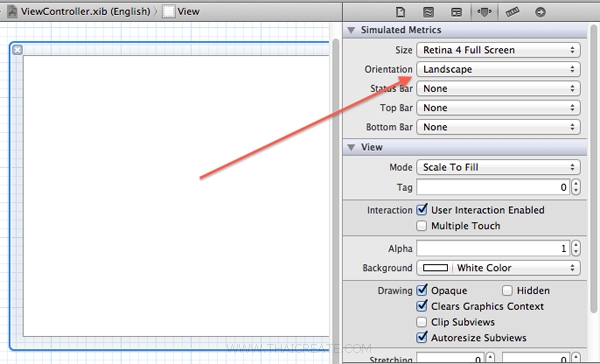
View 2 ให้เลือก Landscape เพื่อปรับเป็นแนวนอน
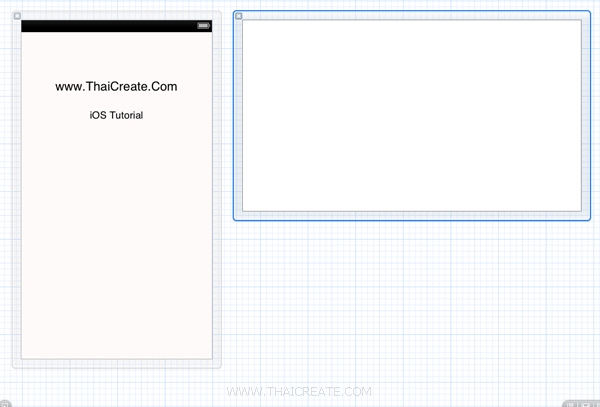
เราจะได้ View 1 (Portrait แนวตั้ง) และ View 2 (Landscape แนวนอน)
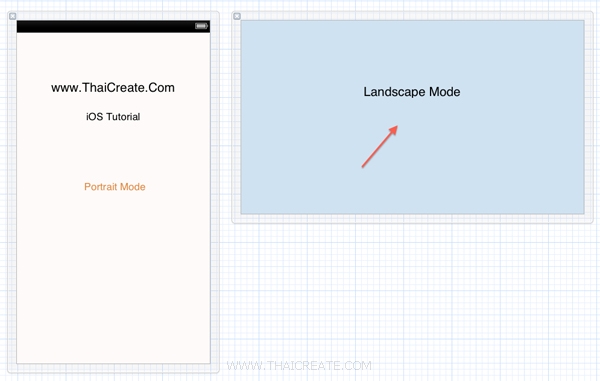
ทดสอบเปลี่ยน Background และใส่ Label ดังรูป
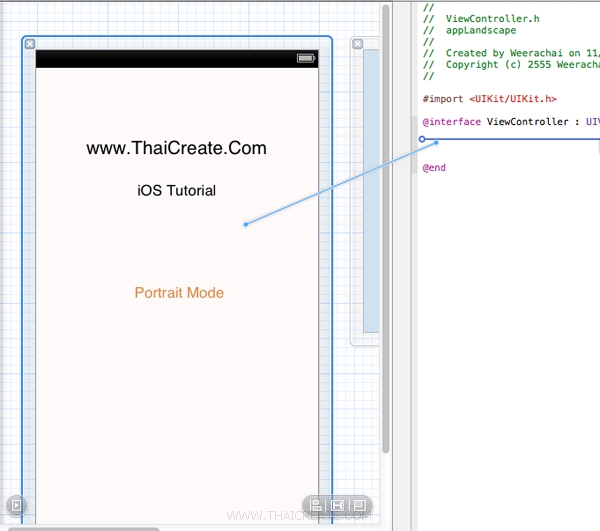
สร้าง IBOutlet สำหรับ View 1
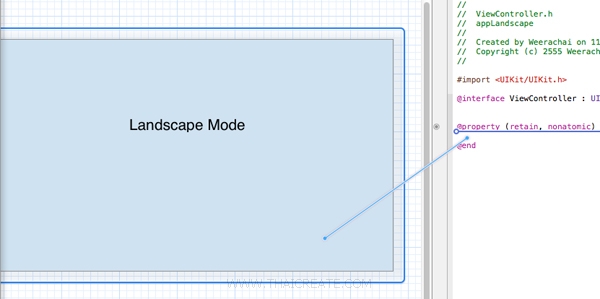
สร้าง IBOutlet สำหรับ View 2
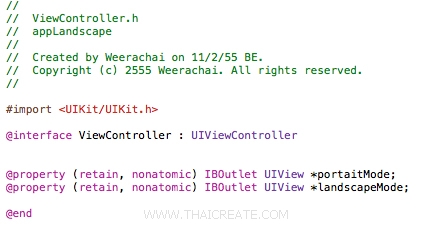
จะได้ สร้าง IBOutlet ทั้ง 2 View เรียบร้อย
ViewController.h
//
//  ViewController.h
//
//  Created by Weerachai on 11/2/55 BE.
//  Copyright (c) 2555 Weerachai. All rights reserved.
//

#import <UIKit/UIKit.h>

@interface ViewController : UIViewController


@property (retain, nonatomic) IBOutlet UIView *portaitMode;
@property (retain, nonatomic) IBOutlet UIView *landscapeMode;

@end
จากนั้นในไฟล์ .m ให้ใส่ Code ดังนี้
ViewController.m
//
//  ViewController.m
//
//  Created by Weerachai on 11/2/55 BE.
//  Copyright (c) 2555 Weerachai. All rights reserved.
//

#import "ViewController.h"
#define deg2rad (3.1415926/180.0)

@interface ViewController ()

@end

@implementation ViewController

@synthesize portaitMode;
@synthesize landscapeMode;

- (void)viewDidLoad
{
    [super viewDidLoad];
	// Do any additional setup after loading the view, typically from a nib.
}

- (void)didReceiveMemoryWarning
{
    [super didReceiveMemoryWarning];
    // Dispose of any resources that can be recreated.
}

- (void)dealloc {
    [portaitMode release];
    [landscapeMode release];
    [self setPortaitView:nil];
    [self setLandscapeView:nil];
    [super dealloc];
}

- (BOOL)shouldAutorotateToInterfaceOrientation:(UIInterfaceOrientation)interfaceOrientation
{
    // Allowed supported orientations
    return (interfaceOrientation == UIInterfaceOrientationPortraitUpsideDown ||
            interfaceOrientation == UIInterfaceOrientationPortrait ||
            interfaceOrientation == UIInterfaceOrientationLandscapeLeft ||
            interfaceOrientation == UIInterfaceOrientationLandscapeRight);
}

- (void) willRotateToInterfaceOrientation:(UIInterfaceOrientation)toInterfaceOrientation duration:(NSTimeInterval)duration
{
    [super willRotateToInterfaceOrientation:toInterfaceOrientation duration:duration];

    if (toInterfaceOrientation == UIInterfaceOrientationLandscapeRight)
    {
        self.view=landscapeMode;
        self.view.transform=CGAffineTransformMakeRotation(deg2rad* (90));
        self.view.bounds=CGRectMake(0.0,0.0,480.0,320.0);
    } else if (toInterfaceOrientation == UIInterfaceOrientationLandscapeLeft)
    {
        self.view=landscapeMode;
        self.view.transform=CGAffineTransformMakeRotation(deg2rad* (-90));
        self.view.bounds=CGRectMake(0.0,0.0,480.0,320.0);
    } else if (toInterfaceOrientation == UIInterfaceOrientationPortrait)
    {
        self.view=portaitMode;
        self.view.transform=CGAffineTransformMakeRotation(deg2rad* (0));
        self.view.bounds=CGRectMake(0.0,0.0,320.0,480.0);
    } else
    {
        self.view=portaitMode;
        self.view.transform=CGAffineTransformMakeRotation(deg2rad* (180));
        self.view.bounds=CGRectMake(0.0,0.0,320.0,480.0);
    }

}
@end
สำหรับ Code อาจจะนั่งไล่ดู แต่สามาถเข้าใจได้โดยไม่ยาก
Screenshot
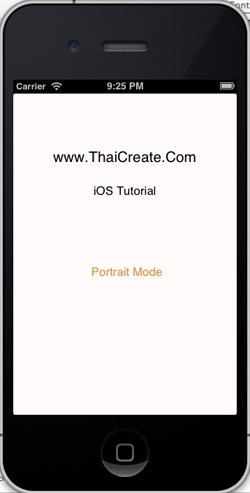
เมื่ออยู่ในแนวตั้ง (Portrait) ก็จะเลือก View 1
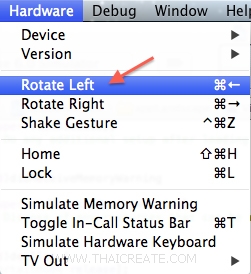
เลือกเปลี่ยนมุมมองให้อยู่ในแนวนอน
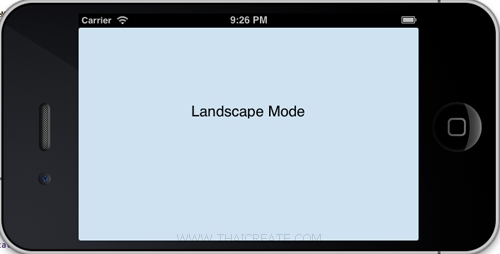
เมื่ออยู่ในแนวนอน (Landscape) ก็จะเลือก View 2
|
 ช่วยกันสนับสนุนรักษาเว็บไซต์ความรู้แห่งนี้ไว้ด้วยการสนับสนุน Source Code 2.0 ของทีมงานไทยครีเอท ช่วยกันสนับสนุนรักษาเว็บไซต์ความรู้แห่งนี้ไว้ด้วยการสนับสนุน Source Code 2.0 ของทีมงานไทยครีเอท
|
|
| |
By : |
ThaiCreate.Com Team (บทความเป็นลิขสิทธิ์ของเว็บไทยครีเอทห้ามนำเผยแพร่ ณ เว็บไซต์อื่น ๆ) |
| |
Score Rating : |
   |
|
| |
Create/Update Date : |
2012-11-07 10:35:56 /
2017-03-26 09:49:20 |
| |
Download : |

|
|
|
Sponsored Links / Related |
|
|
|
|
|
|

|