การใช้งาน Debugging พื้นฐาน ในการเขียน Windows Phone บน Visual Studio |
การใช้งาน Debugging พื้นฐาน ในการเขียน Windows Phone บน Visual Studio ในการเขียน App บน Windows Phone บน Visual Studio 2010 ความสามารถในการรันและ Debug โปรแกรมจะเหมือนกับการเขียน Application อื่น ๆ บน Visual Studio โดยมี Key หลัก ๆ ดังนี้
F5 - Run โปรแกรม หรือปล่อยให้โปรแกรมทำงานจนสิ้นสุด
F11 - Debug โปรแกรมแบบล่ะเอียดโดยจะทำการ วิ่งไปที่ล่ะ Step ทั้งหมด Step ย่อย หรือ Function
F12 - Debug โปรแกรมโดยไม่เข้าไปใน Sub หรือ Class,Function ย่อย
ทดสอบการสร้าง Application และการ Debug เพื่อตรวจสอบค่าตัวแปร
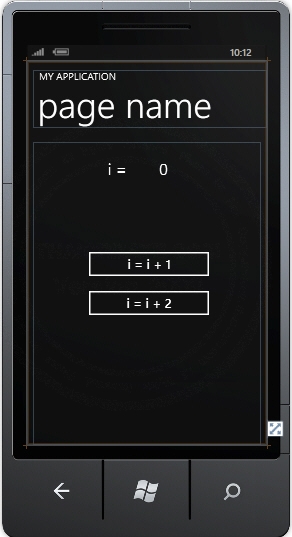
ทดสอบ Application ด้วยการสั่งปุ่ม Button ขึ้นมา 2 ตัว และ TextBlock เพื่อแสดงค่าตัวแปร ตาม Code นี้
MainPage.xaml
    <!--LayoutRoot is the root grid where all page content is placed-->
    <Grid x:Name="LayoutRoot" Background="Transparent">
        <Grid.RowDefinitions>
            <RowDefinition Height="Auto"/>
            <RowDefinition Height="*"/>
        </Grid.RowDefinitions>

        <!--TitlePanel contains the name of the application and page title-->
        <StackPanel x:Name="TitlePanel" Grid.Row="0" Margin="12,17,0,28">
            <TextBlock x:Name="ApplicationTitle" Text="MY APPLICATION" Style="{StaticResource PhoneTextNormalStyle}"/>
            <TextBlock x:Name="PageTitle" Text="page name" Margin="9,-7,0,0" Style="{StaticResource PhoneTextTitle1Style}"/>
        </StackPanel>

        <!--ContentPanel - place additional content here-->
        <Grid x:Name="ContentPanel" Grid.Row="1" Margin="12,0,12,0">
            <TextBlock Height="62" HorizontalAlignment="Left" Margin="132,33,0,0" Name="lblTitle" Text="i = " VerticalAlignment="Top" TextAlignment="Center" FontSize="32" Width="82" />
            <TextBlock FontSize="32" Height="62" HorizontalAlignment="Left" Margin="220,33,0,0" Name="lbli" Text="0" TextAlignment="Center" VerticalAlignment="Top" Width="82" />
            <Button Content="i = i + 1" Height="72" HorizontalAlignment="Left" Margin="100,209,0,0" Name="btn1" VerticalAlignment="Top" Width="264" />
            <Button Content="i = i + 2" Height="72" HorizontalAlignment="Left" Margin="100,287,0,0" Name="btn2" VerticalAlignment="Top" Width="264" />
        </Grid>
    </Grid>
MainPage.xaml.vb (VB.NET)
Partial Public Class MainPage
    Inherits PhoneApplicationPage

    ' Constructor
    Public Sub New()
        InitializeComponent()
    End Sub

    Public i As Integer = 0

    ' i = i + 1
    Private Sub btn1_Click(sender As System.Object, e As System.Windows.RoutedEventArgs) Handles btn1.Click
        i = i + 1
        Me.lbli.Text = i
    End Sub

    ' i = i + 2
    Private Sub btn2_Click(sender As System.Object, e As System.Windows.RoutedEventArgs) Handles btn2.Click
        i = i + 2
        Me.lbli.Text = i
    End Sub

End Class
MainPage.xaml.cs (C#)
using System;
using System.Collections;
using System.Collections.Generic;
using System.Data;
using System.Diagnostics;
public class MainPage : PhoneApplicationPage {

    //  Constructor
    public MainPage() {
        InitializeComponent();
    }

    public int i = 0;

    //  i = i + 1
    private void btn1_Click(object sender, System.Windows.RoutedEventArgs e) {
        i = (i + 1);
        this.lbli.Text = i;
    }

    //  i = i + 2
    private void btn2_Click(object sender, System.Windows.RoutedEventArgs e) {
        i = (i + 2);
        this.lbli.Text = i;
    }
}
Code ที่เป็นภาษา VB.NET และ C#
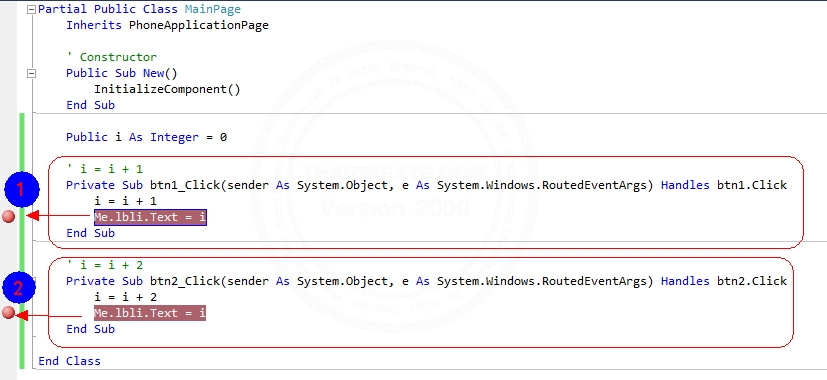
โดยคลิกเพื่อสร้าง Brakepoint จำนวน 2 จุดดังภาพ

จากนั้นให้คลิกที่ Start Debugging หรือ F5
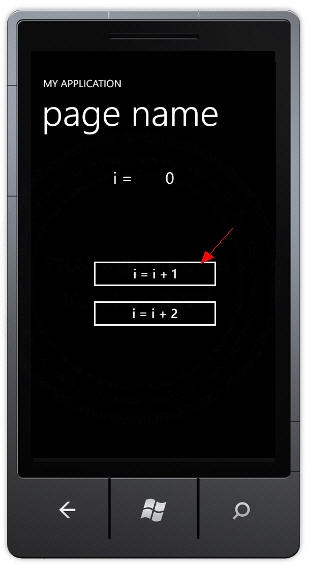
บน Emulator ให้คลิกที่ Button แรก

จากนั้น Brakepoint จะวิ่งมาหยุดในตำแหน่งแรก กรณีที่ต้องการดูค่าตัวแปรที่เป็น String / Integer สามารถเอาเมาส์ไปชี้ที่ตัวแปรได้ทันที
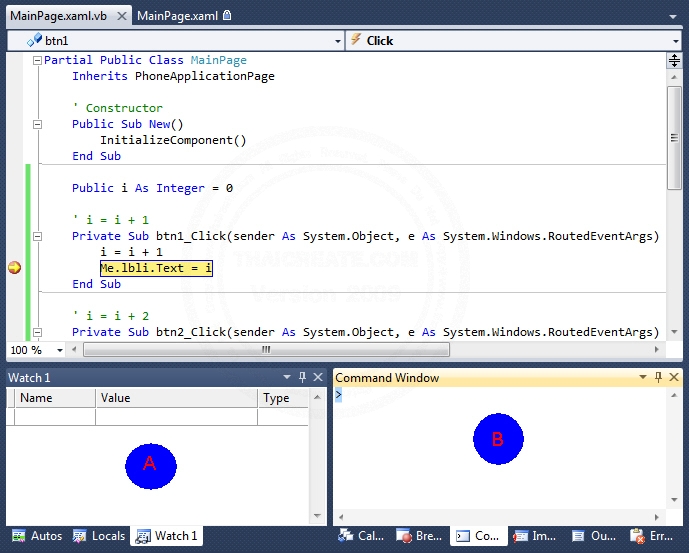
หรือจะดูได้จาก Watch (A)หรือ Command Window (B)
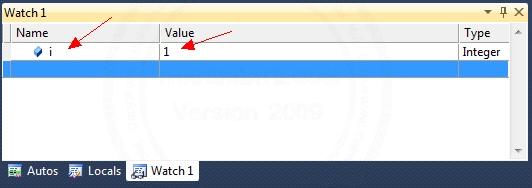
ในส่วนของ Watch (A) สามารถพิมพ์ชื่อตัวแปร และค่าตัวแปรจะแสดงทางด้านขวา
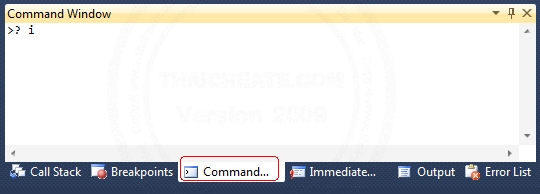
ในส่วนของ Command Window (B) สามารถพิมพ์คำสั่งต่าง ๆ เพื่อตรวจสอบค่าตัวแปร
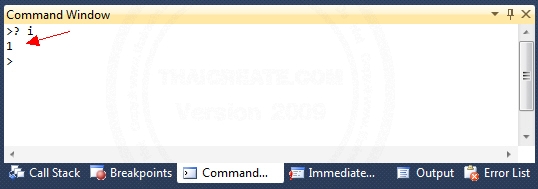
เช่น ? i หมายถึง การถามว่าค่าตัวแปร i มีค่าเป็นอะไร
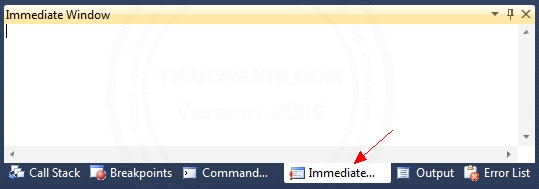
กรณีที่ต้องการใช้มุมมองของ Immediated Windows
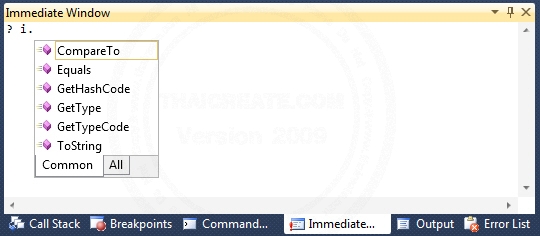
มีกรายการของ Property ของตัวแปรที่สามารถเรียกดูค่าต่าง ๆ ได้
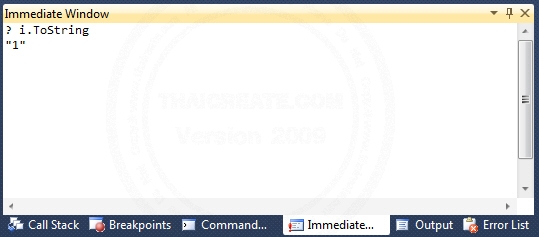
แสดงค่าบนมุมมองของ Immediated Windows
เมื่อกต้องการไปยัง Step ต่อไปสามรถกดปุ่ม F5 หรือเลือกจากเมนู
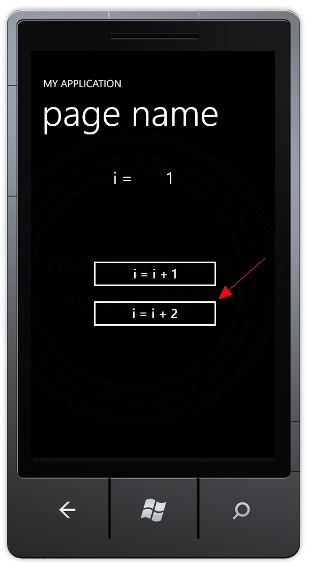
หลังจากสิ้นสุด Step แรกหน้าจอก็จะเข้าสู่โหมดรอการใช้งานในส่วนอื่น ๆ ลองคลิกที่ Button ที่สอง

ตัว Brakepoint จะมาหยุดในตำแหน่งที่สอง
.
|