Margin Property และการจัดวาง Layout ในหน้า Silverlight Page, Windows Phone |
Margin Property และการจัดวาง Layout ในหน้า Silverlight Page, Windows Phone ในการจัดวาง Layout บน Grid ของ Windows Phone (Silverlight) นั้น ในการวางตำแหน่งต่าง ๆ จะใช้ Margin ในการระบุตำแหน่งพิกัดที่อยู่ในหน้าจอของ Windows Phone โดยรูปแบบการใช้งานง่าย ๆ ดูภาพประกอบ
โดย Margin อ้างอิงจากภายใต้ Parent ของ Control นั้น ๆ
Margin Attribute
<frameworkElement Margin="left+right,top+bottom"/>
จาก Attribute ของ Margin จะเห็นว่าค่าตัวเลขจะเป็น Margin="ซ้าย,ขวา,บน,ล่าง"
ทดสอบการสร้าง Project บน Windows Phone

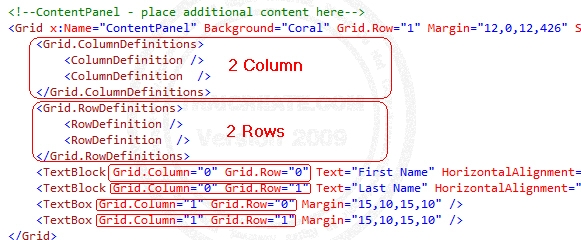
ออกแบบ XAML ดังภาพ
    <!--LayoutRoot is the root grid where all page content is placed-->
    <Grid x:Name="LayoutRoot" Background="Transparent">
        <Grid.RowDefinitions>
            <RowDefinition Height="Auto"/>
            <RowDefinition Height="*"/>
        </Grid.RowDefinitions>

        <!--TitlePanel contains the name of the application and page title-->
        <StackPanel x:Name="TitlePanel" Grid.Row="0" Margin="12,17,0,28">
            <TextBlock x:Name="ApplicationTitle" Text="MY APPLICATION" Style="{StaticResource PhoneTextNormalStyle}"/>
            <TextBlock x:Name="PageTitle" Text="page name" Margin="9,-7,0,0" Style="{StaticResource PhoneTextTitle1Style}"/>
        </StackPanel>

        <!--ContentPanel - place additional content here-->
        <Grid x:Name="ContentPanel" Background="Coral" Grid.Row="1" Margin="12,0,12,426" ShowGridLines="True">
            <Grid.ColumnDefinitions>
                <ColumnDefinition />
                <ColumnDefinition  />
            </Grid.ColumnDefinitions>
            <Grid.RowDefinitions>
                <RowDefinition />
                <RowDefinition  />
            </Grid.RowDefinitions>
            <TextBlock Grid.Column="0" Grid.Row="0" Text="First Name" HorizontalAlignment="Center" VerticalAlignment="Center" />
            <TextBlock Grid.Column="0" Grid.Row="1" Text="Last Name" HorizontalAlignment="Center" VerticalAlignment="Center" />
            <TextBox Grid.Column="1" Grid.Row="0" Margin="15,10,15,10" />
            <TextBox Grid.Column="1" Grid.Row="1" Margin="15,10,15,10" />
        </Grid>

    </Grid>
Code บน XML

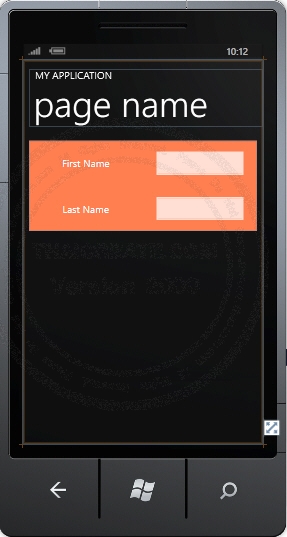
จาก Code และภาพประกอบ จะเป็นตัวอย่างการจัดส่ง Grid และ Layout รวมทั้งการกำหนด Margin
Screenshot

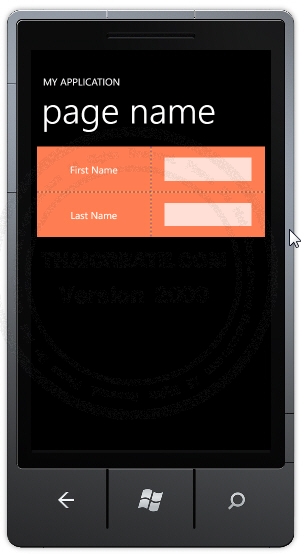
แสดงผลบน Emulator

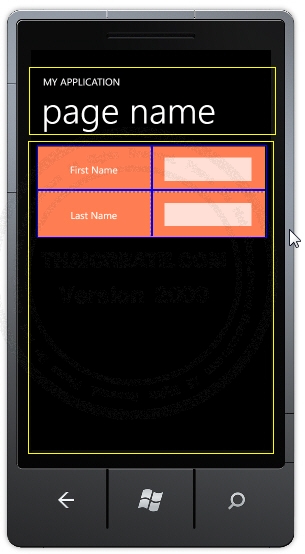
จากตัวอย่างถ้ามองในมุมมองของ Grid จะเห็นว่าจะถูกแบ่งเป็น Rows และ Column ดังภาพ
เพิ่มเติม
ในกรณีที่ต้องการกำหนด Margin ในส่วนของ Code ที่เป็น VB.NET และ C# สามารถใช้เป็น New Thickness(44, 63, 0, 0) เช่น
VB.NET
Dim button As New Button
button.Name = "btn1"
button.Content = "Submit"
button.Height = "72"
button.Width = "160"
button.Margin = New Thickness(44, 63, 0, 0)
AddHandler button.Click, AddressOf Me.buttonClick
ContentPanel.Children.Add(button)
C#
Button button = new Button();
button.Name = "btn1";
button.Content = "Submit";
button.Height = "72";
button.Width = "160";
button.Margin = new Thickness(44, 63, 0, 0);
button.Click += new System.EventHandler(this.buttonClick);
ContentPanel.Children.Add(button);
|