รู้จักกับ Custom User Control และการสร้าง UserControl บน Windows Phone |
รู้จักกับ Custom User Control และการสร้าง UserControl บน Windows Phone ในกรณีที่เราได้เรียกใช้ Controls หรือกลุ่มของ Controls ในหลาย ๆ ส่วนของ Application หรือหลาย ๆ Page แทนที่เราจะสร้างขึ้นมาในแต่ล่ะ Page เราสามารถใช้การสร้างกลุ่มของ Controls เหล่านั้นไว้ใน Page ของ User Controls และใช้การเรียกงาน User Control ใน Page ต่าง ๆ ซึ่งวิธีนี้จะสะดวกในการเขียนและการแก้ไขหน้าจอ Layout ต่าง ๆ ของ Application ไม่ให้เกิดความซ้ำซ้อนในการเขียนโปรแกรมได้
Example การสร้าง UserControl และการเรียกใช้งาน UserControl แบบง่าย ๆ
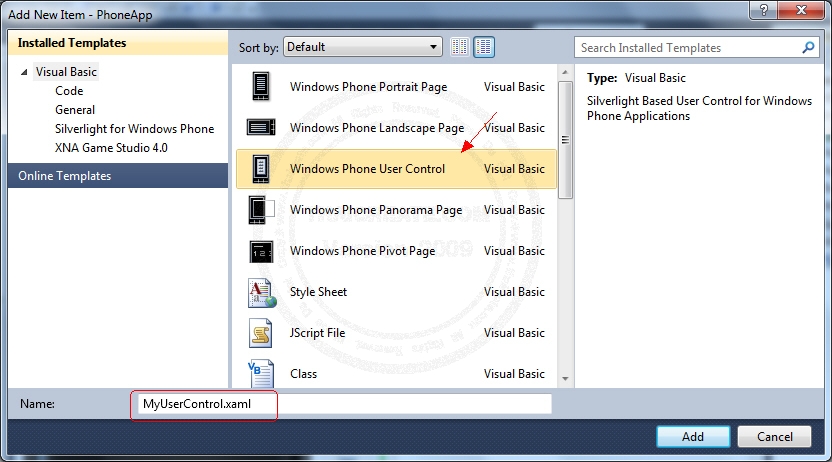
เพิ่ม Item เข้ามาใหม่โดยการคลิกขวาที่ Project -> Add -> New Items เลือกเป็น Windows Phone User Control
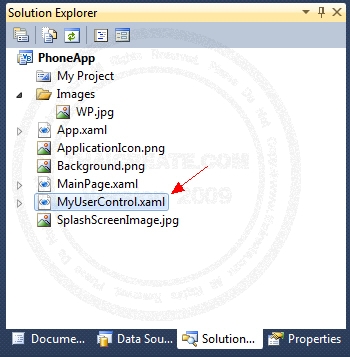
ไฟล์ถูก Add เข้ามาใน Project
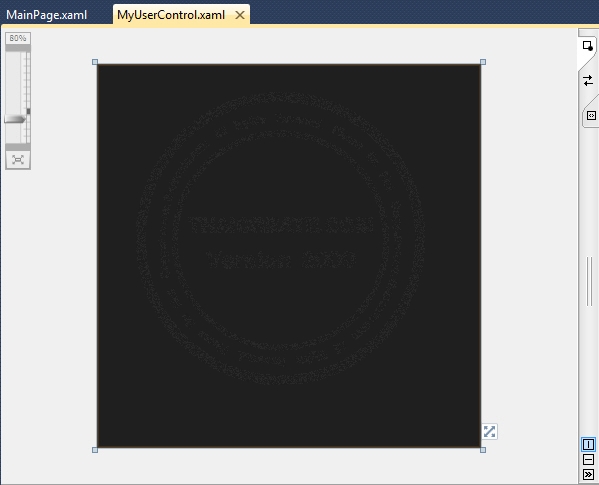
เมื่อดูมุมมอง Design จะเห็นหน้าจอว่างเปล่า
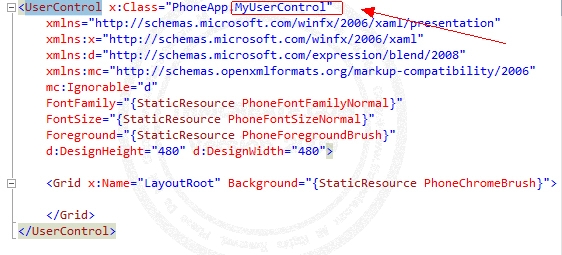
มุมมองของ XAML จะเห็นว่ามีชื่อ User Control ที่เราได้สร้างขึ้นมา
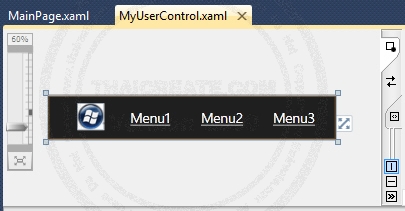
ออกแบบ User Control ดังภาพ
MyUserControl.xaml
    <Grid x:Name="LayoutRoot" Background="{StaticResource PhoneChromeBrush}" Height="72">
        <Grid.ColumnDefinitions>
            <ColumnDefinition Width="*"/>
            <ColumnDefinition Width="*"/>
            <ColumnDefinition Width="*"/>
            <ColumnDefinition Width="*"/>
        </Grid.ColumnDefinitions>
        <Image Height="45" Width="45" HorizontalAlignment="Left" Margin="49,12,0,0" Name="Image1" Stretch="Fill" VerticalAlignment="Top" Source="Images/WP.jpg" />
        <HyperlinkButton Content="Menu1" Grid.Column="1" Height="30" HorizontalAlignment="Left" Name="Link1" VerticalAlignment="center" Width="100" Click="Link1_Click" />
        <HyperlinkButton Content="Menu2" Grid.Column="2" Height="30" HorizontalAlignment="Left" Name="Link2" VerticalAlignment="center" Width="100" Click="Link2_Click" />
        <HyperlinkButton Content="Menu3" Grid.Column="3" Height="30" HorizontalAlignment="Left" Name="Link3" VerticalAlignment="center" Width="100" Click="Link3_Click" />
    </Grid>
XAML ที่ใช้สำหรับสร้าง Layout
VB.NET
    Private Sub Link1_Click(sender As System.Object, e As System.Windows.RoutedEventArgs)
        MessageBox.Show("Your Click Menu 1")
    End Sub

    Private Sub Link2_Click(sender As System.Object, e As System.Windows.RoutedEventArgs)
        MessageBox.Show("Your Click Menu 2")
    End Sub

    Private Sub Link3_Click(sender As System.Object, e As System.Windows.RoutedEventArgs)
        MessageBox.Show("Your Click Menu 3")
    End Sub
C#
private void Link1_Click(System.Object sender, System.Windows.RoutedEventArgs e)
{
	MessageBox.Show("Your Click Menu 1");
}

private void Link2_Click(System.Object sender, System.Windows.RoutedEventArgs e)
{
	MessageBox.Show("Your Click Menu 2");
}

private void Link3_Click(System.Object sender, System.Windows.RoutedEventArgs e)
{
	MessageBox.Show("Your Click Menu 3");
}
สร้าง Event ในภาษา VB.NET และ C#
การเรียกใช้ Windows Phone User Control
กลับมายัง Application Page ที่จะเรียกใช้ User Control ที่ได้สร้างขึ้น
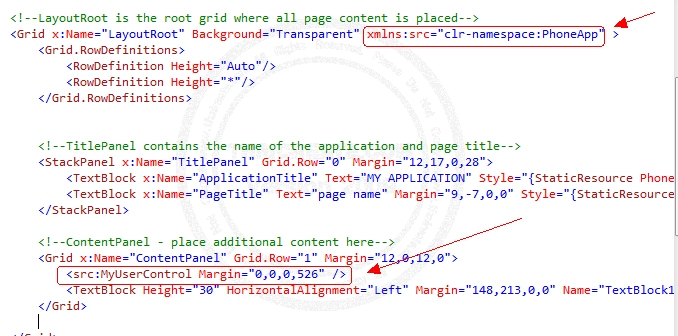
ในกรณีที่เรียกใช้ภายใต้ Grid ให้กำหนดค่าดังภาพ
    <!--LayoutRoot is the root grid where all page content is placed-->
    <Grid x:Name="LayoutRoot" Background="Transparent" xmlns:src="clr-namespace:PhoneApp" >
        <Grid.RowDefinitions>
            <RowDefinition Height="Auto"/>
            <RowDefinition Height="*"/>
        </Grid.RowDefinitions>


        <!--TitlePanel contains the name of the application and page title-->
        <StackPanel x:Name="TitlePanel" Grid.Row="0" Margin="12,17,0,28">
            <TextBlock x:Name="ApplicationTitle" Text="MY APPLICATION" Style="{StaticResource PhoneTextNormalStyle}"/>
            <TextBlock x:Name="PageTitle" Text="page name" Margin="9,-7,0,0" Style="{StaticResource PhoneTextTitle1Style}"/>
        </StackPanel>

        <!--ContentPanel - place additional content here-->
        <Grid x:Name="ContentPanel" Grid.Row="1" Margin="12,0,12,0">
            <src:MyUserControl Margin="0,0,0,526" />
            <TextBlock Height="30" HorizontalAlignment="Left" Margin="148,213,0,0" Name="TextBlock1" Text="Main Page" VerticalAlignment="Top" Width="167" TextAlignment="Center" />
        </Grid>

    </Grid>
xmlns:src="clr-namespace:PhoneApp" เป็นการเรียก NameSpace ของ Application
src:MyUserControl อ้างถึง User Control
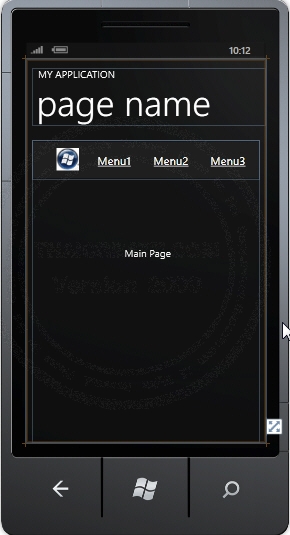
หน้าจอ Page ที่ได้ ซึ่งจะเห็นว่าจะแสดง Layout ที่มาจาก User Control ที่ได้สร้างขึ้น
Screenshot
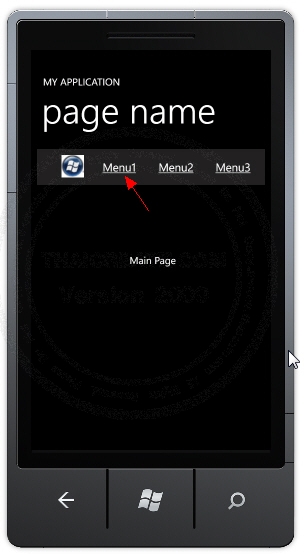
ทดสอบเรียกผ่าน Emulator แสดงผลลัพธ์ของ User Control ดังภาพ
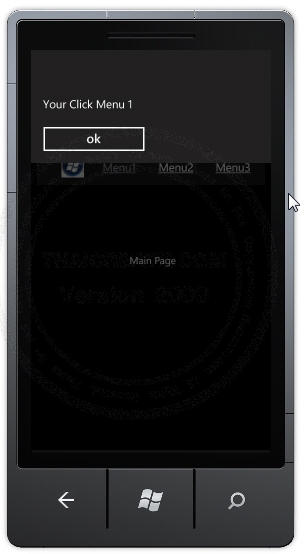
เมื่อคลิกที่ Item ของ User Control จะแสดง Event ต่าง ๆ ที่ได้กำหนดขึ้นในขั้นตอนการสร้าง User Control
สรุป
User Control จะเหมาะสำหรับ Application ที่ต้องการเรียกใช้งาน Control ชุดนั้นบ่อย ๆ เช่นในตัวอย่างจะสร้างเป็น Menu และ Menu นี้จะเสามารถเรียกใช้งานได้จากหลาย ๆ Page ของ Application
|