การติดตั้ง Linux Server แบบติดตั้งเอง เพื่อให้บริการเว็บไซต์ และ Web Server |
การติดตั้ง Linux Server แบบติดตั้งเอง เพื่อให้บริการเว็บไซต์ และ Web Server ปกติแล้วเว็บไซต์ทั่ว ๆ ไป มักจะใช้ Web Hosting ที่เป็น Shared Hosting ทั่ว ๆ ไป และ Web Hosting เหล่านี้ก็มักจะติดตั้งพวก Control Panel มาเรียบร้อยแล้ว อาทิเช่น Direct Admin หรือ Cpanel แต่ในกรณีที่เรามีเครื่อง Server เป็นของตัวเอง หรืออาจจะเป็นพวก VPS , VM และต้องการติดตั้งให้เครื่องเหล่านั้นเป็น Web Server โดยใช้ OS ของ Linux ก็สามารถทำได้ไม่ยากเช่นเดียวกัน โดยหลัก ๆ แล้วก็เพีงแค่ติดตั้ง Linux+Apache+PHP+MySQL หรือทีคนทั่ว ๆ ไปเรียกกันว่า LAMP
 Linux Logo
สำหรับ Linux ที่จะนำมาทำเป็น Web Server ในการรันเว็บไซต์ทั่ว ๆ ไป เราสามารถใช้ได้หลายตระกูล เช่น CentOS , Debian , Ubuntu , Scientific , Redhat , Fedora และอื่น ๆ แต่ที่ได้รับความนิยมมากที่สุดของตระกูล Linux ที่น่าสนใจก็คือ CentOS และสำหรับ CentOS ก็มีการพัฒนาอย่างต่อเนื่อง และมี Package Source ของโปรแกรมต่าง ๆ ที่จะนำมาติดตั้งเป็น Web Server ให้เลือกติดตั้งมากมาย เช่น Web Server(Apache), FTP Server(ProFTPd/VSFTPd), Mail Server(Sendmail/Postfix/Dovecot), Database Server(MySQL/PostgreSQL), File and Printer Server(Samba), Proxy Server(Squid), DNS Server(BIND), DHCP Server(DHCPd), Antivirus Server(ClamAV), Streaming Server, RADIUS Server(FreeRADIUS), Control Panel(ISPConfig)
 Cent OS
และสิ่งหนึ่งที่ทำให้ผมเลือกใช้ CentOS ก็คือ CentOS มี Desktop ที่ช่วยให้เราใช้งานได้ง่ายขึ้น และการติดตั้งโปรแกรมต่าง ๆ ก็ใช้เพียงคำสั่งง่าย ๆ และในกรณีที่มีปัญหาก็ยังมีแหล่งคู่มือ และ วิธีการแก้ปัญหาตามอินเตอร์เน็ตทั่ว ๆ ไป
สำหรับบทความในหัวข้อนี้ จะเป็นตัวอย่างการติดตั้ง Linux Server ให้เป็น Web Server แบบง่าย ๆ ด้วยการติดตั้ง Linux Server และโปรแกรมสำหรับ Web Server ประกอบด้วย Apache , PHP และ MySQL Database ซึ่งทั้งหมดนี้สามารถปฏิบัติได้จริง และสามารถนำไปใช้งานได้จริง ๆ กับการ Config เพื่อรันเว็บไซต์
เริ่มต้นด้วยการหาโปรแกรมของ CentOS ซึ่งหาได้จากเว็บไซต์ของ CentOS
เวอร์ชั่นในปัจจุบันที่ได้รับความยิมมากที่สุดคือ 6.4
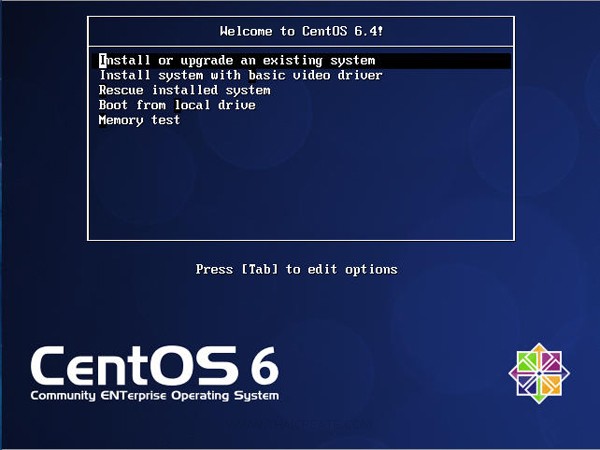
เริ่มต้นการติดตั้งให้เลือก Install or upgrade an existing system
กาติดตั้งรูปแบบนี้จะเป็น GUI สวยงามกกว่า Version ก่อน ๆ ซึ่งขั้นตอนส่วนมากแล้วจะให้เลือกเป็นค่า Default ที่โปรแกรมกำหนดให้ บางขั้นตอนอาจจะไม่ได้แสดงรายละเอียดไว้
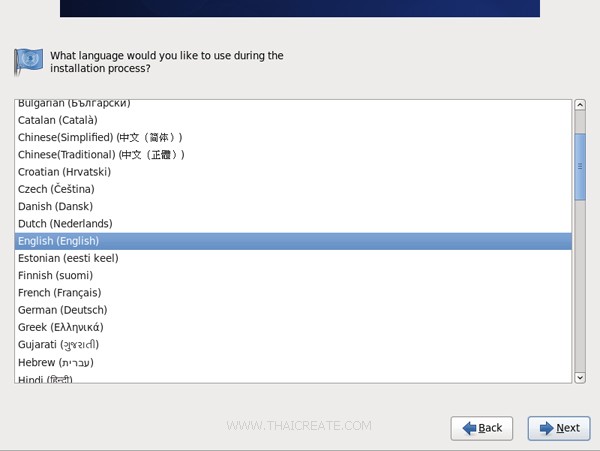
เลือกภาษา English
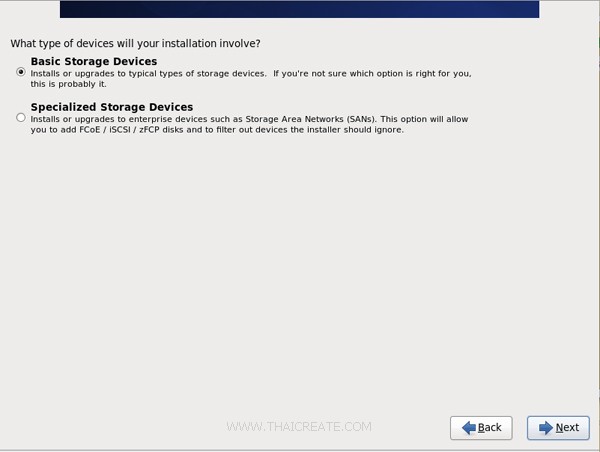
เลือก Basic Storage Devices
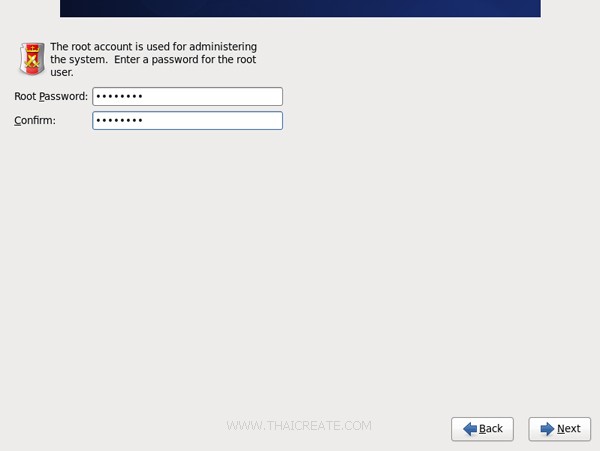
กำหนดรหัสผ่านของ root
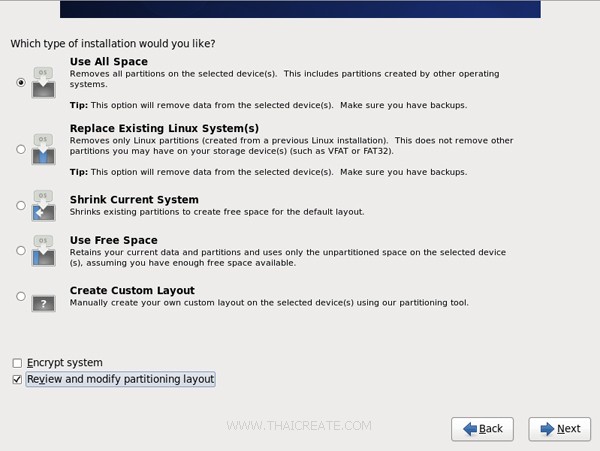
เลือก Use All Space
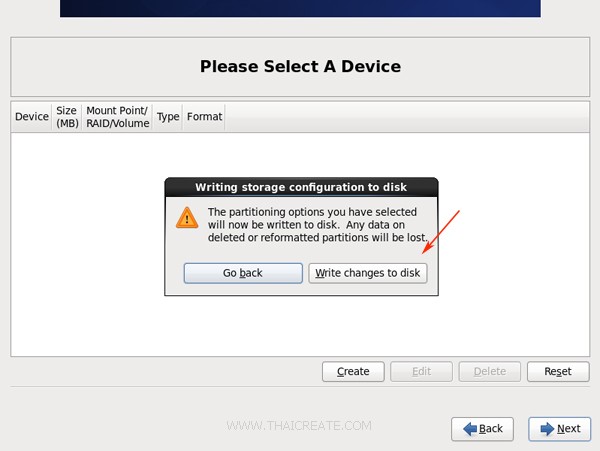
เลือก Write change to disk
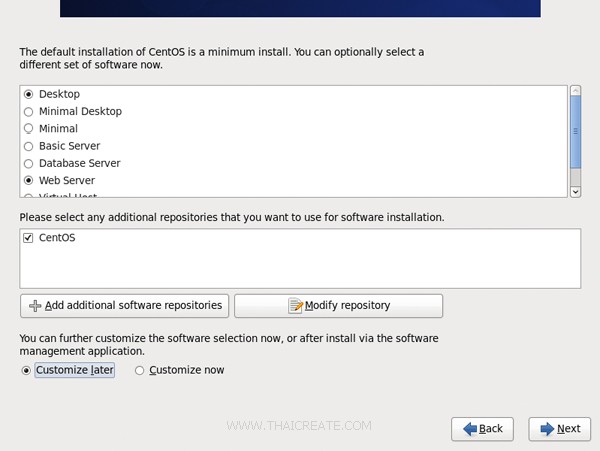
ในขั้นตอนนี้ให้เลือกเป็นแบบ Web Server และ Desktop (เราจะใช้ Desktop GUI ด้วย)
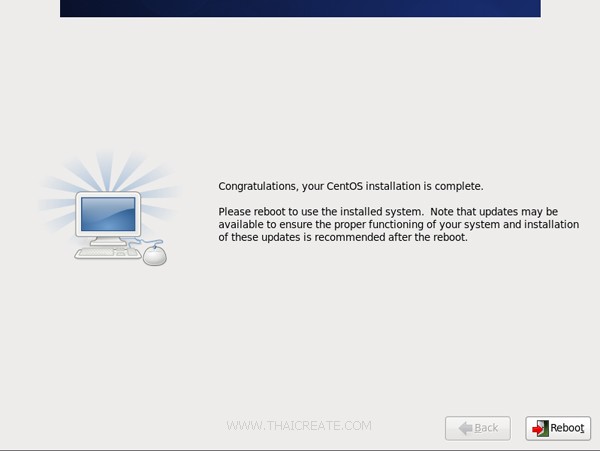
จากนั้นทำตามขั้นตอนไปเรื่อย ๆ ซึ่งการติดตั้งอาจจะใช้เวลา ประมาณ 30-60 นาที การติดตั้งเรียบร้อย จากนั้นเครื่องจะ Reboot 1 รอบ
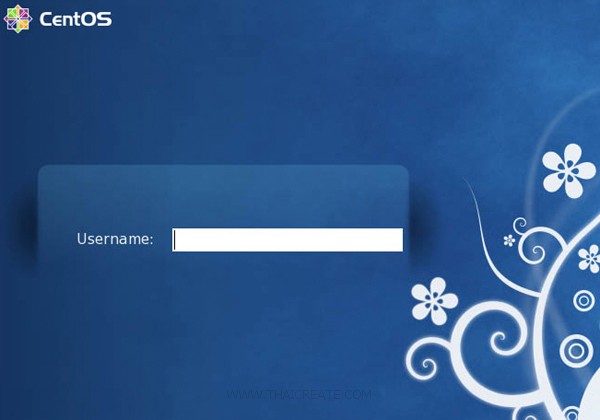
หลังจากที่ Reboot ใหม่จะเข้าสู่หน้าจอของ Desktop ให้กรอกรหัสผ่านของ root

หน้าจอของ Desktop บน CentOS
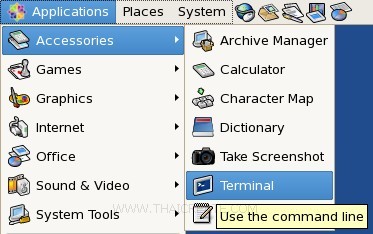
ในกรณีที่ต้องการเปิด Terminal ไว้สำหรับทำงานต่าง ๆ ให้เลือกที่
Applications -> Accessories -> Terminal
การ Remote ด้วย SSH ในกรณีที่ CentOS ได้ทำการกำหนดค่า IP Address และสามารถเชื่อมต่อกับ Network ได้ เราสามารถใช้โปรแกรม PuTTY เพื่อ Remote ไว้สำหรับการทำงานต่าง ๆ ผ่าน Command Line
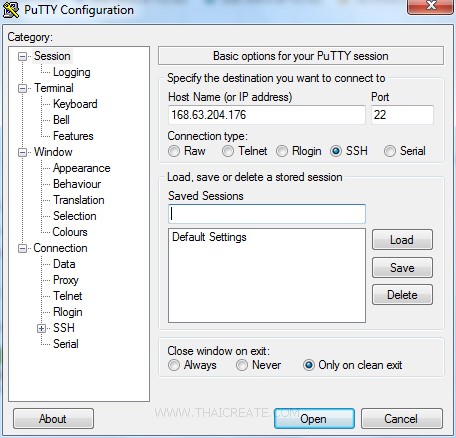
ใส่ IP Adress และ Port : 21 (ส่วนมากจะเป็น Port Default)
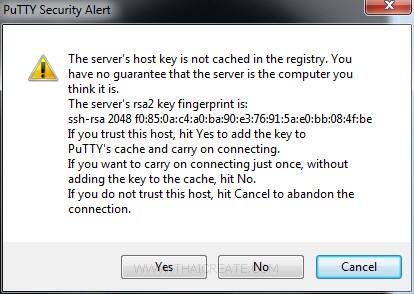
เลือก Yes
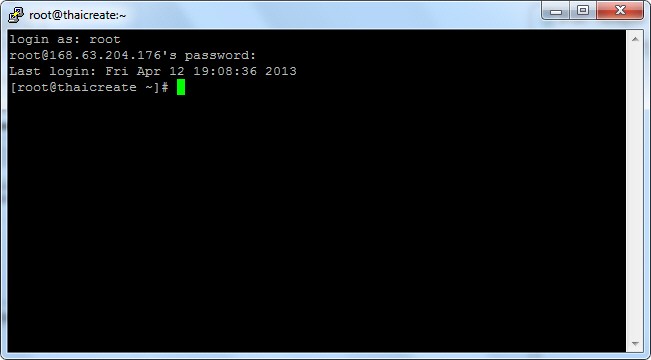
หน้าจอ Remote สำหรับสำหรับการทำงานผ่าน Command Line
บทความถัดไปที่แนะนำให้อ่าน
|