ตอนที่ 3 : เชื่อมต่อ SQL Database ผ่าน SQL Server Management Studio (SSMS) |
ตอนที่ 3 : เชื่อมต่อ SQL Database ผ่าน SQL Server Management Studio (SSMS) บทความนี้จะเป็นการเริ่มต้นการใช้งานจริงกับ SQL Azure หรือ SQL Database โดยจะยกตัวอย่างการ Login เข้าไปจัดการกับ SQL Database ผ่าน URL Manage และผ่านเครื่องของ SQL Server Management Studio จากนั้นจะเป็นการสร้าง ตาราง (Table) และการ Query ข้อมูลจาก Table แบบง่าย ๆ มาแสดงบนหน้าจอ Query
SQL Azure ผ่าน SQL Server Management Studio
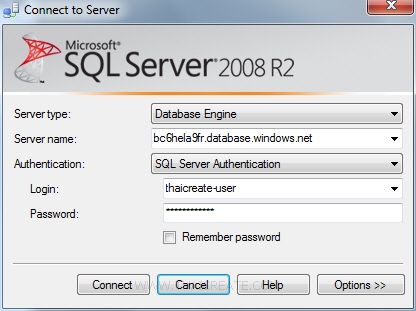
การ Login ผ่าน SQL Server Management Studio เข้าสู่หน้าจอด้วย Username และ Password ของ SQL Database ทีได้กำหนดขึ้น
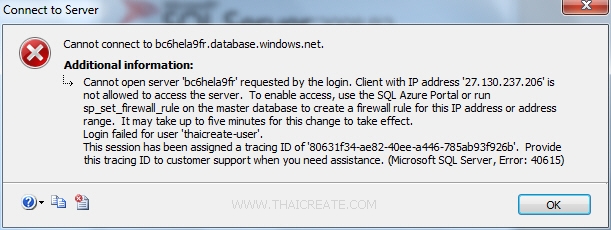
กรณีที่ยังไม่ได้ Allow IP ให้ทำการ Allow IP สามารถอ่านได้จากบทความนี้
ตอนที่ 2 : การสร้าง SQL Azure และการใช้งาน SQL Database เบื้องต้น บน Windows Azure
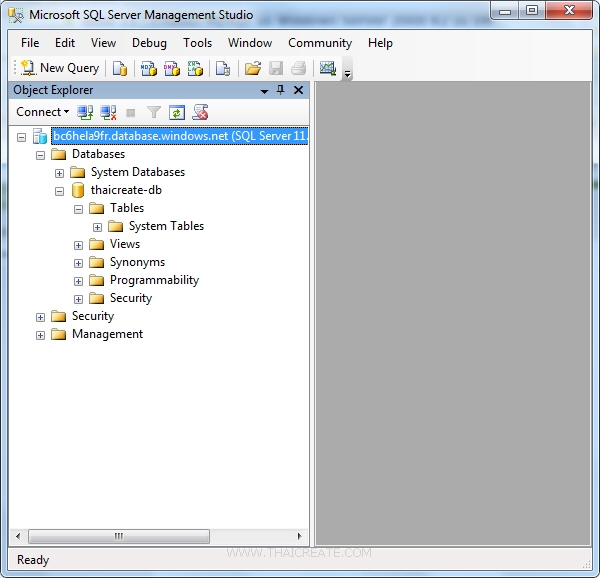
หน้าจอ SQL Database เมื่อ Login ผ่าน SQL Server Management Studio ซึ่งการใช้งานอาจจะไม่เหมือนกับ SQL Server แต่จะสามารถใช้งานในบาง Feature ที่คล้าย ๆ กัน
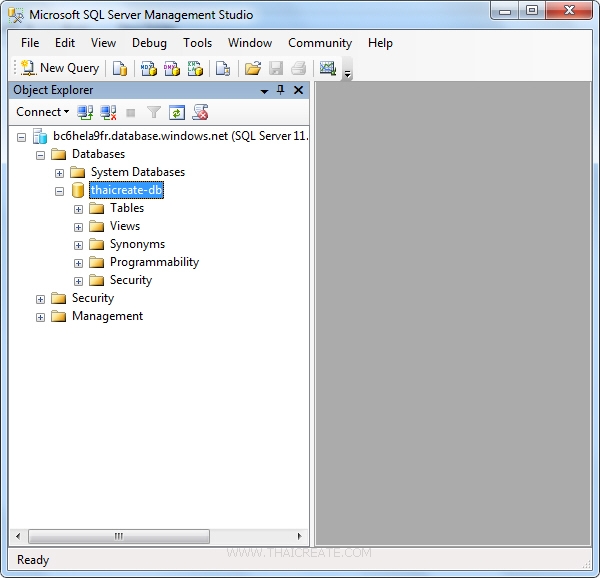
เราจะพบกับรายชื่อ Database ของ SQL Azure
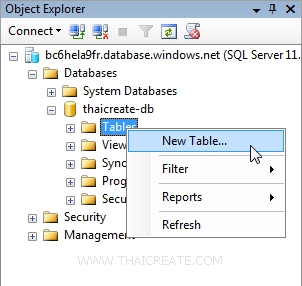
ในกรณีที่ต้องการสร้าง Table ให้คลิกขวาที่ Tables แล้วเลือก New Tables...
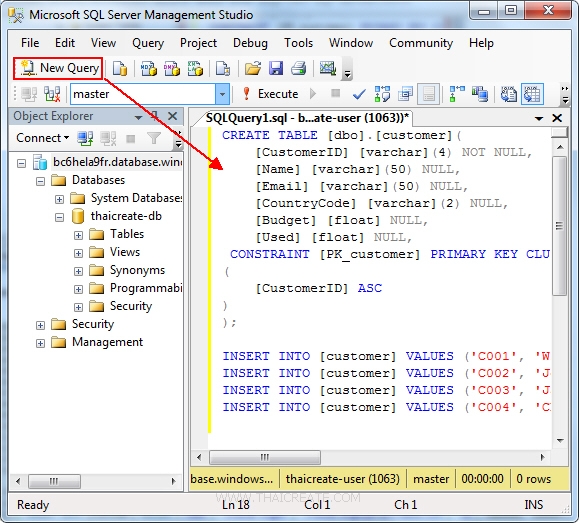
การใช้งาน SQL Azure Login ผ่าน SQL Server Management Studio จะต้องใช้งานในรูปแบบของ Query ซึ่งในตัวอย่างกรณีสร้าง Table จะใช้การเขียน Query แทน ซึ่งใน SQL Server ปกติ จะมีหน้าจอ GUI ให้เราเลือกสร้างแต่ล่ะ Column
CREATE TABLE [dbo].[customer](
	[CustomerID] [varchar](4) NOT NULL,
	[Name] [varchar](50) NULL,
	[Email] [varchar](50) NULL,
	[CountryCode] [varchar](2) NULL,
	[Budget] [float] NULL,
	[Used] [float] NULL,
 CONSTRAINT [PK_customer] PRIMARY KEY CLUSTERED
(
	[CustomerID] ASC
)
);

INSERT INTO [customer] VALUES ('C001', 'Win Weerachai', '[email protected]', 'TH', 1000000, 600000);
INSERT INTO [customer] VALUES ('C002', 'John  Smith', '[email protected]', 'UK', 2000000, 800000);
INSERT INTO [customer] VALUES ('C003', 'Jame Bond', '[email protected]', 'US', 3000000, 600000);
INSERT INTO [customer] VALUES ('C004', 'Chalee Angel', '[email protected]', 'US', 4000000, 100000);
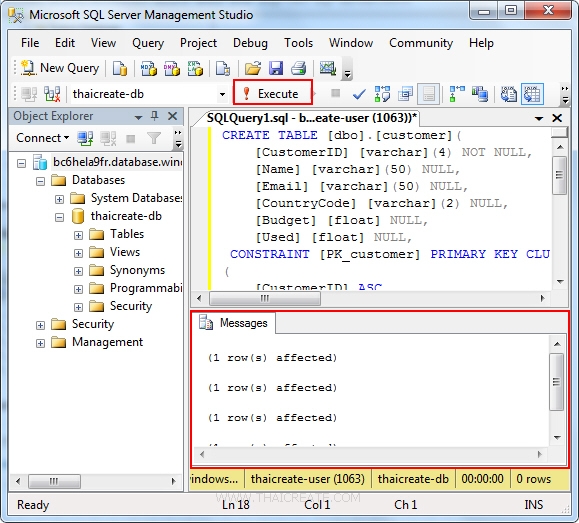
คลิกที่ Execute เพื่อรัน Query ในการสร้าง Table และ Insert
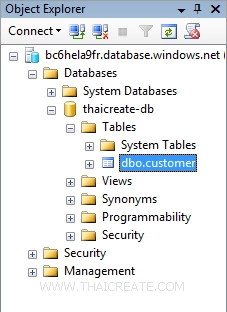
ให้คลิกวาเพื่อ Refresh ซะ 1 ครั้ง เราก็จะพบกับ Table ที่เราสร้างขึ้นมา
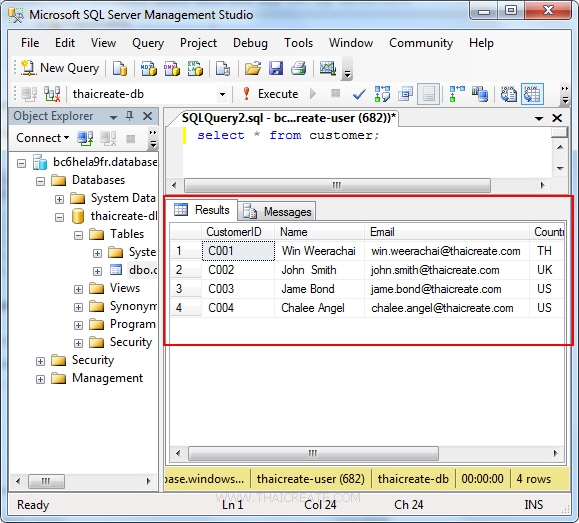
select * from customer;
ทดสอบการ Query ข้อมูลง่าย ๆ
SQL Azure ผ่าน URL Manage
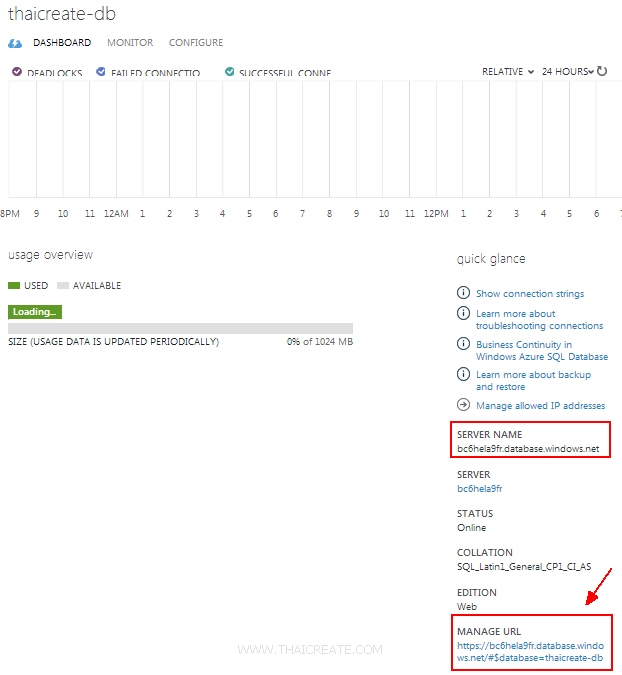
ในหน้าจอ Dashboard ของ SQL Database จะมีเมนูสำหรับ Link ไปยังหน้าจอ MANAGE URL
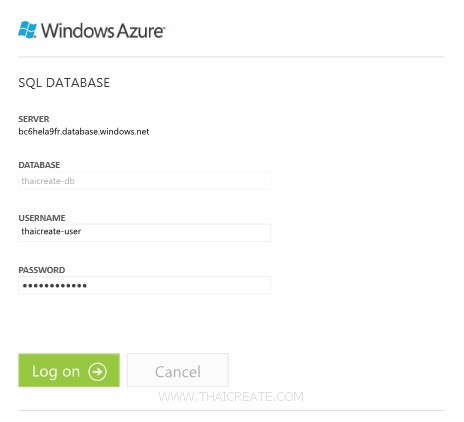
Login เข้าสู่หน้าจอด้วย Username และ Password ของ SQL Database ทีได้กำหนดขึ้น
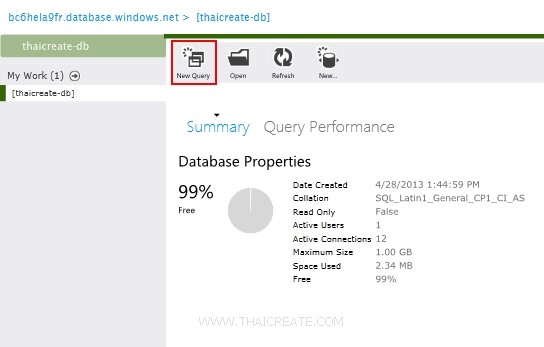
หน้าจอ MANAGE URL บน Windows Azure ซึ่งจะแสดงคุณสมบัติต่าง ๆ ของ SQL Azure ให้คลิกที่ New Query
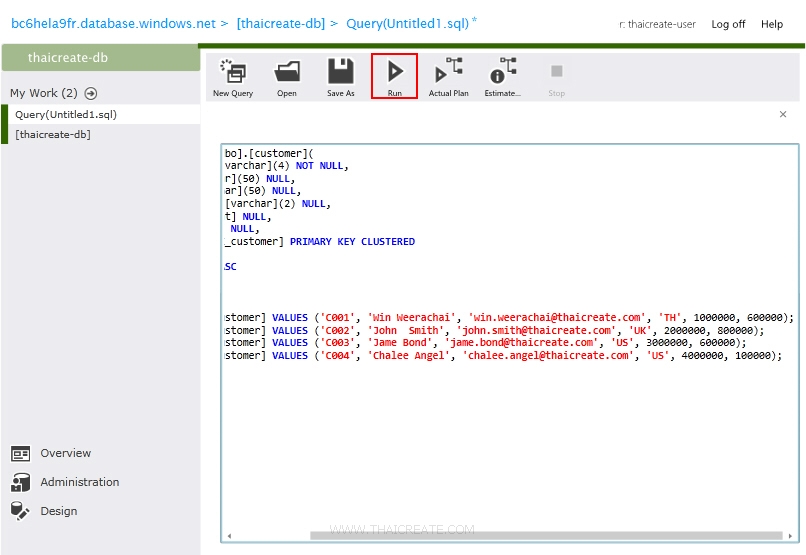
Copy ตัว Query ก่อนหน้านี้ แล้วคลิกเลือก Run
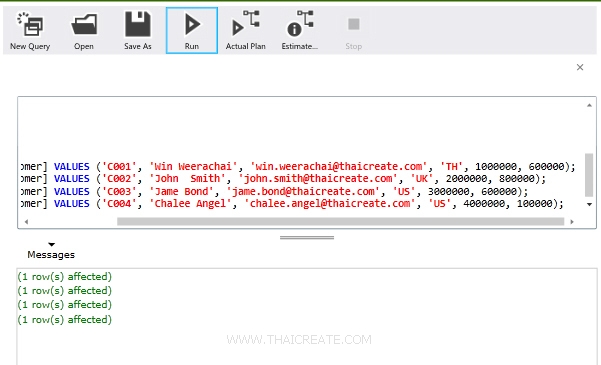
แสดงหน้าจอหลังจากที่ได้ทำการ Run Query เรียบร้อยแล้ว ในกรณีที่มี Error ต่าง ๆ ก็จะแจ้งให้ทราบทันที
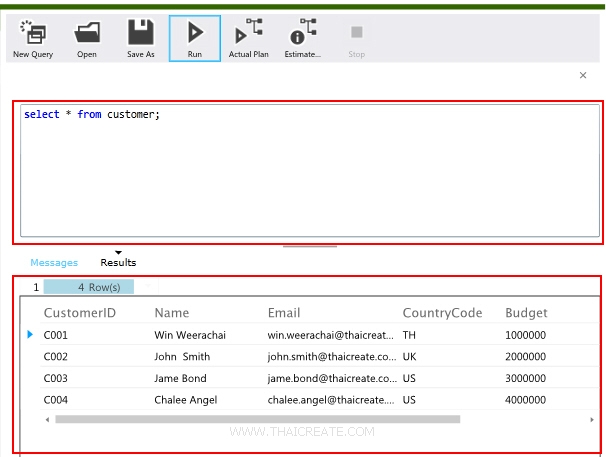
เมื่อทดสอบรัน Query เพื่อดูข้อมูล
สรุป
ในการเข้าไปจัดการกับ SQL Azure หรือ SQL Database สามารถที่จะเชื่อมต่อได้หลากหลายวิธี แต่โดยปกติแล้วเราอาจจะคุ้นกับ 2 วิธีที่ได้แนะนำในบทความนี้ และนอกจากนี้ถ้าเราได้ใช้พวก Tool ของ Visual Studio ในการเขียนโปรแกรม เราจะเห็นในส่วนของ SQL หรือ Data Connection ที่สามารถจะเรียกและแสดงผลบน Visual Studio ได้ในทันที
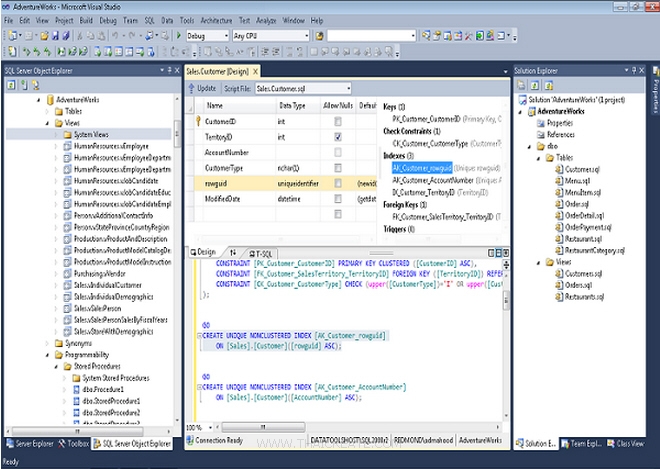
และก็เช่นเดียวกัน Windows Azure สามารถที่จะนำไปใช้บน Visual Studio ได้ด้วยเช่นกัน เพียงแต่เราอาจจะต้องลงโปรแกรมบางตัวเพิ่มตึ้น โดยสามารถอ่านได้จากบทความถัดไป
บทความถัดไปที่แนะนำให้อ่าน
อ่านเพิ่มเติม
|