ตอนที่ 6 : Android สร้างตาราง Table บน Mobile Services และการ Insert ข้อมูล |
ตอนที่ 6 : Android สร้างตาราง Table บน Mobile Services และการจัดเก็บ Insert ข้อมูล บทความนี้ขอต่อจากตอนที่แล้ว ซึ่งจะเป็นการสร้าง Table ไว้สำหรับจัดเก็บข้อมูลบน Mobile Services การเขียน Android App เพื่อสร้าง Column หรือฟิวด์ พร้อม ๆ กับการส่งข้อมูลจาก Android แล้วนำไปจัดเก็บ Insert ไว้ใน Table ของ Mobile Services บน Windows Azure

ตอนนี้เรามี Mobile Services อยู่ 1 ตัว
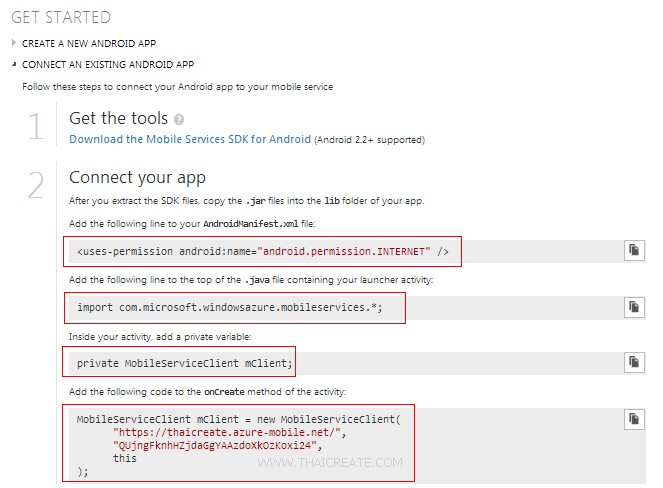
ในหน้า Get Started จะแสดงรายละเอียดของการเชื่อมต่อ และได้อธิบายไว้ในบทความก่อน ๆ หน้านี้แล้ว
ขั้นตอนการสร้าง Table หรือตาราง
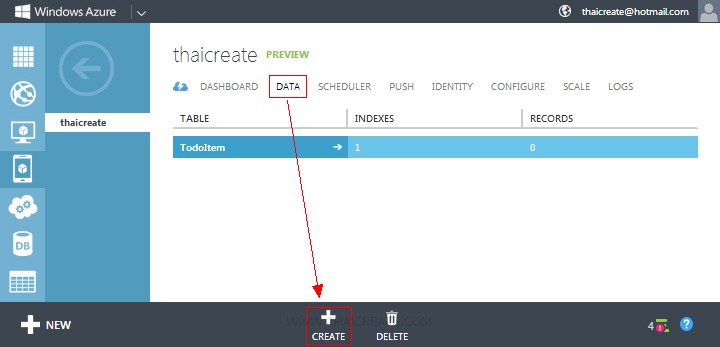
ตลิกที่ DATA และเลือก CREATE
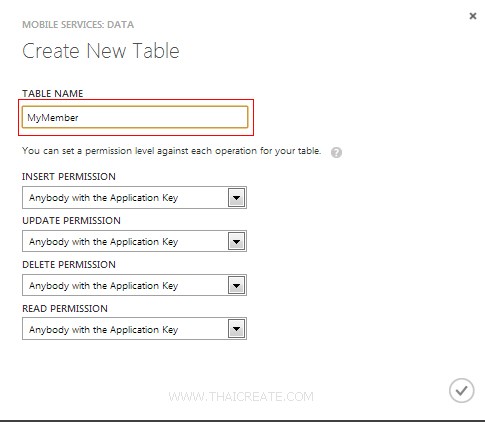
ใส่ชื่อตารางในที่นี้จะใส่เป็น MyMember

ได้ตารางขึ้นมา 1 รายการชื่อว่า MyMember
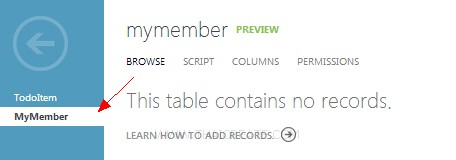
ให้คลิกเข้าไปใน Table (ตาราง) ซึ่งตอนนี้ยังไม่มี Column และ Rows
เพิ่มเติม
จะสังเกตุว่าไม่มีเครื่องมือสำหรับการสร้าง Table และการ Insert ข้อมูล (มีแต่ลบ Column และบน Rows ข้อมูล) แต่ทั้งนี้เราสามารถที่จะสร้าง Column และ Insert ข้อมูลได้จากการเขียน App บน Android
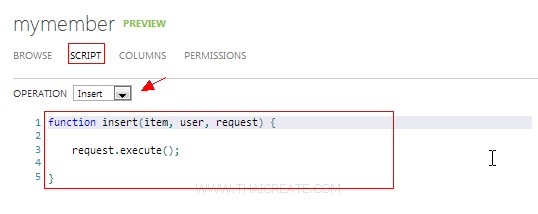
เมนู SCRIPT เป็นพวก Script ที่ไว้ทำหน้าที่รับข้อมูลจาก Android แล้ว Insert ลงใน Table การทำงานคล้าย ๆ กับ Stored Procedure ซึ่งเราสามารถเขียน Script เพิ่มเติมได้ แต่ตอนนี้แนะนำให้กำหนดเป็นค่า Default ซะก่อน
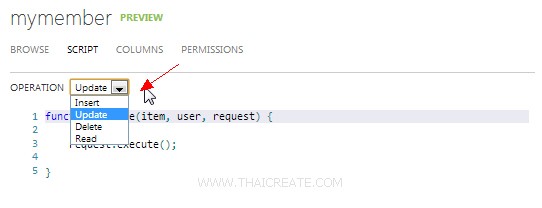
หลัก ๆ จะมีอยู่ 4 ตัวคือ Insert , Update , Delete , Read
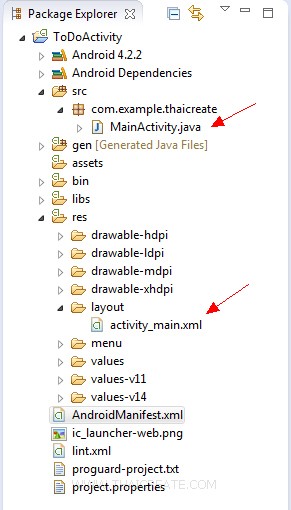
กลับมาบน Project ของ Android ตอนนี้เรายังคงมีแค่ไฟล์ MainActivity.java และ activity_main.xml
ขั้นตอนการสร้าง Class สำหรับจัดการกับ Table และการสร้าง Column ฟิวด์
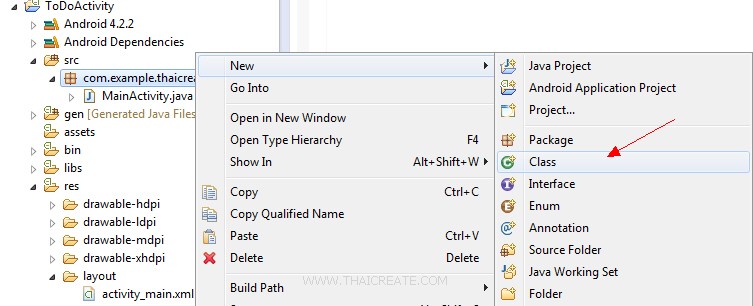
ให้สร้าง Class ขึ้นมา 1 ตัวโดยไปที่ คลิกขวา New -> Class
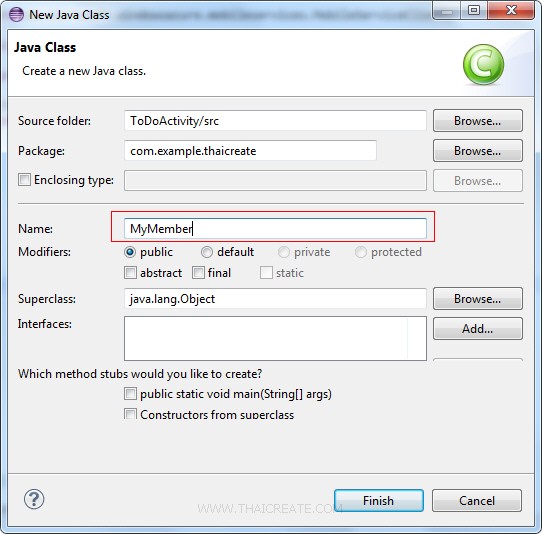
การตั้งชื่อไฟล์ของ Class จะต้องชื่อเดียวกับ Table เท่านั้น
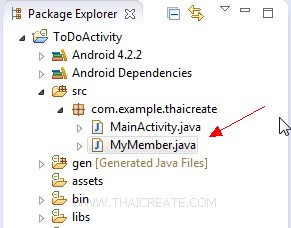
เราได้ไฟล์ MyMember.java ไว้สำหรับการจัดการกับตาราง MyMember เรียบร้อยแล้ว

ตอนนี้ในไฟล์ MyMember.java ยังไม่มีคำสั่งใด ๆ นอกจากค่า Default เราจะมาเริ่มสร้าง Column ให้กับตาราง
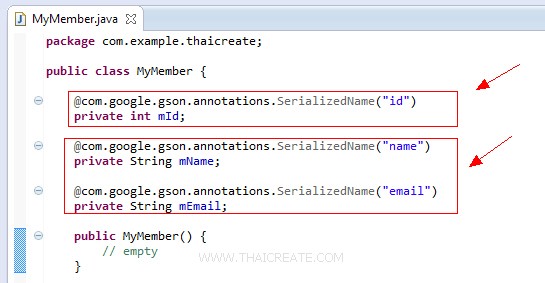
MyMember.java
package com.example.thaicreate;

public class MyMember {

	@com.google.gson.annotations.SerializedName("id")
	private int mId;

	@com.google.gson.annotations.SerializedName("name")
	private String mName;

	@com.google.gson.annotations.SerializedName("email")
	private String mEmail;

	public MyMember() {
		// empty
	}

	public MyMember(String name, String email) {
		this.setName(name);
		this.setEmail(email);
	}

	public final void setName(String name) {
		mName = name;
	}

	public final void setEmail(String email) {
		mEmail = email;
	}

}
ตัวอย่างการสร้าง Column ฟิวด์ที่ประกอบด้วย id,name และ email โดยที่ฟิวด์ id เป็น Column ฟิวด์บังคับที่จะต้องมีทุกครั้ง
เพิ่มเติม
1. ฟิวด์แรกจะต้องชื่อว่า id เป็นชนิดแบบ int
2. การสร้าง Column จะเรียกใช้งานทุก ๆ ครั้งที่ App ทำงาน โดยที่โปรแกรมจะตรวจสอบก่อนว่ามี Column แล้วหรือยัง ถ้ามีแล้วจะไม่สร้างเพิ่ม
3. ในกรณีที่มี Column ใหม่ สามารถมาสร้างเพิ่มได้ทันที เพราะเมื่อโปรแกรมทำงานใหม่อีกครั้ง Column ใหม่ก็จะถูกสร้างขึ้นมาใหม่
การ Insert ข้อมูลลงใน Table ตัวอย่างการ Insert ข้อมูลไปยัง Mobile Services
MainActivity.java
        /*** Create to Mobile Services ***/
        try {
			mClient = new MobileServiceClient(
				      "https://thaicreate.azure-mobile.net/",
				      "QUjngFknhHZjdaGgYAAzdoXkOzKoxi24",
				      this);

		} catch (MalformedURLException e) {
			// TODO Auto-generated catch block
			e.printStackTrace();
		}

        /*** Create getTable ***/
        mMyMember = mClient.getTable(MyMember.class);

        	/*** Item for Insert ***/
        	MyMember item = new MyMember();
    		item.setName("Win");
    		item.setEmail("[email protected]");

    		// Insert the new item
    		mMyMember.insert(item, new TableOperationCallback<MyMember>() {

    			public void onCompleted(MyMember entity, Exception exception, ServiceFilterResponse response) {

    				if (exception == null) {
    					// Suscess
    				} else {
    					// Failed
    				}

    			}
    		});
จากตัวอย่างจะเป็นการ Insert ข้อมูลจาก Android ไปยัง Table ชื่อว่า MyMember ของ Mobile Services ที่อยู่บน Windows Azure
Code เต็ม ๆ ทั้งหมด
activity_main.xml
<?xml version="1.0" encoding="utf-8"?>
<LinearLayout xmlns:android="http://schemas.android.com/apk/res/android"
    android:layout_width="match_parent"
    android:layout_height="match_parent"
    android:orientation="vertical" >

    <TextView
        android:id="@+id/lblText"
        android:layout_width="wrap_content"
        android:layout_height="wrap_content"
        android:text="TextView" />

</LinearLayout>
MyMember.java
package com.example.thaicreate;

public class MyMember {

	@com.google.gson.annotations.SerializedName("id")
	private int mId;

	@com.google.gson.annotations.SerializedName("name")
	private String mName;

	@com.google.gson.annotations.SerializedName("email")
	private String mEmail;

	public MyMember() {
		// empty
	}

	public MyMember(String name, String email) {
		this.setName(name);
		this.setEmail(email);
	}

	public final void setName(String name) {
		mName = name;
	}

	public final void setEmail(String email) {
		mEmail = email;
	}

}
MainActivity.java
package com.example.thaicreate;

import java.net.MalformedURLException;

import android.app.Activity;
import android.os.Bundle;
import android.view.Menu;
import android.widget.TextView;

import com.microsoft.windowsazure.mobileservices.MobileServiceClient;
import com.microsoft.windowsazure.mobileservices.MobileServiceTable;
import com.microsoft.windowsazure.mobileservices.ServiceFilterResponse;
import com.microsoft.windowsazure.mobileservices.TableOperationCallback;

public class MainActivity extends Activity {

	private MobileServiceClient mClient;
	private MobileServiceTable<MyMember> mMyMember;

    @Override
    public void onCreate(Bundle savedInstanceState) {
        super.onCreate(savedInstanceState);
        setContentView(R.layout.activity_main);

        /*** Create to Mobile Services ***/
        try {
			mClient = new MobileServiceClient(
				      "https://thaicreate.azure-mobile.net/",
				      "QUjngFknhHZjdaGgYAAzdoXkOzKoxi24",
				      this);

		} catch (MalformedURLException e) {
			// TODO Auto-generated catch block
			e.printStackTrace();
		}

        /*** Create getTable ***/
        mMyMember = mClient.getTable(MyMember.class);

        final TextView lbText = (TextView) findViewById(R.id.lblText);

        if (mClient != null) {

        	/*** Item for Insert ***/
        	MyMember item = new MyMember();
    		item.setName("Win");
    		item.setEmail("[email protected]");

    		// Insert the new item
    		mMyMember.insert(item, new TableOperationCallback<MyMember>() {

    			public void onCompleted(MyMember entity, Exception exception, ServiceFilterResponse response) {

    				if (exception == null) {
    					lbText.setText("Insert Data Successfully.");
    				} else {
    					lbText.setText("Insert Data Failed! Error = " + exception.getCause().getMessage());
    				}

    			}
    		});

        }

    }

    @Override
    public boolean onCreateOptionsMenu(Menu menu) {
        getMenuInflater().inflate(R.menu.activity_main, menu);
        return true;
    }

}
Screenshot
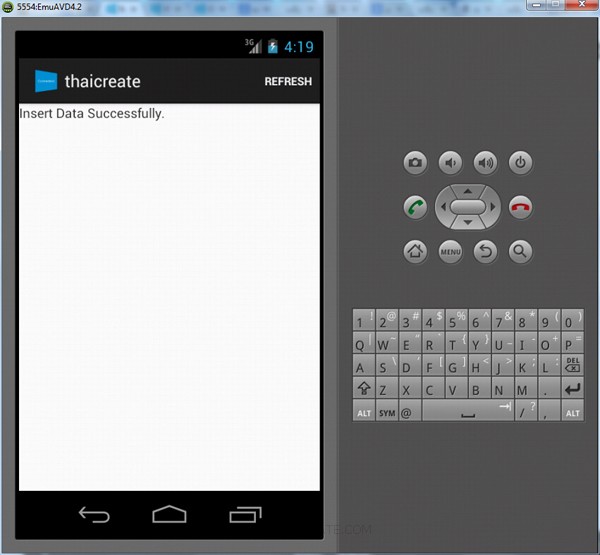
แสดงผลบนหน้าจอ App ของ Android

เมื่อกลับไปดูบน Portal Management ของ Mobile Services จะเห็นว่า Column ถูกสร้าง และ Rows ถูก Insert
บทความถัดไปที่แนะนำให้อ่าน
บทความที่เกี่ยวข้อง
| Property & Method (Others Related) |
|
 ช่วยกันสนับสนุนรักษาเว็บไซต์ความรู้แห่งนี้ไว้ด้วยการสนับสนุน Source Code 2.0 ของทีมงานไทยครีเอท ช่วยกันสนับสนุนรักษาเว็บไซต์ความรู้แห่งนี้ไว้ด้วยการสนับสนุน Source Code 2.0 ของทีมงานไทยครีเอท
|
|
| |
By : |
ThaiCreate.Com Team (บทความเป็นลิขสิทธิ์ของเว็บไทยครีเอทห้ามนำเผยแพร่ ณ เว็บไซต์อื่น ๆ) |
| |
Score Rating : |
  |
|
| |
Create/Update Date : |
2013-05-08 16:10:17 /
2017-03-24 11:13:27 |
| |
Download : |

|
|
|
Sponsored Links / Related |
|
|
|
|
|
|

|