ตอนที่ 2 : การจัดการ MySQL บน Windows Azure ด้วย MySQL Workbench |
ตอนที่ 2 : การจัดการ MySQL บน Windows Azure ด้วย MySQL Workbench บทความก่อนหน้านี้เราได้สร้าง Web Site บน Windows Azure เพื่อที่จะรันเว็บไซต์ที่พัฒนาด้วย PHP กับ MySQL และตามที่ได้เกรินไว้ว่าบน Web Site ของ Azure จะไม่มี phpMyAdmin หรือ Tools ที่จะใช้สำหรับการจัดการกับฐานข้อมูล MySQL มาให้ แต่เราสามารถที่จะใช้ phpMyAdmin , Navicat , MySQL Workbench และ Tools อื่น ๆ ที่จะจัดการกับ MySQL Database บน Windows Azure ด้วยการเชื่อต่อกับ Connection String ที่ได้จากขั้นตอนการสร้าง Web Site และวิธีการนั้นก็เช่นเดียวกับการเชื่อมต่อกับ MySQL บน local หรือ Host อื่น ๆ
MySQL Database Tools
โดย Tools ต่าง ๆ เหล่านี้สามารถใช้งานได้ฟรี
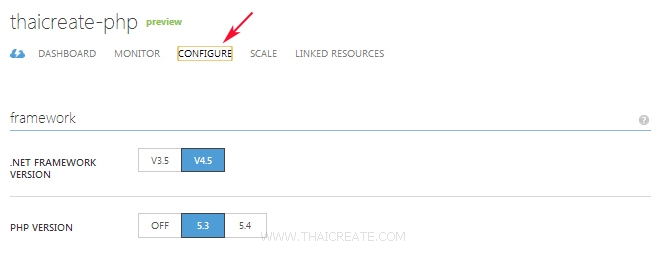
ในหน้า Dashboard ของ Web Site ให้คลิกที่ CONFIGURE

จะเห็น Connection String ของ MySQL อยู่ด้านล่าง

ตัวอย่าง Connection String
Database=thaicreateDB;Data Source=us-cdbr-azure-west-b.cleardb.com;User Id=bf8b0efb6c1b5b;Password=325bfa78
Connection String
Host = us-cdbr-azure-west-b.cleardb.com
User Id = bf8b0efb6c1b5b
Password = 325bfa78
Database = thaicreateDB
โดยในบทความนี้ผมเลือกใช้ MySQL Workbench เพราะเป็นของ MySQL และสามารถใช้งานได้ฟรี ๆ
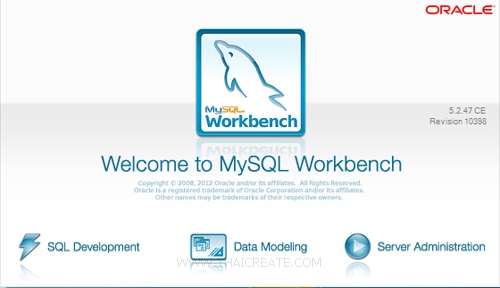
เปิดโปรแกรม MySQL Workbench เลือกที่ SQL Development
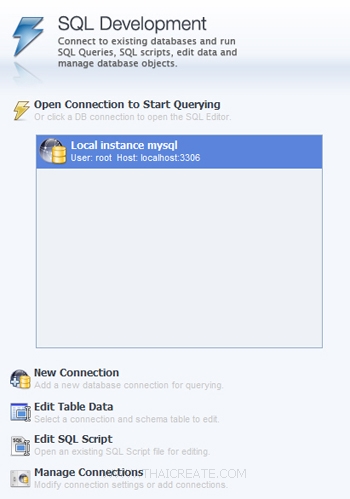
ในส่วนของ SQL Development ให้เลือกที่ New Connection
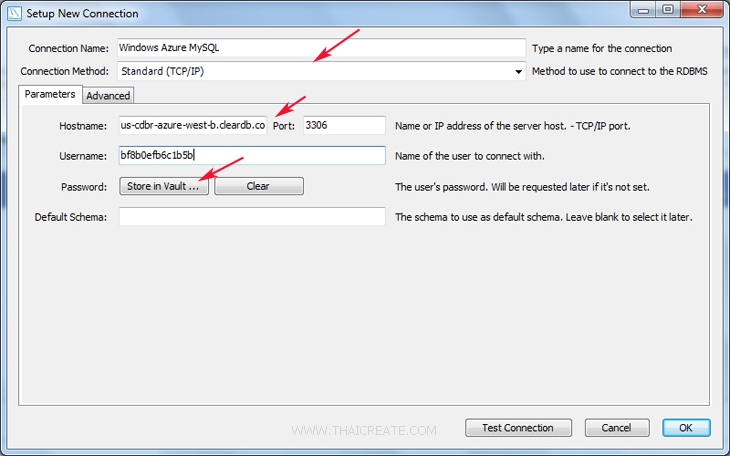
สร้างข้อมูลสำหรับการเชื่อมต่อ โดนผ่าน Connection String ต่าง ๆ ที่ได้แจ้งไว้ก่อนหน้านี้
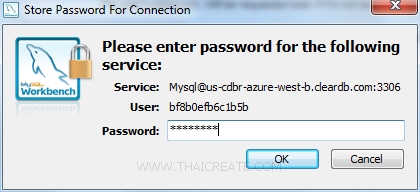
ใส่ User Id และ Password ให้ครบ
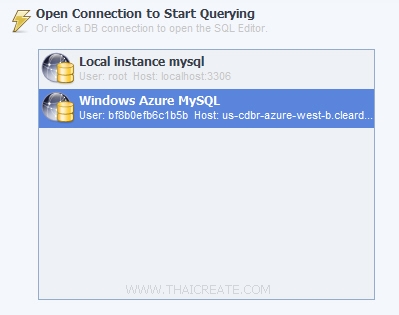
เมื่อได้ Connection ใหม่ก็ให้ดับเบิ้ลคลิกเพื่อเปิด Connection
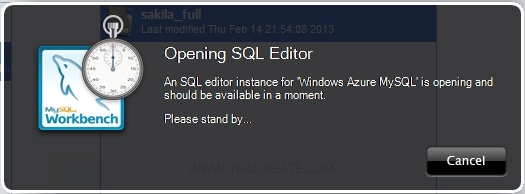
รอซะครู่ กำลังเชื่อมต่อข้อมูล
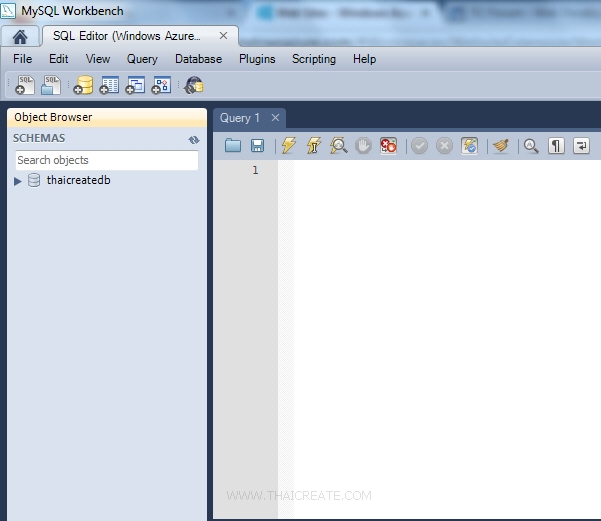
หลังจากเชื่อมต่อเรียบร้อย ก็จะพบกับรายชื่อ Database ที่เราได้สร้างไว้บน Azure Web Site ตอนนี้มีอยู่ 1 Database ชื่อว่า thaicreatedb
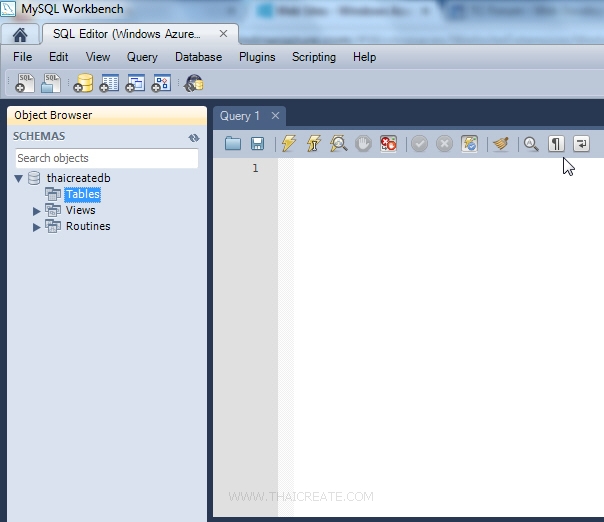
คลิกที่ Tables ซึ่งตอนนี้จะยังว่าง ๆ
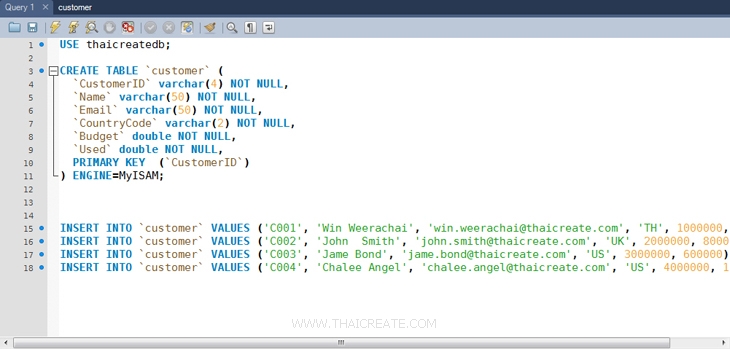
ให้สร้าง Table และ Insert ข้อมูลแบบง่าย ๆ ดังนี้
USE thaicreatedb;

CREATE TABLE `customer` (
  `CustomerID` varchar(4) NOT NULL,
  `Name` varchar(50) NOT NULL,
  `Email` varchar(50) NOT NULL,
  `CountryCode` varchar(2) NOT NULL,
  `Budget` double NOT NULL,
  `Used` double NOT NULL,
  PRIMARY KEY  (`CustomerID`)
) ENGINE=MyISAM;


INSERT INTO `customer` VALUES ('C001', 'Win Weerachai', '[email protected]', 'TH', 1000000, 600000);
INSERT INTO `customer` VALUES ('C002', 'John  Smith', '[email protected]', 'UK', 2000000, 800000);
INSERT INTO `customer` VALUES ('C003', 'Jame Bond', '[email protected]', 'US', 3000000, 600000);
INSERT INTO `customer` VALUES ('C004', 'Chalee Angel', '[email protected]', 'US', 4000000, 100000);
โดยให้คลิกที่ Query หรือสัญลักษณ์ สายฟ้า เพื่อทำการ Query คำสั่ง SQL

สังเกตุว่าเมื่อเราเขียน Query ต่าง ๆ ก็จะมี Log แจ้งบอกด้วยทุกครั้ง เป็นการแสดงสถานะการทำงานต่าง ๆ ว่ามี Error หรือ Failed หรือไม่
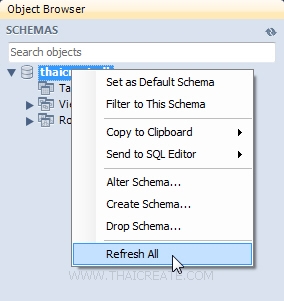
ลองคลิกขวาที่ Tables แล้วเลือก Refresh All
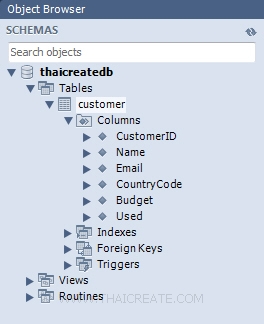
จะเห็นว่าตอนนี้มี Table ถุกสร้างขึ้นมา 1 Table ชื่อว่า customer
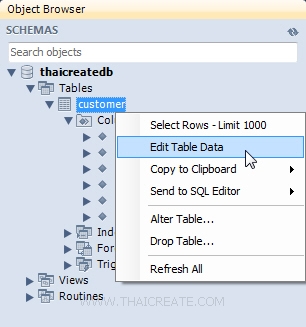
คลิกที่ Edit Table Data เพื่อดูข้อมูล หรือจะแก้ไขข้อมูลต่าง ๆ

แสดงข้อมูลของ MySQL ที่อยู่บน Azure Web Site เราสามารถแก้ไขข้อมูลหรือเพิ่มลบข้อมูลต่าง ๆ ผ่านโปรแกรม MySQL Workbench ได้ในทันที
ทดสอบการเชื่อมต่อผ่านโปรแกรม phpMyAdmin
สำหรับโปรแกรม phpMyAdmin เราสามารถที่จะ Upload ตัวโปรแกรมไปไว้บน Web Site หรือจะเรียกจาก local จากเครื่องเราได้เช่นเดียวกัน
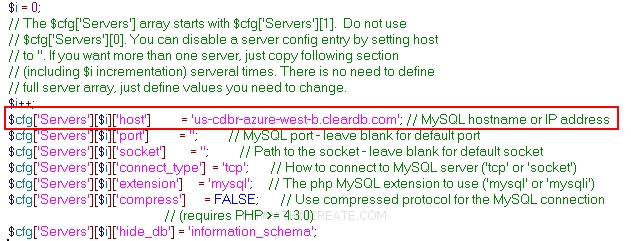
โดยการเข้าไปแก้ไขไฟล์ที่ชื่อว่า config.inc.php โดยแก้ไขตรงส่วนที่ชื่อว่า $cfg['Servers'][$i]['host'] ให้เป็น Host ของ MySQL Database ที่อยู่บน Windows Azure
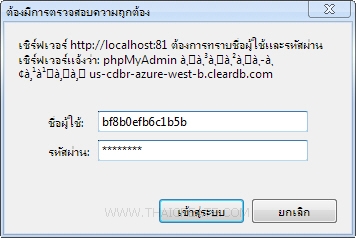
ตอนที่ Login ก็เพียงแค่ใส่ User Id และ Password ให้ถูกต้อง
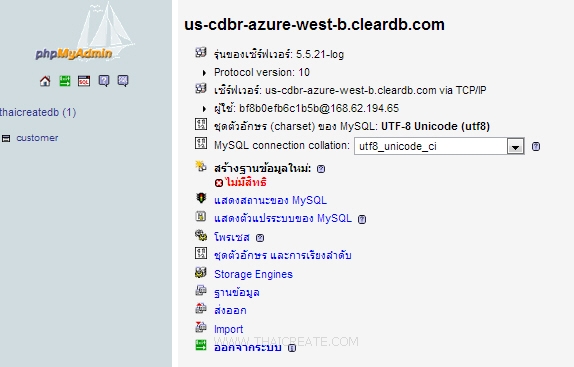
เข้าสู่หน้าหลักของโปรแกรม phpMyAdmin ซึ่งจะแสดงชื่อ Database และ Table ที่เราได้สร้างไว้ก่อนหน้านี้ ผ่านโปรแกรม MySQL Workbench

ข้อมูลที่ถูกสร้าง สามารถที่จะเพิ่ม/แก้ไข/อัพเดด/ลบ ผ่านโปรแกรม phpMyAdmin ได้ในทันที
จากบทความนี้เราจะได้เรียนรู้ว่า MySQL Database บน Windows Azure มีการเปิดให้เราสามารถทำการเชื่อมต่อได้จากทุก ๆ ที่ ซึ่งเหตุผลนี้เอง เราสามารถที่จะเรียกใช้ MySQL Database จากส่วนใดของโลกนี้ก็ได้ เช่น เราอาจจะเขียน PHP อยู่อีก Host หนึ่ง แต่ก็สามารถที่จะเชื่อมต่อกับ Database ของ MySQL บน Windows Azure ได้เช่นเดียวกัน และไม่เฉพาะ PHP เท่านั้น ๆ ทุก ๆ Application ก็สามารถที่จะเชื่อมต่อกับ Database ตัวนี้ ไม่ว่าจะเป็น ASP.NET , Windows App จาก .NET Framework , Java, Ruby หรือภาษาอื่น ๆ
บทความถัดไปที่แนะนำให้อ่าน
อ่านเพิ่มเติม
|