ตอนที่ 2 : การปรับแต่ง Windows Store App เพื่อทำงานร่วมกับ Azure Mobile Services |
ตอนที่ 2 : การปรับแต่ง Windows Store App เพื่อทำงานร่วมกับ Azure Mobile Services บทความนี้จะเป็นการเริ่มต้นตั้งแต่การสร้าง Project ของ Windows Store App บน Visual Studio ด้วยการสร้าง Project ใหม่ และเรียกใช้ Library ของ Azure Mobile Services หรือถ้ามี Project อยู่แล้วก็สามารถเปิดโปรเจคนั้น ๆ เข้ามาทำการ Add ตัว Library ที่จำเป็นในการติดต่อกับ Azure Mobile Services เข้ามาใน Project ได้เช่นเดียวกัน จากนั้นจะอธิบายขั้นตอนการทำการเขียนคำสั่งเพื่อติดต่อไปยัง Mobile Services ที่อยู่บน Windows Store App
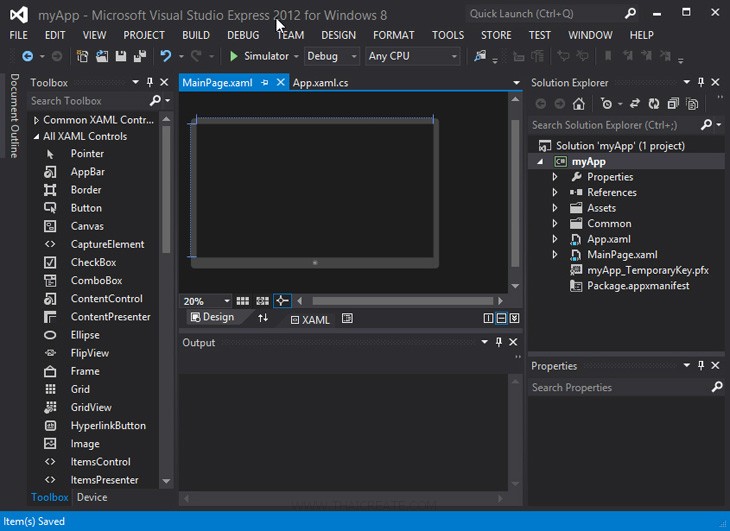
ตอนนี้เรามี Project ของ Windows Store App ที่ถูกสร้างบน Visual Studio 2012 ซึ่งยังไม่ได้ทำอะไรเพิ่มเติม
การเรียกใช้งาน Azure Mobile Services เข้ามาใน Project บน Visual Studio
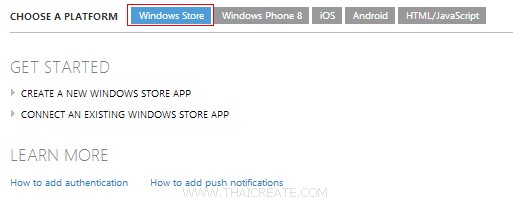
ในหน้า Dashboard คลิกที่ Windows Store
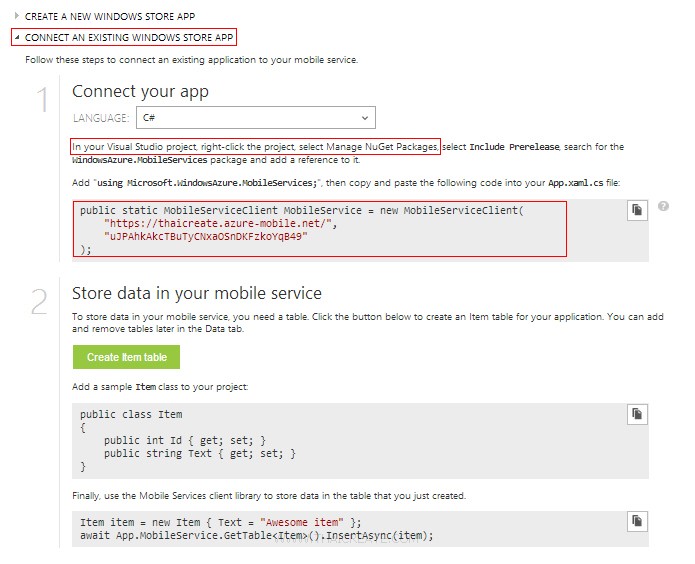
ซึ่งคำแนะนำคือจะต้องทำการ Add Reference ตัว NuGet Package เข้ามาใน Project
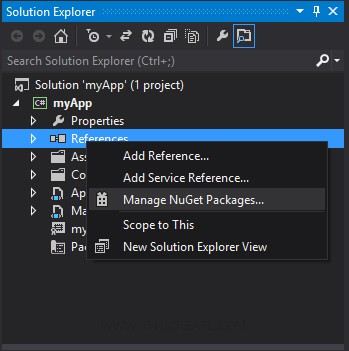
ให้ไปที่ Project ของเราคลิกขวาที่ References -> Manage Nuget Packages...
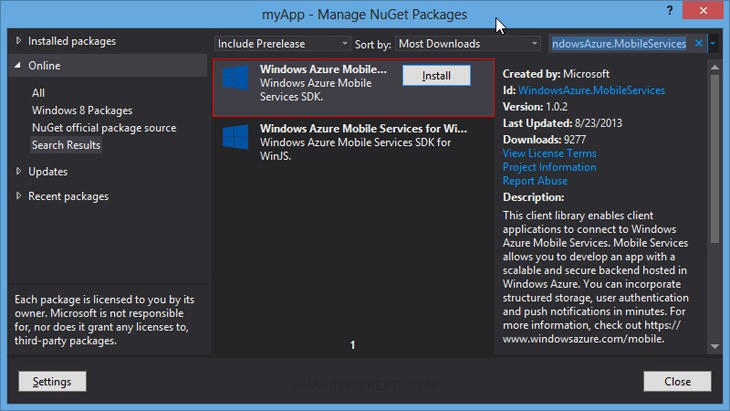
ให้ค้นหาคำว่า WindowsAzure.MobileServices เมื่อเจอแล้วให้คลิก Install
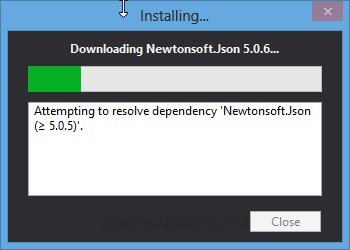
กำลังติดตั้ง
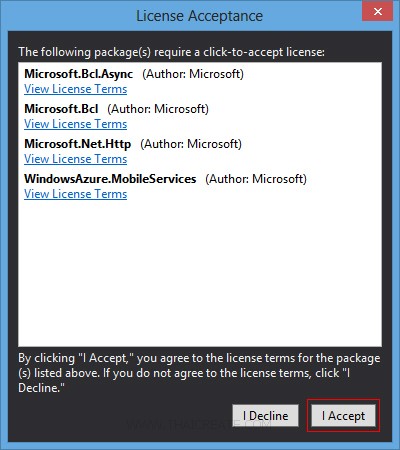
เลือก I Accept
กรณีที่ Error
Could not install package 'Newtonsoft.Json 4.5.11'. You are trying to install this package into a project that targets 'WindowsPhone,Version=v8.0', but the package does not contain any assembly references that are compatible with that framework. For more information, contact the package author.
ให้ทำการ Update NuGet Package Manager ด้วยการดาวน์โหลดไฟล์ที่นี่
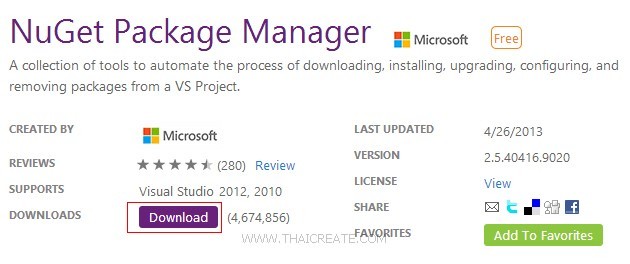
เลือก Download
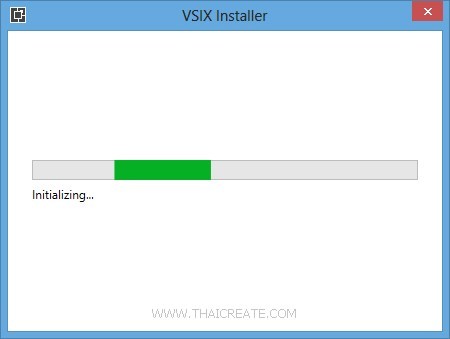
หลังจากที่ดาวน์โหลดแล้วก็ให้ติดตั้งตามปกติ
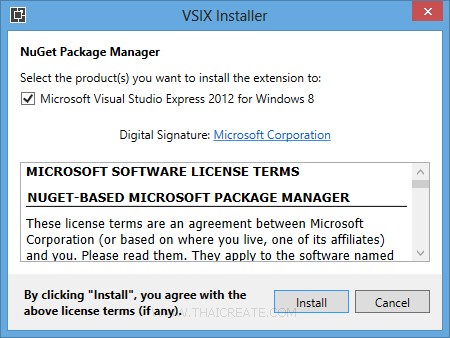
Install กำลังติดตั้ง ซึ่งจะใช้เวลา 2-3 นาทีก็เสร็จ
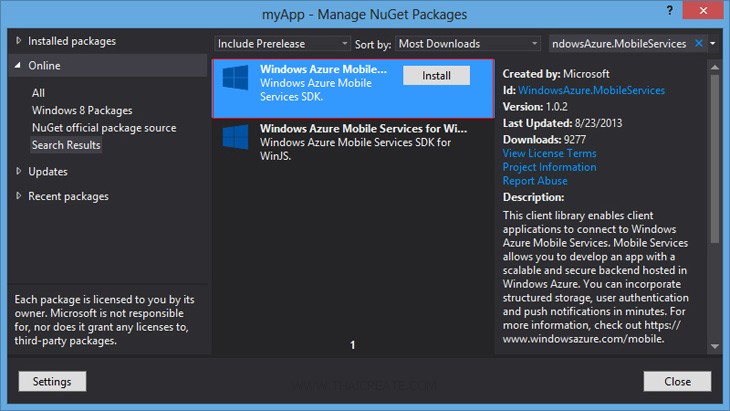
จากนั้นให้ปิดโปรแกรม Visual Studio แล้วเปิดโปรแกรมใหม่ พร้อมกับติดตั้งตัว WindowsAzure.MobileServices อีกครั้ง
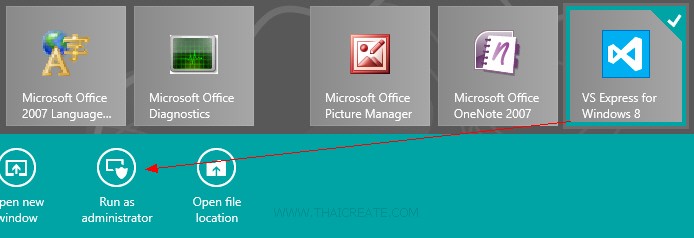
ในกรณีที่ยังไม่ทำเสร็จ ลองเปิด Visual Studio แล้วเปิดมันด้วย Run As Administator
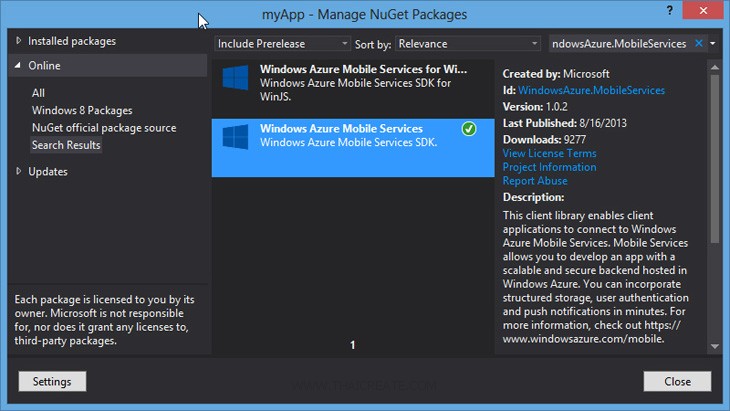
แล้วติดตั้งใหม่อีกครั้ง
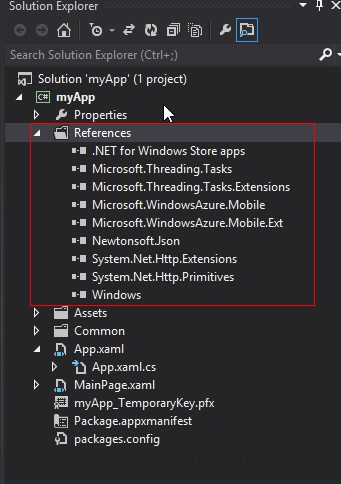
ซึ่งตอนนี้ Library ต่าง ๆ ของ Windows Azure Mobile Services ก็เข้ามาอยู่ใน Project ของเราเรียบร้อยแล้ว
เริ่มต้นเขียน Windows Store ติดต่อกับ Mobile Services
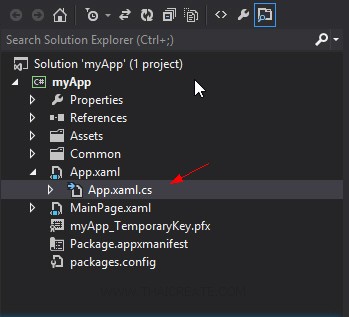
ขั้นแรกสุดให้เราคลิกที่ไฟล์ App.xaml.cs (ไฟล์นี้เปลี่ยนเสือนไฟล์ไว้เก็บ Config เช่น App.Config หรือ Web.Config)
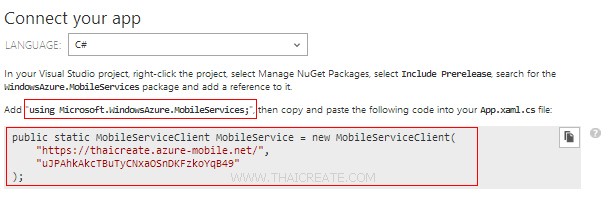
ในหน้า Dashboard ของ Mobile Services แนะนำให้เราสร้าง Service และ Keys ไว้ที่ URL นี้
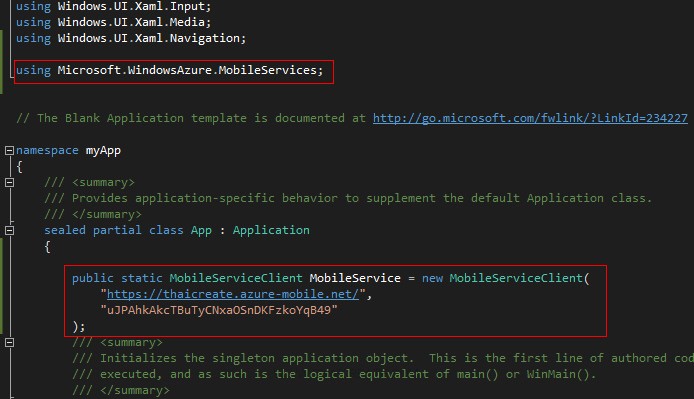
ให้ Add และ Copy ลงดังรูป
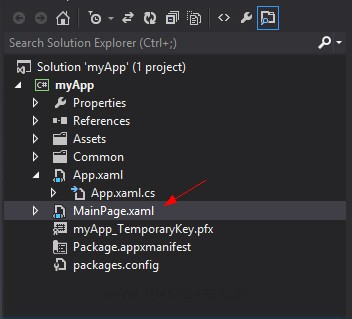
จากนั้นมายังไฟล์ MainPage.xaml ซึ่งเป็นไฟล์หลักและไฟล์แรกของ App
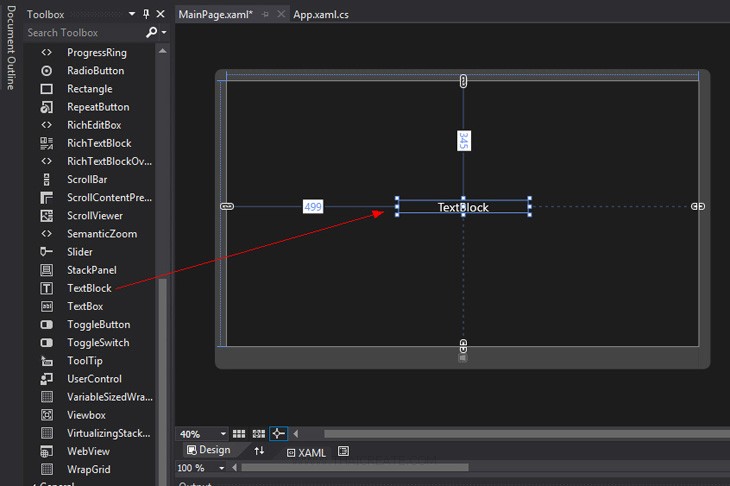
สร้าง TextBlock ไว้ตรงกลางหน้าจอของ Page จากนั้นปรับขนาด Size และ Color ตามต้องการ ได้จากส่วนของ Properties
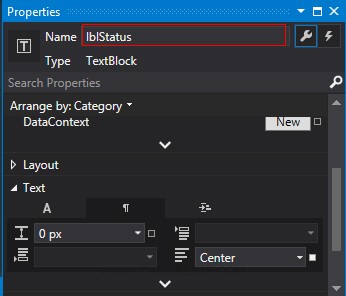
กำหนดชื่อว่า lblStatus
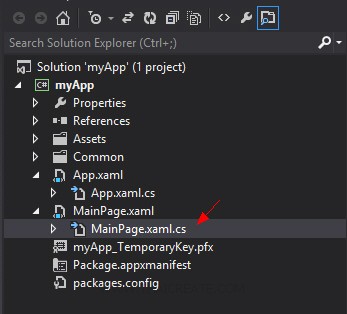
คลิกที่ไฟล์ MainPage.xaml.cs ซึ่งเป็น Code Behind ไว้เขียนพวกคำสั่งต่าง ๆ
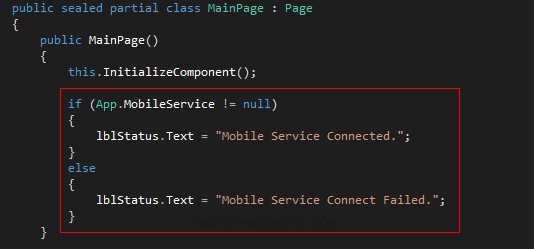
เขียนคำสั่งสำหรับตรวจสอบสถานะของ Services ง่าย ๆ ด้วยคำสั่ง
        public MainPage()
        {
            this.InitializeComponent();

            if (App.MobileService != null)
            {
                lblStatus.Text = "Mobile Service Connected.";
            }
            else
            {
                lblStatus.Text = "Mobile Service Connect Failed.";
            }
        }
Code สำหรับการตรวจสอบสถานะการทำงานและการเชื่อมต่อของ Mobile Services กับ Windows Store App

ทดสอบการรันผ่าน Simulator
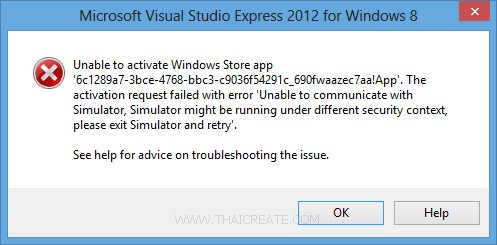
Unable to Activate Windows Store App. The activation request failed with error E_Fail. กรณีที่ Error ดังรูป
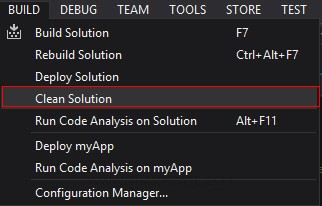
เลือก Clean Project ซะ 1 รอบ
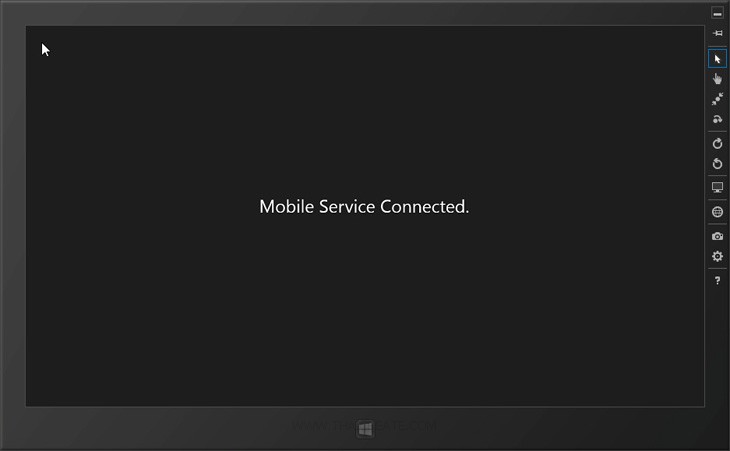
ทดสอบการรันผ่าน Simulator ซึ่งถ้าการเชื่อมต่อไปยัง Azure Mobile Services สมบูรณ์จะแสดงข้อความว่า "Mobile Service Connected." แสดงสถานะการเชื่อมต่อ ซึ่งแสดงว่าตอนนี้เราสามารถทำการเชื่อมต่อไปยัง Mobile Services ด้วย Windows Store App เรียบร้อยแล้ว และในบทความถัดไปเราจะมารู้วิธีการสร้างตารางและการ Insert ข้อมูลลงไปในตาราง
ตัวอย่าง Code ที่เขียน
App.xaml.cs
using System;
using System.Collections.Generic;
using System.IO;
using System.Linq;
using Windows.ApplicationModel;
using Windows.ApplicationModel.Activation;
using Windows.Foundation;
using Windows.Foundation.Collections;
using Windows.UI.Xaml;
using Windows.UI.Xaml.Controls;
using Windows.UI.Xaml.Controls.Primitives;
using Windows.UI.Xaml.Data;
using Windows.UI.Xaml.Input;
using Windows.UI.Xaml.Media;
using Windows.UI.Xaml.Navigation;

using Microsoft.WindowsAzure.MobileServices;


// The Blank Application template is documented at http://go.microsoft.com/fwlink/?LinkId=234227

namespace myApp
{
    /// <summary>
    /// Provides application-specific behavior to supplement the default Application class.
    /// </summary>
    sealed partial class App : Application
    {

        public static MobileServiceClient MobileService = new MobileServiceClient(
            "https://thaicreate.azure-mobile.net/",
            "uJPAhkAkcTBuTyCNxaOSnDKFzkoYqB49"
        );
        /// <summary>
        /// Initializes the singleton application object.  This is the first line of authored code
        /// executed, and as such is the logical equivalent of main() or WinMain().
        /// </summary>
        public App()
        {
            this.InitializeComponent();
            this.Suspending += OnSuspending;
        }

        /// <summary>
        /// Invoked when the application is launched normally by the end user.  Other entry points
        /// will be used when the application is launched to open a specific file, to display
        /// search results, and so forth.
        /// </summary>
        /// <param name="args">Details about the launch request and process.</param>
        protected override void OnLaunched(LaunchActivatedEventArgs args)
        {
            Frame rootFrame = Window.Current.Content as Frame;

            // Do not repeat app initialization when the Window already has content,
            // just ensure that the window is active
            if (rootFrame == null)
            {
                // Create a Frame to act as the navigation context and navigate to the first page
                rootFrame = new Frame();

                if (args.PreviousExecutionState == ApplicationExecutionState.Terminated)
                {
                    //TODO: Load state from previously suspended application
                }

                // Place the frame in the current Window
                Window.Current.Content = rootFrame;
            }

            if (rootFrame.Content == null)
            {
                // When the navigation stack isn't restored navigate to the first page,
                // configuring the new page by passing required information as a navigation
                // parameter
                if (!rootFrame.Navigate(typeof(MainPage), args.Arguments))
                {
                    throw new Exception("Failed to create initial page");
                }
            }
            // Ensure the current window is active
            Window.Current.Activate();
        }

        /// <summary>
        /// Invoked when application execution is being suspended.  Application state is saved
        /// without knowing whether the application will be terminated or resumed with the contents
        /// of memory still intact.
        /// </summary>
        /// <param name="sender">The source of the suspend request.</param>
        /// <param name="e">Details about the suspend request.</param>
        private void OnSuspending(object sender, SuspendingEventArgs e)
        {
            var deferral = e.SuspendingOperation.GetDeferral();
            //TODO: Save application state and stop any background activity
            deferral.Complete();
        }
    }
}
MainPage.xaml.cs
using System;
using System.Collections.Generic;
using System.IO;
using System.Linq;
using Windows.Foundation;
using Windows.Foundation.Collections;
using Windows.UI.Xaml;
using Windows.UI.Xaml.Controls;
using Windows.UI.Xaml.Controls.Primitives;
using Windows.UI.Xaml.Data;
using Windows.UI.Xaml.Input;
using Windows.UI.Xaml.Media;
using Windows.UI.Xaml.Navigation;

// The Blank Page item template is documented at http://go.microsoft.com/fwlink/?LinkId=234238

namespace myApp
{
    /// <summary>
    /// An empty page that can be used on its own or navigated to within a Frame.
    /// </summary>
    public sealed partial class MainPage : Page
    {
        public MainPage()
        {
            this.InitializeComponent();

            if (App.MobileService != null)
            {
                lblStatus.Text = "Mobile Service Connected.";
            }
            else
            {
                lblStatus.Text = "Mobile Service Connect Failed.";
            }
        }

        /// <summary>
        /// Invoked when this page is about to be displayed in a Frame.
        /// </summary>
        /// <param name="e">Event data that describes how this page was reached.  The Parameter
        /// property is typically used to configure the page.</param>
        protected override void OnNavigatedTo(NavigationEventArgs e)
        {
        }
    }
}
|
 ช่วยกันสนับสนุนรักษาเว็บไซต์ความรู้แห่งนี้ไว้ด้วยการสนับสนุน Source Code 2.0 ของทีมงานไทยครีเอท ช่วยกันสนับสนุนรักษาเว็บไซต์ความรู้แห่งนี้ไว้ด้วยการสนับสนุน Source Code 2.0 ของทีมงานไทยครีเอท
|
|
| |
By : |
ThaiCreate.Com Team (บทความเป็นลิขสิทธิ์ของเว็บไทยครีเอทห้ามนำเผยแพร่ ณ เว็บไซต์อื่น ๆ) |
| |
Score Rating : |
    |
|
| |
Create/Update Date : |
2013-08-26 06:12:55 /
2017-03-24 12:50:41 |
| |
Download : |

|
|
|
Sponsored Links / Related |
|
|
|
|
|
|

|