ListView และ GridView บน Windows Store Apps (C#) |
ListView และ GridView บน Windows Store Apps (C#) สำหรับ Control ของ ListView และ GridView เป็น Controls ที่ใช้สำหรับแสดงรายการของ Object ในรูปแบบของ Rows และ Columns โดย Control ทั้ง 2 ตัวนี้สามารถทำการ Bind ข้อมูล ItemsSource จากแหล่งข้อมูลต่าง ๆ ได้ เช่นจาก Object หรือ List , Array , ArrayList ที่มีรูปแบบของข้อมูลแบบ Rows และ Column
 ตัวอย่างของ ListView
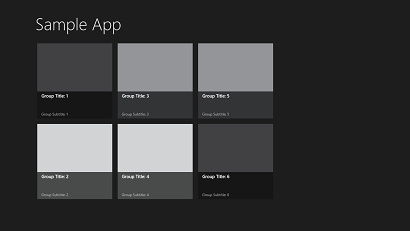 ตัวอย่างของ GridView
1. ListView เป็น Control ใช้สำหรับแสดงรายการของ Object ซึ่งทั่วไปจะมีลักษณะข้อมูลที่เป็น Loop โดยจะแสดงข้อมูลแบบแนวทั้ง จากบนลงล่าง

<ListView x:Name="name"></ListView>
Example 1.1 แสดงรายการข้อมูลบน ListView แบบง่าย ๆ
MainPage.xaml
<Page
    x:Class="WindowsStoreApps.MainPage"
    xmlns="http://schemas.microsoft.com/winfx/2006/xaml/presentation"
    xmlns:x="http://schemas.microsoft.com/winfx/2006/xaml"
    xmlns:local="using:WindowsStoreApps"
    xmlns:d="http://schemas.microsoft.com/expression/blend/2008"
    xmlns:mc="http://schemas.openxmlformats.org/markup-compatibility/2006"
    mc:Ignorable="d">

    <Grid Background="{ThemeResource ApplicationPageBackgroundThemeBrush}">


        <ListView x:Name="lsView" SelectionChanged="ListView_SelectionChanged" Margin="42,33,675,441" FontSize="36">
            <x:String>Item 1</x:String>
            <x:String>Item 2</x:String>
            <x:String>Item 3</x:String>
        </ListView>

    </Grid>

</Page>
MainPage.xaml.cs
using System;
using System.Collections.Generic;
using System.IO;
using System.Linq;
using System.Runtime.InteropServices.WindowsRuntime;
using Windows.Foundation;
using Windows.Foundation.Collections;
using Windows.UI.Xaml;
using Windows.UI.Xaml.Controls;
using Windows.UI.Xaml.Controls.Primitives;
using Windows.UI.Xaml.Data;
using Windows.UI.Xaml.Input;
using Windows.UI.Xaml.Media;
using Windows.UI.Xaml.Navigation;

using Windows.UI.Popups;

// The Blank Page item template is documented at http://go.microsoft.com/fwlink/?LinkId=234238

namespace WindowsStoreApps
{
    /// <summary>
    /// An empty page that can be used on its own or navigated to within a Frame.
    /// </summary>
    ///


    public sealed partial class MainPage : Page
    {
        public MainPage()
        {
            this.InitializeComponent();
        }

        private void ListView_SelectionChanged(object sender, SelectionChangedEventArgs e)
        {
            MessageDialog msgDialog = new MessageDialog("Your Selected : " + lsView.SelectedItem.ToString(), "Result");
            msgDialog.ShowAsync();
        }

    }
}
Screenshot

ทดสอบการทำงาน แสดงผลดังรูป
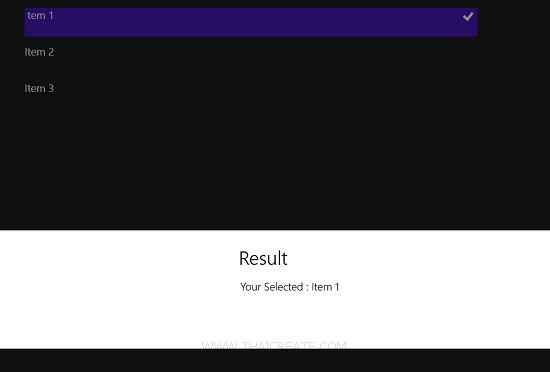
เมื่อมีการคลิกที่ Item บน ListView
Example 1.2 แสดงรายการ Border บน ListView สร้างกล่องแบบ Windows Store Apps
MainPage.xaml
<Page
	x:Class="WindowsStoreApps.MainPage"
	xmlns="http://schemas.microsoft.com/winfx/2006/xaml/presentation"
	xmlns:x="http://schemas.microsoft.com/winfx/2006/xaml"
	xmlns:local="using:WindowsStoreApps"
	xmlns:d="http://schemas.microsoft.com/expression/blend/2008"
	xmlns:mc="http://schemas.openxmlformats.org/markup-compatibility/2006"
	mc:Ignorable="d">

<Grid Background="{ThemeResource ApplicationPageBackgroundThemeBrush}">

        <ListView x:Name="lsView" Margin="42,33,1059,138" FontSize="36">
            <Border Height="160" Width="200" Margin="5" Background="Blue" />
            <Border Height="160" Width="200" Margin="5" Background="Green" />
            <Border Height="160" Width="200" Margin="5" Background="Red" />
            <Border Height="160" Width="200" Margin="5" Background="Yellow" />
            <Border Height="160" Width="200" Margin="5" Background="Cyan" />
            <Border Height="160" Width="200" Margin="5" Background="Magenta" />
            <Border Height="160" Width="200" Margin="5" Background="DarkKhaki" />
            <Border Height="160" Width="200" Margin="5" Background="Beige" />
            <Border Height="160" Width="200" Margin="5" Background="DarkViolet" />
        </ListView>

    </Grid>

</Page>
Screenshot
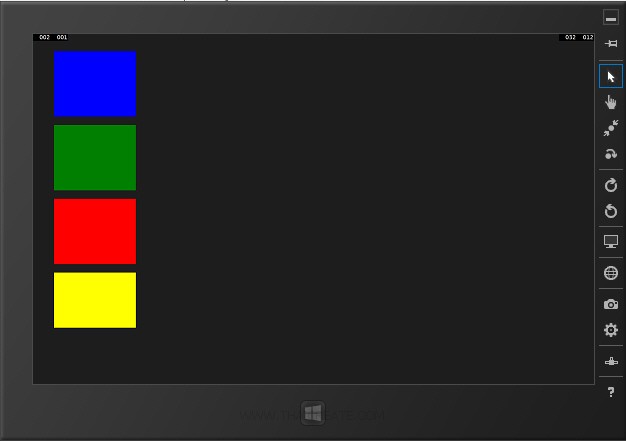
แสดง Border บน ListView
Example 1.3 แสดงรายการข้อมูลบน ListView แบบง่าย ๆ โดยสร้าง ItemsSource จากภาษา C#
MainPage.xaml
<Page
    x:Class="WindowsStoreApps.MainPage"
    xmlns="http://schemas.microsoft.com/winfx/2006/xaml/presentation"
    xmlns:x="http://schemas.microsoft.com/winfx/2006/xaml"
    xmlns:local="using:WindowsStoreApps"
    xmlns:d="http://schemas.microsoft.com/expression/blend/2008"
    xmlns:mc="http://schemas.openxmlformats.org/markup-compatibility/2006"
    mc:Ignorable="d">

    <Grid Background="{ThemeResource ApplicationPageBackgroundThemeBrush}">

        <ListView x:Name="lsView" Margin="42,33,1059,138" FontSize="36" SelectionChanged="ListView_SelectionChanged">
        </ListView>

    </Grid>

</Page>
MainPage.xaml.cs
using System;
using System.Collections.Generic;
using System.IO;
using System.Linq;
using System.Runtime.InteropServices.WindowsRuntime;
using Windows.Foundation;
using Windows.Foundation.Collections;
using Windows.UI.Xaml;
using Windows.UI.Xaml.Controls;
using Windows.UI.Xaml.Controls.Primitives;
using Windows.UI.Xaml.Data;
using Windows.UI.Xaml.Input;
using Windows.UI.Xaml.Media;
using Windows.UI.Xaml.Navigation;

using Windows.UI.Popups;

// The Blank Page item template is documented at http://go.microsoft.com/fwlink/?LinkId=234238

namespace WindowsStoreApps
{
    /// <summary>
    /// An empty page that can be used on its own or navigated to within a Frame.
    /// </summary>
    ///


    public sealed partial class MainPage : Page
    {
        public MainPage()
        {
            this.InitializeComponent();
        }

        protected override void OnNavigatedTo(NavigationEventArgs e)
        {
            List<string> item = new List<string>();
            item.Add("Item 1");
            item.Add("Item 2");
            item.Add("Item 3");

            lsView.ItemsSource = item;
        }

        private void ListView_SelectionChanged(object sender, SelectionChangedEventArgs e)
        {
            MessageDialog msgDialog = new MessageDialog("Your Selected : " + lsView.SelectedItem.ToString(), "Result");
            msgDialog.ShowAsync();
        }

    }
}
Screenshot
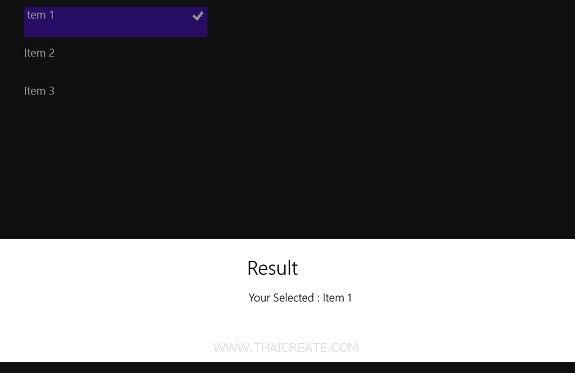
แสดงข้อมูลบน ListView จาก ItemsSource
2. GridView เป็น Control ใช้สำหรับแสดงรายการของ Object โดยมีลักษณ์การแสดงผลแบบ Grid ที่ประกอบด้วย Column และ Row ซึ่ง GridView สามารถรองรับการแสดงผลได้หลาย Column และ Rows

<GridView x:Name="name"></GridView>
Example 2.1 แสดงรายการข้อมูลบน GridView แบบง่าย ๆ
MainPage.xaml
<Page
    x:Class="WindowsStoreApps.MainPage"
    xmlns="http://schemas.microsoft.com/winfx/2006/xaml/presentation"
    xmlns:x="http://schemas.microsoft.com/winfx/2006/xaml"
    xmlns:local="using:WindowsStoreApps"
    xmlns:d="http://schemas.microsoft.com/expression/blend/2008"
    xmlns:mc="http://schemas.openxmlformats.org/markup-compatibility/2006"
    mc:Ignorable="d">

    <Grid Background="{ThemeResource ApplicationPageBackgroundThemeBrush}">

        <GridView x:Name="gdView" SelectionChanged="GridView_SelectionChanged" Margin="19,23,1010,674">
            <x:String>Item 1</x:String>
            <x:String>Item 2</x:String>
            <x:String>Item 3</x:String>
            <x:String>Item 4</x:String>
        </GridView>
    </Grid>

</Page>
MainPage.xaml.cs
using System;
using System.Collections.Generic;
using System.IO;
using System.Linq;
using System.Runtime.InteropServices.WindowsRuntime;
using Windows.Foundation;
using Windows.Foundation.Collections;
using Windows.UI.Xaml;
using Windows.UI.Xaml.Controls;
using Windows.UI.Xaml.Controls.Primitives;
using Windows.UI.Xaml.Data;
using Windows.UI.Xaml.Input;
using Windows.UI.Xaml.Media;
using Windows.UI.Xaml.Navigation;

using Windows.UI.Popups;

// The Blank Page item template is documented at http://go.microsoft.com/fwlink/?LinkId=234238

namespace WindowsStoreApps
{
    /// <summary>
    /// An empty page that can be used on its own or navigated to within a Frame.
    /// </summary>
    ///


    public sealed partial class MainPage : Page
    {
        public MainPage()
        {
            this.InitializeComponent();
        }

        private void GridView_SelectionChanged(object sender, SelectionChangedEventArgs e)
        {
            MessageDialog msgDialog = new MessageDialog("Your Selected : " + gdView.SelectedItem.ToString(), "Result");
            msgDialog.ShowAsync();
        }


    }
}
Screenshot
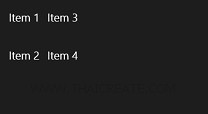
แสดงข้อมูลบน GridView จะเห็นว่าแสดงข้อมูลแบบ Column และ Rows โดยที่ Column จะขยับตามขนาดและความกว้างของ GridView
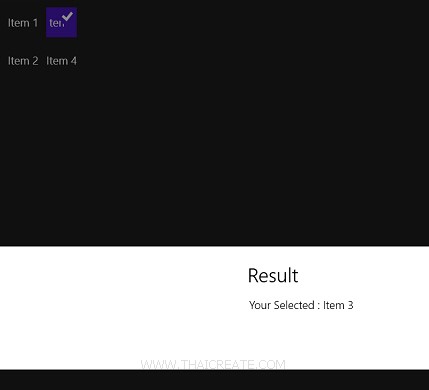
เมื่อมีการคลิกที่ Iitem ของ GridView
Example 2.2 แสดงรายการข้อมูลบน GridView โดยใช้ Border แสดงกล่องเหมือนกับ Windows 8
MainPage.xaml
<Page
    x:Class="WindowsStoreApps.MainPage"
    xmlns="http://schemas.microsoft.com/winfx/2006/xaml/presentation"
    xmlns:x="http://schemas.microsoft.com/winfx/2006/xaml"
    xmlns:local="using:WindowsStoreApps"
    xmlns:d="http://schemas.microsoft.com/expression/blend/2008"
    xmlns:mc="http://schemas.openxmlformats.org/markup-compatibility/2006"
    mc:Ignorable="d">


    <Grid Background="{ThemeResource ApplicationPageBackgroundThemeBrush}">

        <GridView x:Name="gdView" Margin="19,23,389,338">
            <Border Height="160" Width="200" Margin="5" Background="Blue" />
            <Border Height="160" Width="200" Margin="5" Background="Green" />
            <Border Height="160" Width="200" Margin="5" Background="Red" />
            <Border Height="160" Width="200" Margin="5" Background="Yellow" />
            <Border Height="160" Width="200" Margin="5" Background="Cyan" />
            <Border Height="160" Width="200" Margin="5" Background="Magenta" />
            <Border Height="160" Width="200" Margin="5" Background="DarkKhaki" />
            <Border Height="160" Width="200" Margin="5" Background="Beige" />
            <Border Height="160" Width="200" Margin="5" Background="DarkViolet" />
        </GridView>

    </Grid>

</Page>
Screenshot
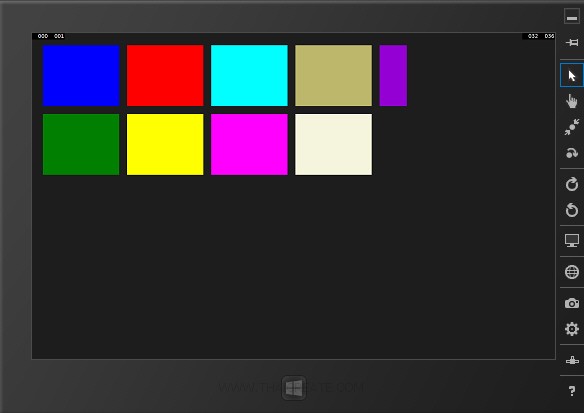
แสดงกล่องของ Border แบบหลาย Column และหลาย Rows เหมือนกับ Windows 8
Example 2.3 แสดงรายการข้อมูลบน GridView แบบง่าย ๆ โดยสร้าง ItemsSource จากภาษา C#
MainPage.xaml
<Page
    x:Class="WindowsStoreApps.MainPage"
    xmlns="http://schemas.microsoft.com/winfx/2006/xaml/presentation"
    xmlns:x="http://schemas.microsoft.com/winfx/2006/xaml"
    xmlns:local="using:WindowsStoreApps"
    xmlns:d="http://schemas.microsoft.com/expression/blend/2008"
    xmlns:mc="http://schemas.openxmlformats.org/markup-compatibility/2006"
    mc:Ignorable="d">


    <Grid Background="{ThemeResource ApplicationPageBackgroundThemeBrush}">

        <GridView x:Name="gdView" Margin="19,23,1052,702" SelectionChanged="GridView_SelectionChanged">
        </GridView>

    </Grid>

</Page>
MainPage.xaml.cs
using System;
using System.Collections.Generic;
using System.IO;
using System.Linq;
using System.Runtime.InteropServices.WindowsRuntime;
using Windows.Foundation;
using Windows.Foundation.Collections;
using Windows.UI.Xaml;
using Windows.UI.Xaml.Controls;
using Windows.UI.Xaml.Controls.Primitives;
using Windows.UI.Xaml.Data;
using Windows.UI.Xaml.Input;
using Windows.UI.Xaml.Media;
using Windows.UI.Xaml.Navigation;

using Windows.UI.Popups;

// The Blank Page item template is documented at http://go.microsoft.com/fwlink/?LinkId=234238

namespace WindowsStoreApps
{
    /// <summary>
    /// An empty page that can be used on its own or navigated to within a Frame.
    /// </summary>
    ///


    public sealed partial class MainPage : Page
    {
        public MainPage()
        {
            this.InitializeComponent();
        }

        protected override void OnNavigatedTo(NavigationEventArgs e)
        {
            List<string> item = new List<string>();
            item.Add("Item 1");
            item.Add("Item 2");
            item.Add("Item 3");
            item.Add("Item 4");

            gdView.ItemsSource = item;
        }

        private void GridView_SelectionChanged(object sender, SelectionChangedEventArgs e)
        {
            MessageDialog msgDialog = new MessageDialog("Your Selected : " + gdView.SelectedItem.ToString(), "Result");
            msgDialog.ShowAsync();
        }

    }
}
Screenshot
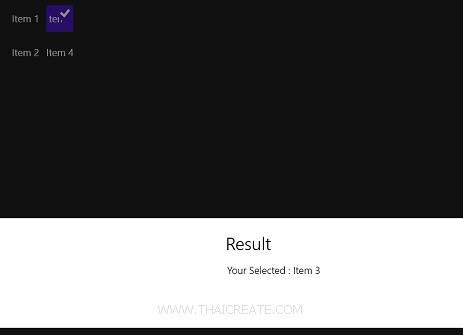
แสดงข้อมูลบน GridView จาก ItemsSource
.
|
 ช่วยกันสนับสนุนรักษาเว็บไซต์ความรู้แห่งนี้ไว้ด้วยการสนับสนุน Source Code 2.0 ของทีมงานไทยครีเอท ช่วยกันสนับสนุนรักษาเว็บไซต์ความรู้แห่งนี้ไว้ด้วยการสนับสนุน Source Code 2.0 ของทีมงานไทยครีเอท
|
|
| |
By : |
ThaiCreate.Com Team (บทความเป็นลิขสิทธิ์ของเว็บไทยครีเอทห้ามนำเผยแพร่ ณ เว็บไซต์อื่น ๆ) |
| |
Score Rating : |
  |
|
| |
Create/Update Date : |
2014-02-20 20:50:29 /
2017-03-19 14:45:27 |
| |
Download : |
No files |
|
|
Sponsored Links / Related |
|
|
|
|
|
|

|