Page และ Controls สำหรับการออก Windows Store Apps ด้วย XAML UI (C#) |
Page และ Controls สำหรับการออก Windows Store Apps ด้วย XAML UI (C#) ในบทความนี้เราจะมาเรียนรู้พื้นฐานเกี่ยวกับการเขียน Apps บน Windows Store ด้วยภาษา C# ซึ่งเป็นภาษาที่ได้รับความนิยมมากที่สุดในการเขียน Apps บน Windows Store เหตุหลลักก็คือ C# สามารถทำอะไรได้หลากหลากมากกว่าเขียนด้วย JavaScript/HTML อีก C# ก็ยังสามารถมีตัวอย่างและหาแหล่งความรู้อ้างอิงได้ง่ายกว่า และจำนวนผู้เขียนก็ได้รับความนิยมมาก ในการพัฒนาโปรแกรมบน .Net Framwork
กลับมายัง Windows Store Apps ตามที่ได้เกรินไว้ในบทความก่อนหน้านี้แล้วว่า พื้นฐานการเขียนด้วยภาษา C# จะถูกแบ่งออกเป็น 2 ส่วนคือ XAML และ C# โดย XAML ทำหน้าที่เป็นไฟล์ UI (User Interface) แสดงผลออกทางหน้าจอซึ่งเราจะเรียกสั้น ๆ ว่า "Page" ส่วน C# เป็น Code Behind ทำหน้าที่ควบคุมการทำงานของ Page รวมทั้งทำงานอยู่เบื้องหลังของโปรแกรม และปกติแล้วในกรณีที่เราสร้าง Page ขึ้นมา 1 Page นั้น จะมีการสร้างไฟล์ XAML และ C# ควบคู่กันด้วย เช่น
- MainPage.xaml
- MainPage.xaml.cs
และในส่วนของ XAML นั้น ซึ่งเป็น User Interface ก็สามารถทำการออกแบบหน้าตาของ Apps ด้วย Controls ต่าง ๆ ที่อยู่บน Visual Studio เช่น TextBlock ไว้สำหรับแสดง Label , TextBox สำหรับเป็น Input ข้อมูล หรือ Button ก็ไว้สำหรับสร้าง Event พวก Click ซึ่ง Controls ต่าง ๆ เหล่านี้อาศัยการลากมาวางในหน้าจอบน Screen ของ Page ก็จะสามารถเรียกใช้งาน และแสดงผลได้ทันที
ตัวอย่างการสร้าง Page และการเรยกใช้งาน Controls เพื่อออกแบบ User Interface
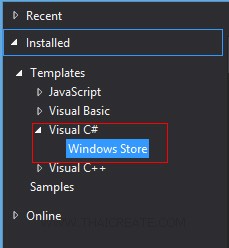
สร้าง Project ของ Windows Store Apps ด้วยภาษา C#
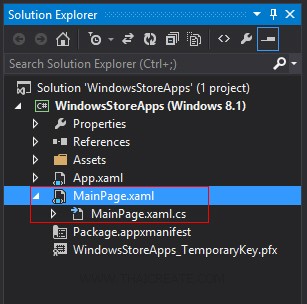
หลังจากที่สร้าง Project เราจะได้ Page ขึ้นมา 1 หน้า ซึ่งเป็นไฟล์ Default ที่โปรเจคสร้างมาให้ โดยจะชื่อว่า MainPage.xaml และ MainPage.xaml.cs
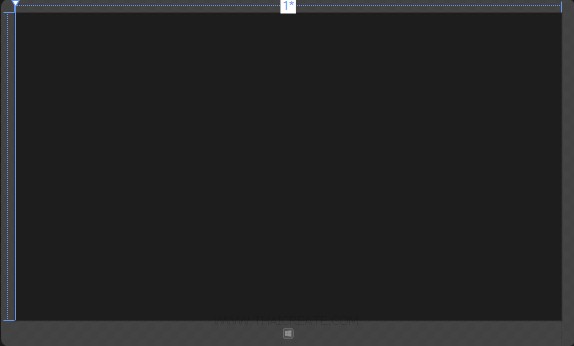
มายังหน้า Page ตอนนี้เราจะมี Screen หน้าจอที่ยังว่าง ๆ ซึ่งปกติ Themes ของ Windows Store จะ Default สีดำมาให้
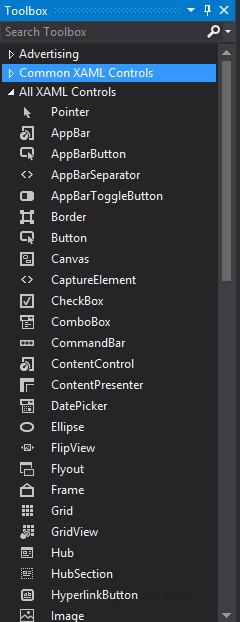
ในฝั่งซ้ายมือ เราจะเห็นมี Controls ต่าง ๆ มากมาย ที่จะสามารถนำมาใช้ออกแบบหน้าจอ Windows Store Apps ได้
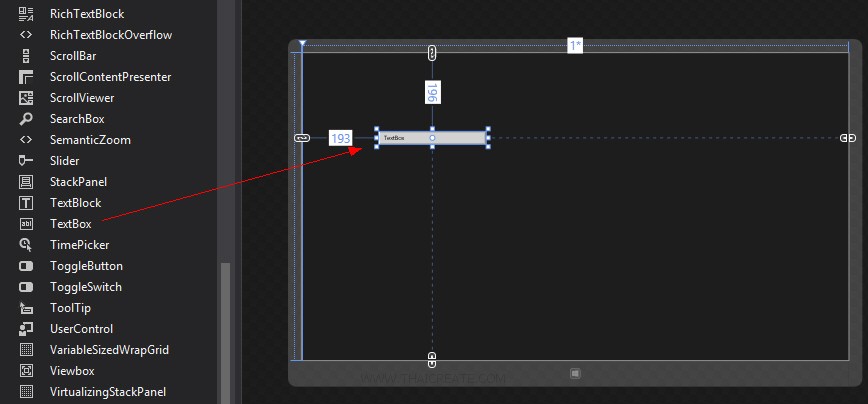
การสร้าง Controls นั้น ทำได้ง่าย ๆ ด้วยการวาง Controls นั้น ๆ มาวางบนหน้าจอ Drag and Drop
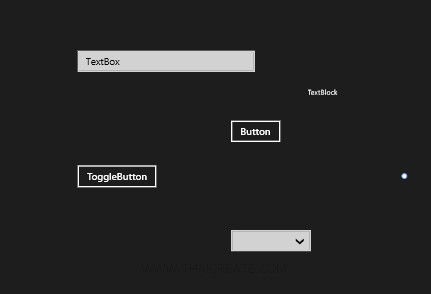
ตัวอย่างการสร้าง Controls และการลากมาวางไว้บนหน้าจอ
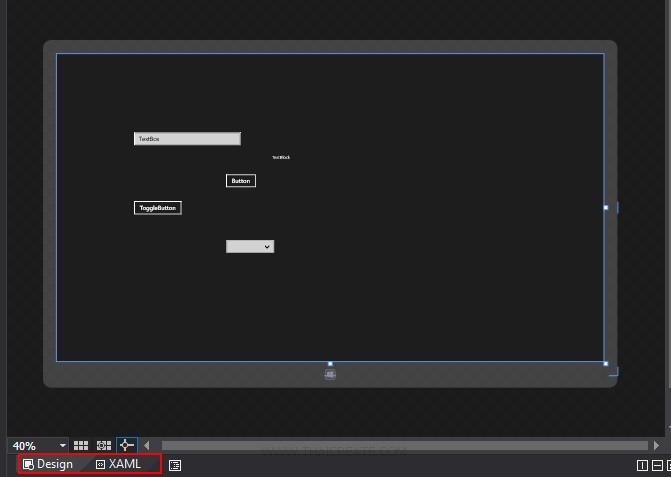
นอกจากจะใช้ผ่าน UI แล้ว ยังสามารถสลับดูมุมมองของ Design และ XAML ได้
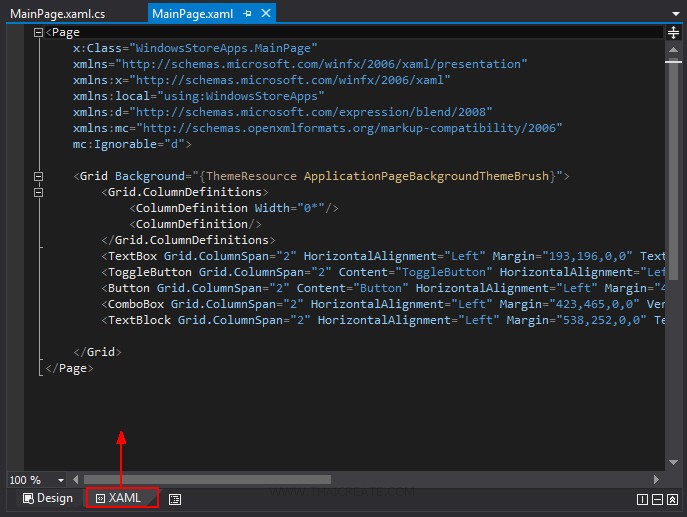
มุมมองของ XAML จะเห็นว่า Controls ต่าง ๆ ถูก Generate เป็น XAML ซึ่งเราสามารถทำการแก้ไขเพิ่มเติมได้จากส่วนของ XAML ได้เช่นเดียวกัน
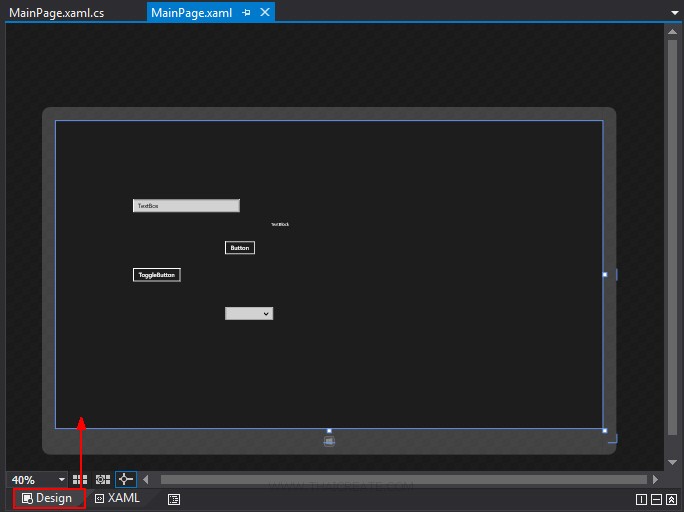
สลับมายังมุมมองของ Design
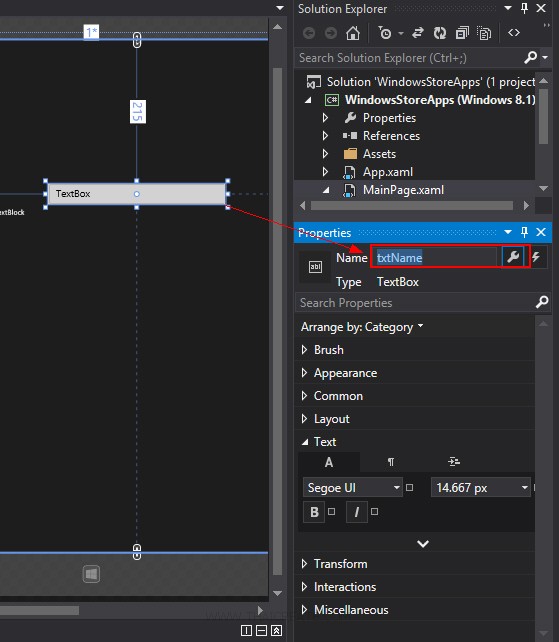
ในการสร้าง Controls บน Windows Store Apps จะเหมือนกับการเขียน Application ด้วย .Net ในรูปแบบอื่น ๆ คือ จะต้องมีการสร้างชื่อหรือ ID ให้กับ Controls นั้น ๆ เพื่อจะได้เรียกใช้งานส่วนของ Code Behindได้อย่างูกต้อง

โดยในส่วนของ Code Behind สามารถเลือกที่ VIEW -> Code
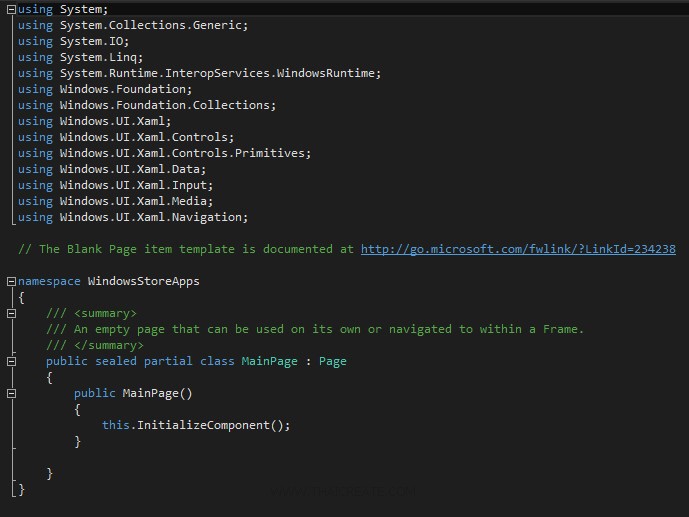
แสดงมุมมอมของ Code Behind ซึ่งเราสามารถเขียนคำสั่งเพื่อควบคุมการทำงานของ Page ด้วยภาษา C# โดยการทำงานนี้จะทำงานอยู่เบื้องหลังของโปรแกรม
ตัวอย่างไฟล์ XAML และ C# ที่ถูกสร้างขึ้น
MainPage.xaml
<Page
    x:Class="WindowsStoreApps.MainPage"
    xmlns="http://schemas.microsoft.com/winfx/2006/xaml/presentation"
    xmlns:x="http://schemas.microsoft.com/winfx/2006/xaml"
    xmlns:local="using:WindowsStoreApps"
    xmlns:d="http://schemas.microsoft.com/expression/blend/2008"
    xmlns:mc="http://schemas.openxmlformats.org/markup-compatibility/2006"
    mc:Ignorable="d">

    <Grid Background="{ThemeResource ApplicationPageBackgroundThemeBrush}">
        <Grid.ColumnDefinitions>
            <ColumnDefinition Width="0*"/>
            <ColumnDefinition/>
        </Grid.ColumnDefinitions>
        <TextBox Grid.ColumnSpan="2" HorizontalAlignment="Left" Margin="193,196,0,0" TextWrapping="Wrap" Text="TextBox" VerticalAlignment="Top" Width="266"/>
        <ToggleButton Grid.ColumnSpan="2" Content="ToggleButton" HorizontalAlignment="Left" Margin="190,365,0,0" VerticalAlignment="Top"/>
        <Button Grid.ColumnSpan="2" Content="Button" HorizontalAlignment="Left" Margin="420,298,0,0" VerticalAlignment="Top"/>
        <ComboBox Grid.ColumnSpan="2" HorizontalAlignment="Left" Margin="423,465,0,0" VerticalAlignment="Top" Width="120"/>
        <TextBlock Grid.ColumnSpan="2" HorizontalAlignment="Left" Margin="538,252,0,0" TextWrapping="Wrap" Text="TextBlock" VerticalAlignment="Top" Height="32" Width="114"/>

    </Grid>
</Page>
MainPage.xaml.cs
using System;
using System.Collections.Generic;
using System.IO;
using System.Linq;
using System.Runtime.InteropServices.WindowsRuntime;
using Windows.Foundation;
using Windows.Foundation.Collections;
using Windows.UI.Xaml;
using Windows.UI.Xaml.Controls;
using Windows.UI.Xaml.Controls.Primitives;
using Windows.UI.Xaml.Data;
using Windows.UI.Xaml.Input;
using Windows.UI.Xaml.Media;
using Windows.UI.Xaml.Navigation;

// The Blank Page item template is documented at http://go.microsoft.com/fwlink/?LinkId=234238

namespace WindowsStoreApps
{
    /// <summary>
    /// An empty page that can be used on its own or navigated to within a Frame.
    /// </summary>
    public sealed partial class MainPage : Page
    {
        public MainPage()
        {
            this.InitializeComponent();
        }

    }
}
|
 ช่วยกันสนับสนุนรักษาเว็บไซต์ความรู้แห่งนี้ไว้ด้วยการสนับสนุน Source Code 2.0 ของทีมงานไทยครีเอท ช่วยกันสนับสนุนรักษาเว็บไซต์ความรู้แห่งนี้ไว้ด้วยการสนับสนุน Source Code 2.0 ของทีมงานไทยครีเอท
|
|
| |
By : |
ThaiCreate.Com Team (บทความเป็นลิขสิทธิ์ของเว็บไทยครีเอทห้ามนำเผยแพร่ ณ เว็บไซต์อื่น ๆ) |
| |
Score Rating : |
   |
|
| |
Create/Update Date : |
2014-01-19 12:55:06 /
2017-03-19 14:35:47 |
| |
Download : |
No files |
|
|
Sponsored Links / Related |
|
|
|
|
|
|

|